
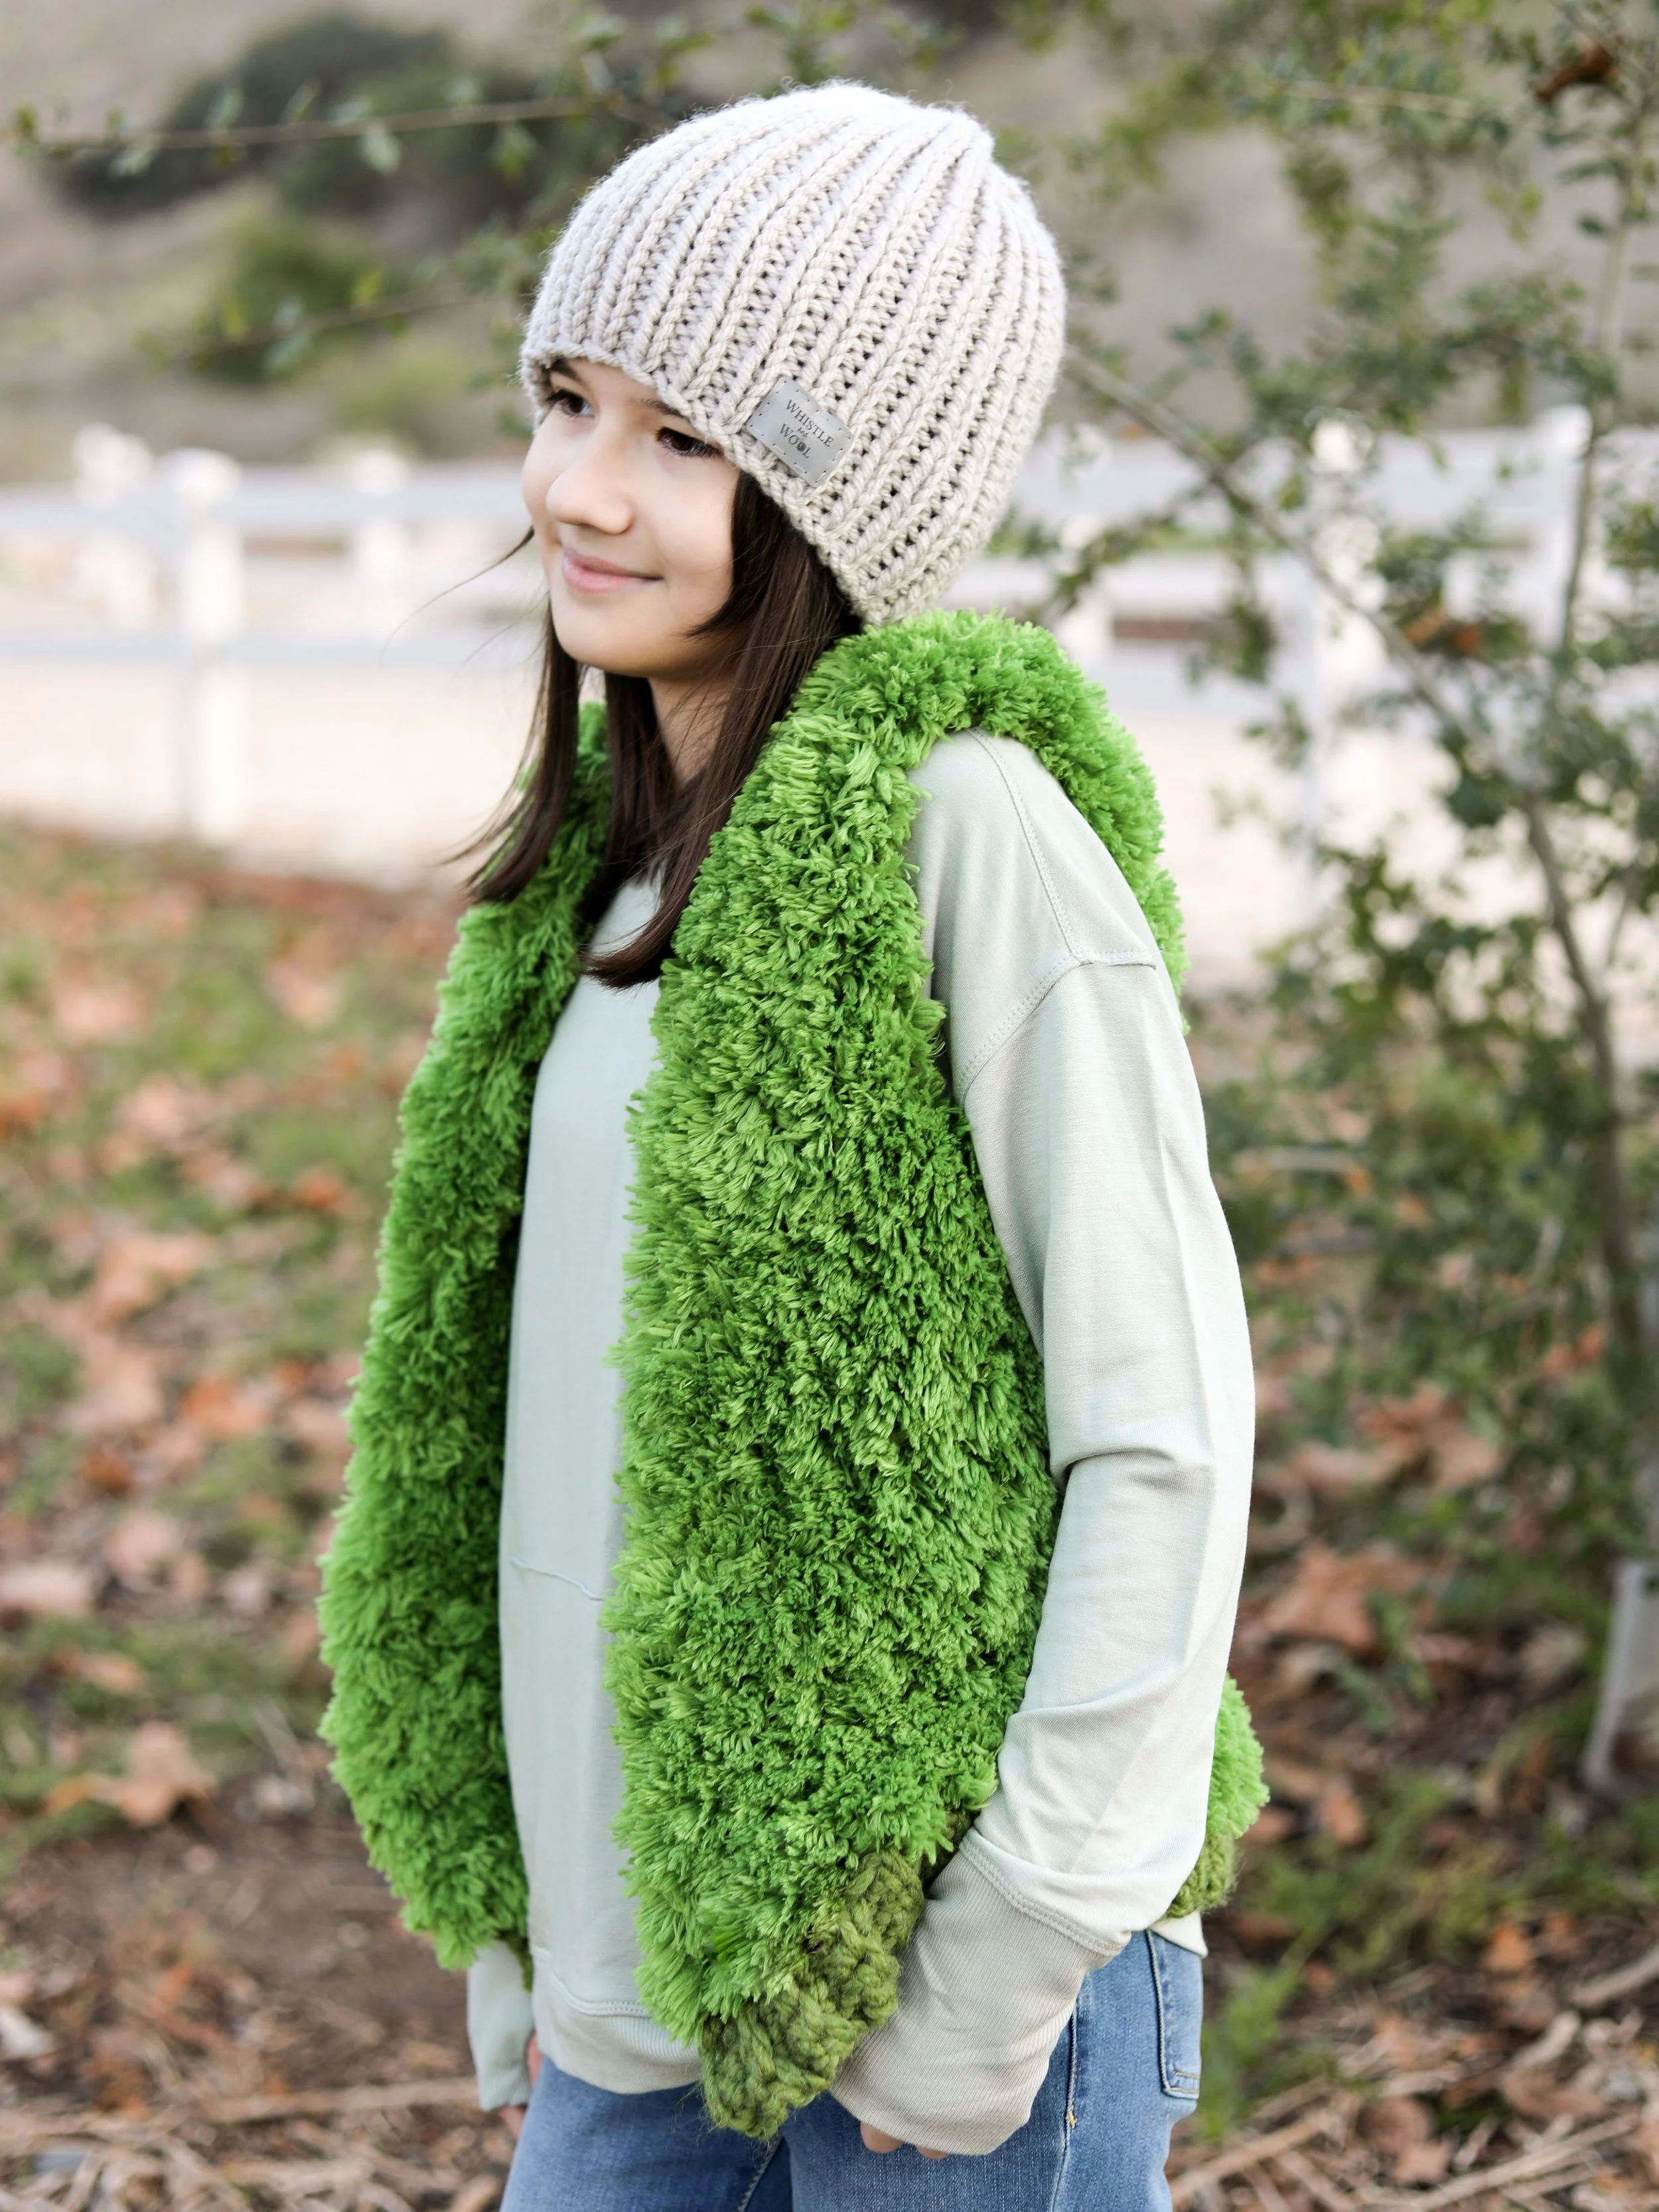
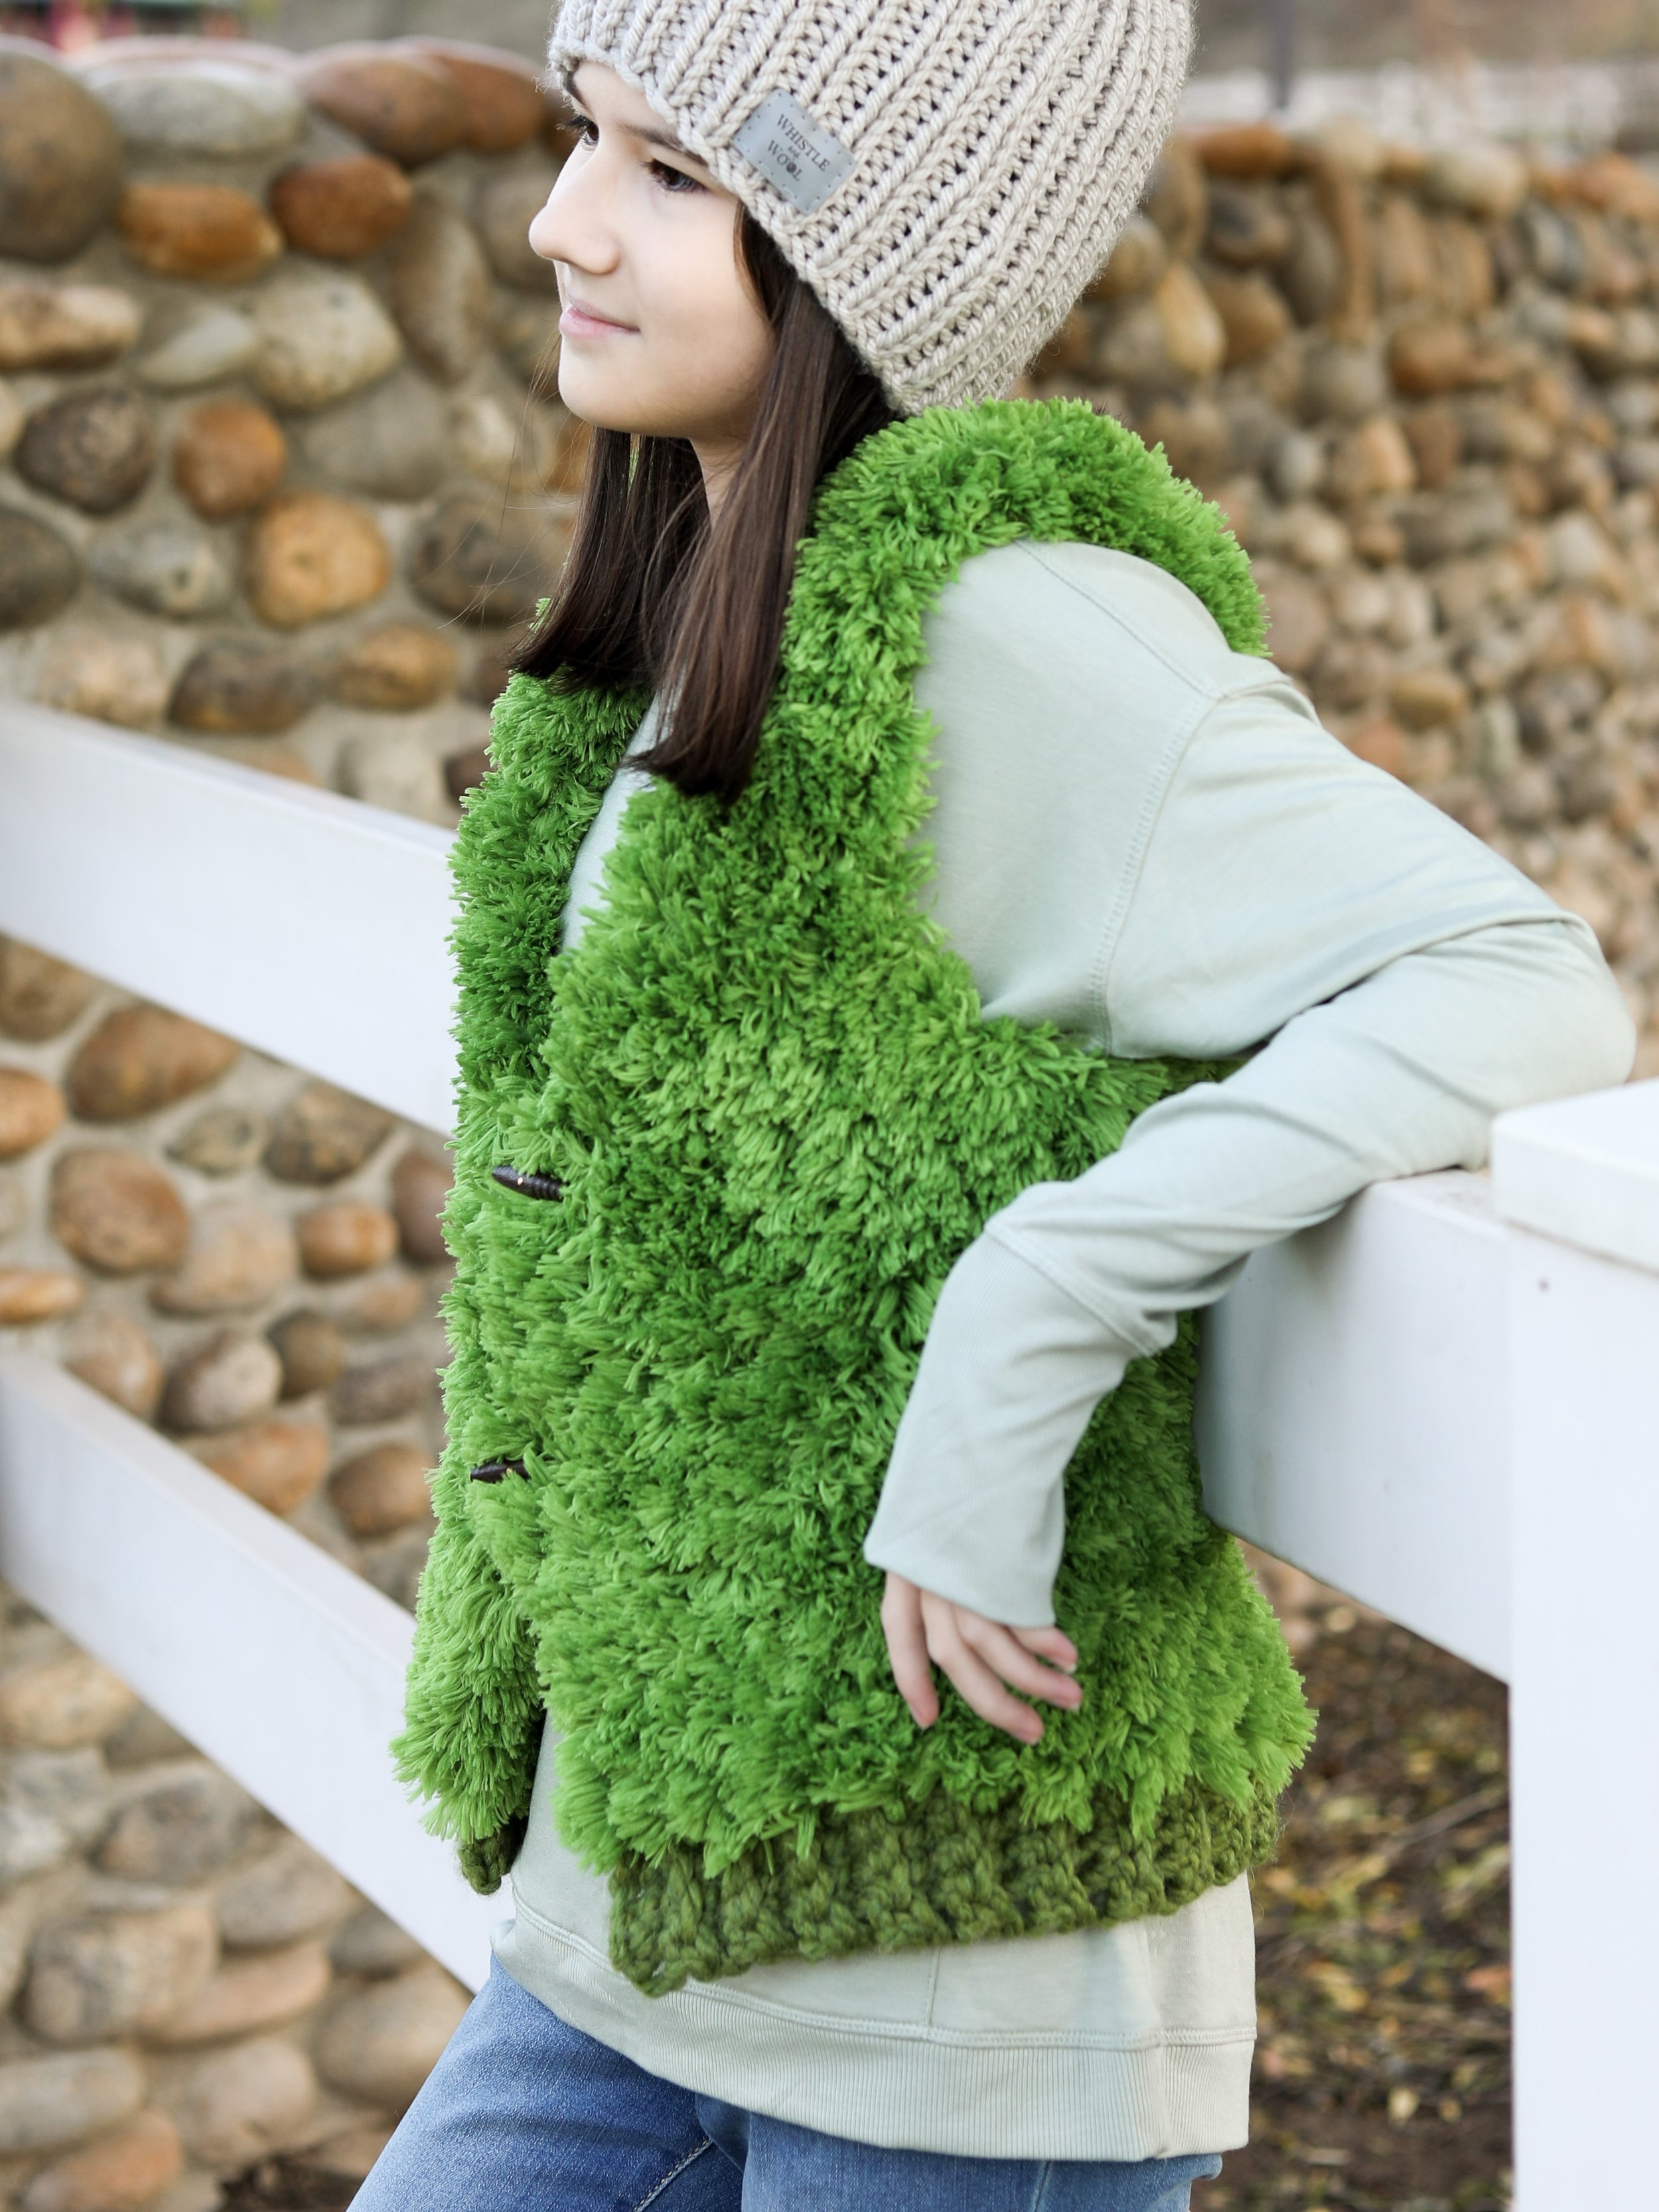
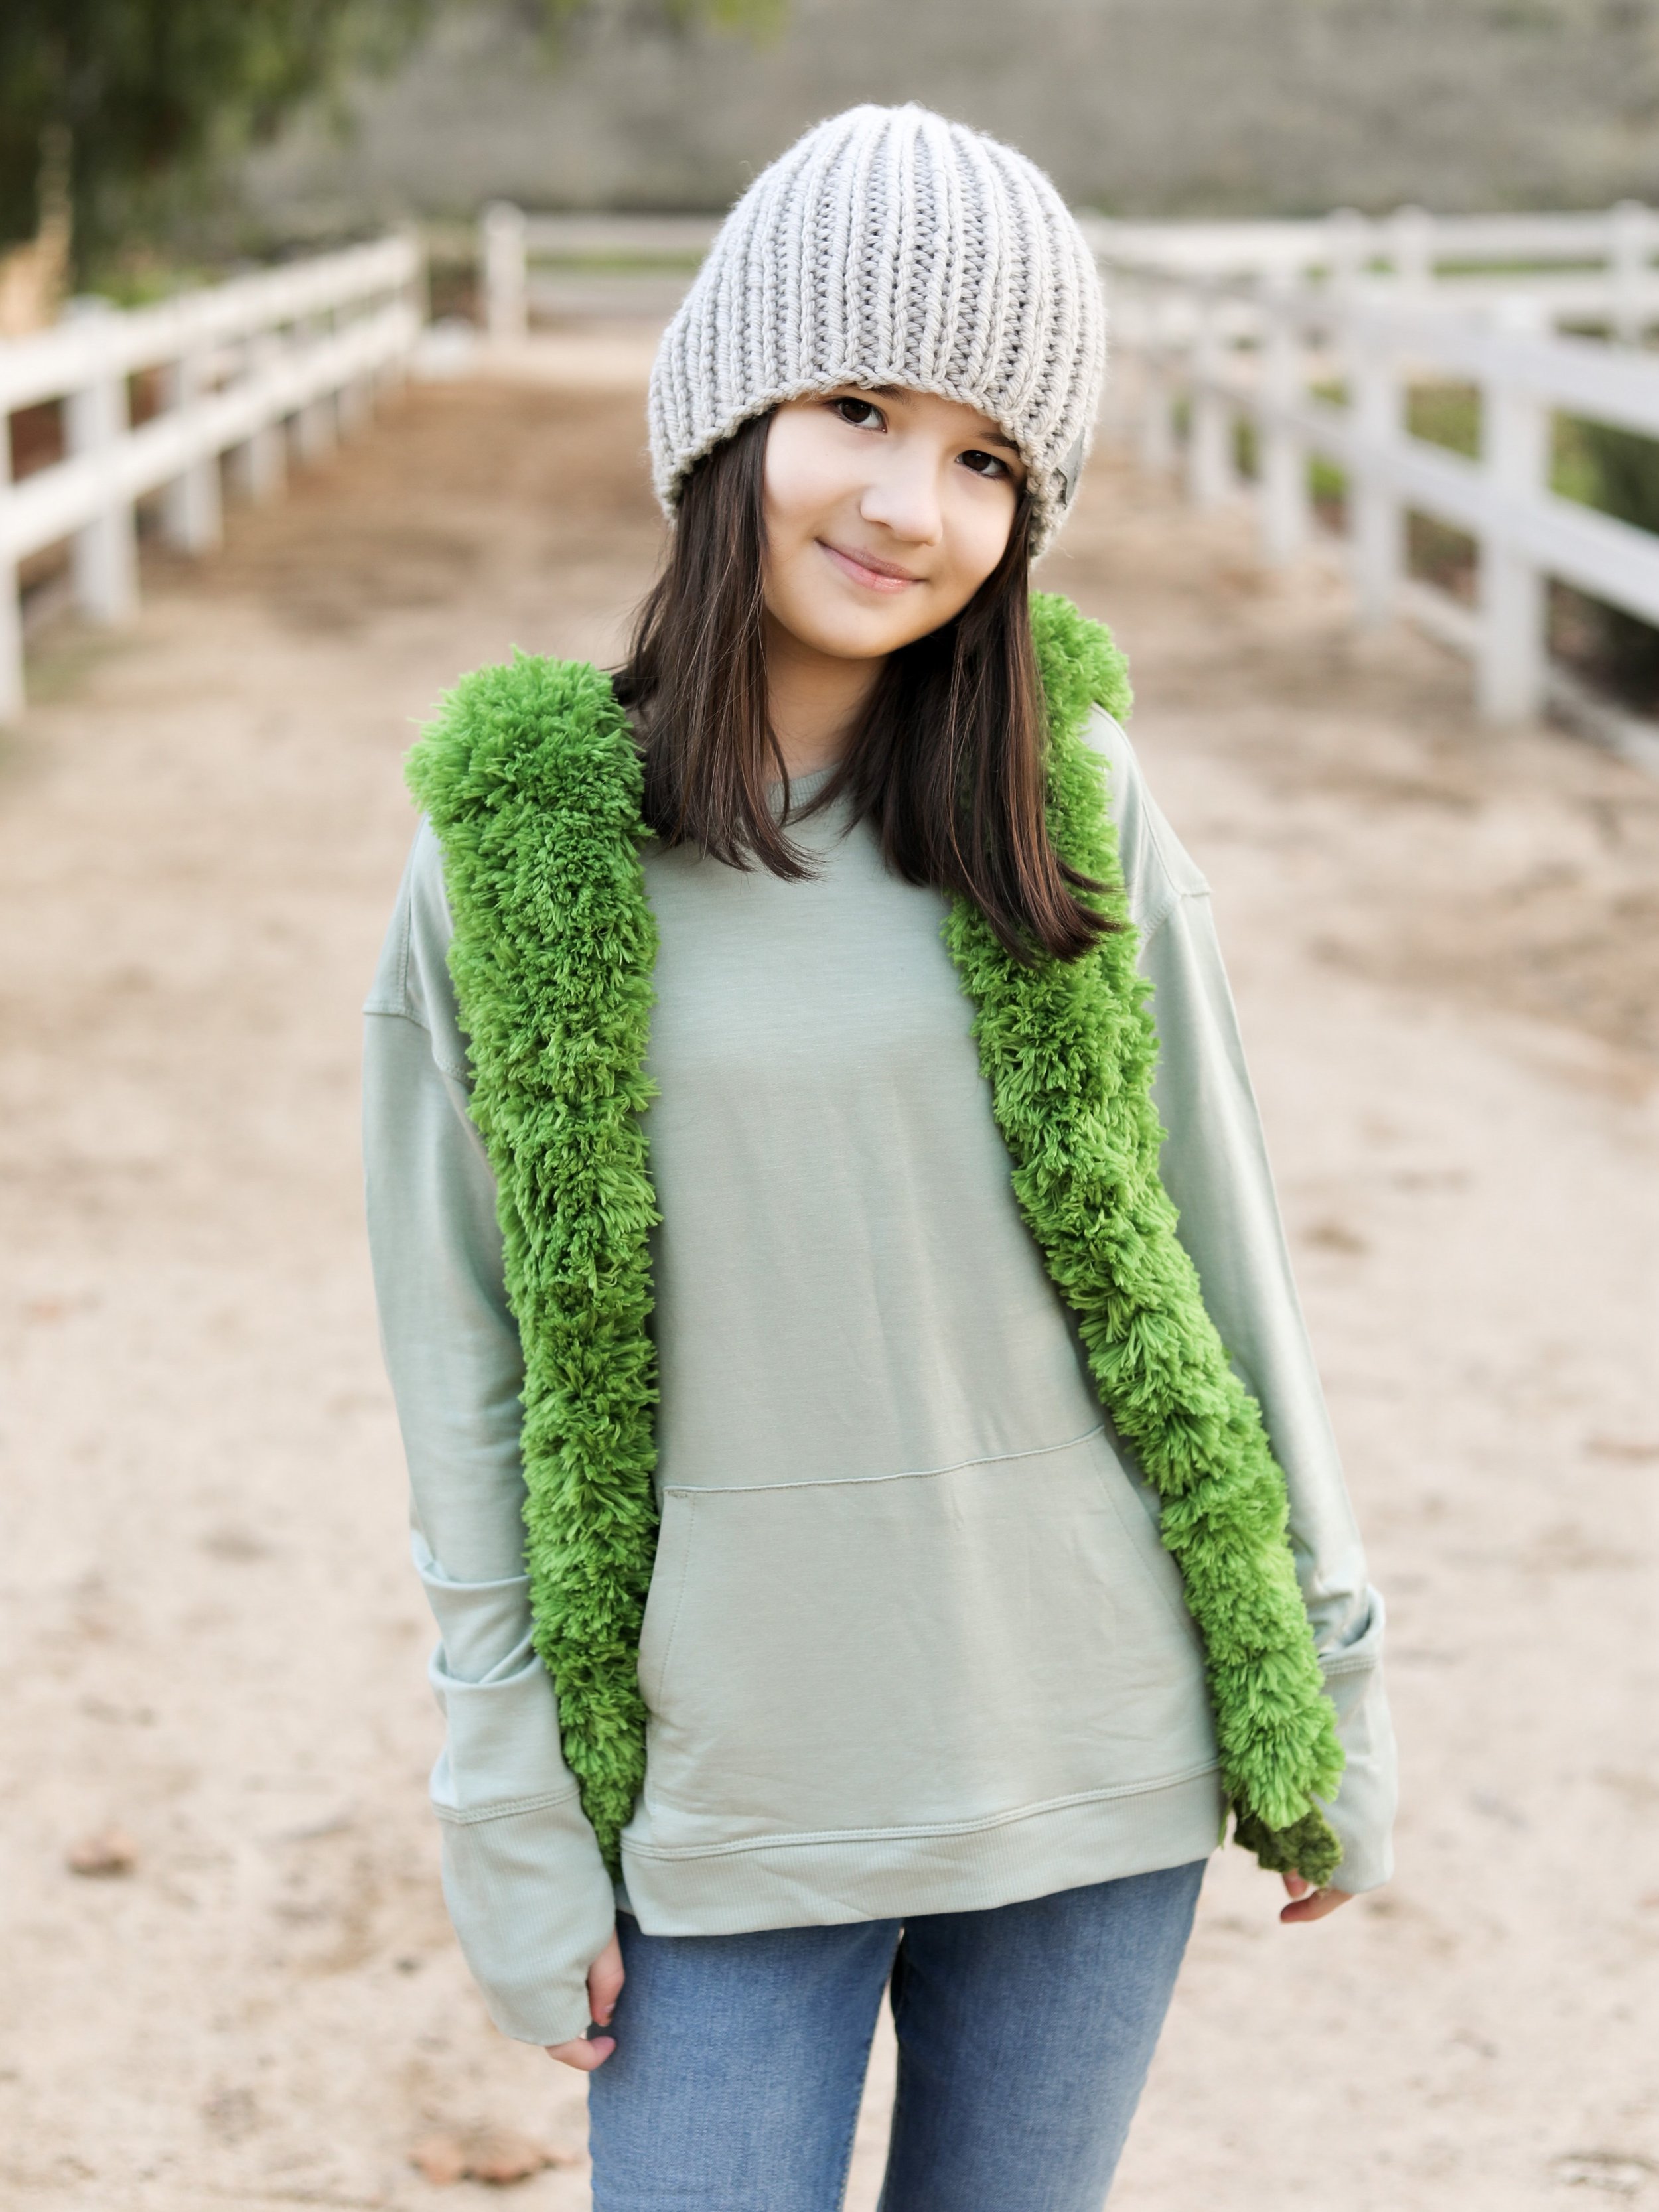
Brisk Fur Vest
NEW - Available as a crochet Kit through Lion Brand Yarn for 30% this weekend, 12/22/22, PDF in my Ravelry, Etsy and LoveCrafts shops!
A bit of inspiration behind the name: Brisk Fur Vest
When LB came out with this yarn my green loving kiddo instantly wanted something fun made in this. My kids have long been a fan of LB’s faux fur yarns because of how soft they are! This yarn in particular is incredibly fluffy, which is why it’s a #7. It’s incredibly light and different from the other faux fur yarns I’ve tried. It’s a marvelous combo and my kids are loving their vests! I hope you love it too!
Available in sizes 2-12yr
I made this cute kids vest with a new yarn Lion Brand Yarn just came out with, Sesame Street Fuzzy Friends! The colors are a perfect match to the show characters we all grew up with and loved. My girls love Yellow and Green so those are the two vests I set out to make. This green has such a fun nostalgic feel.
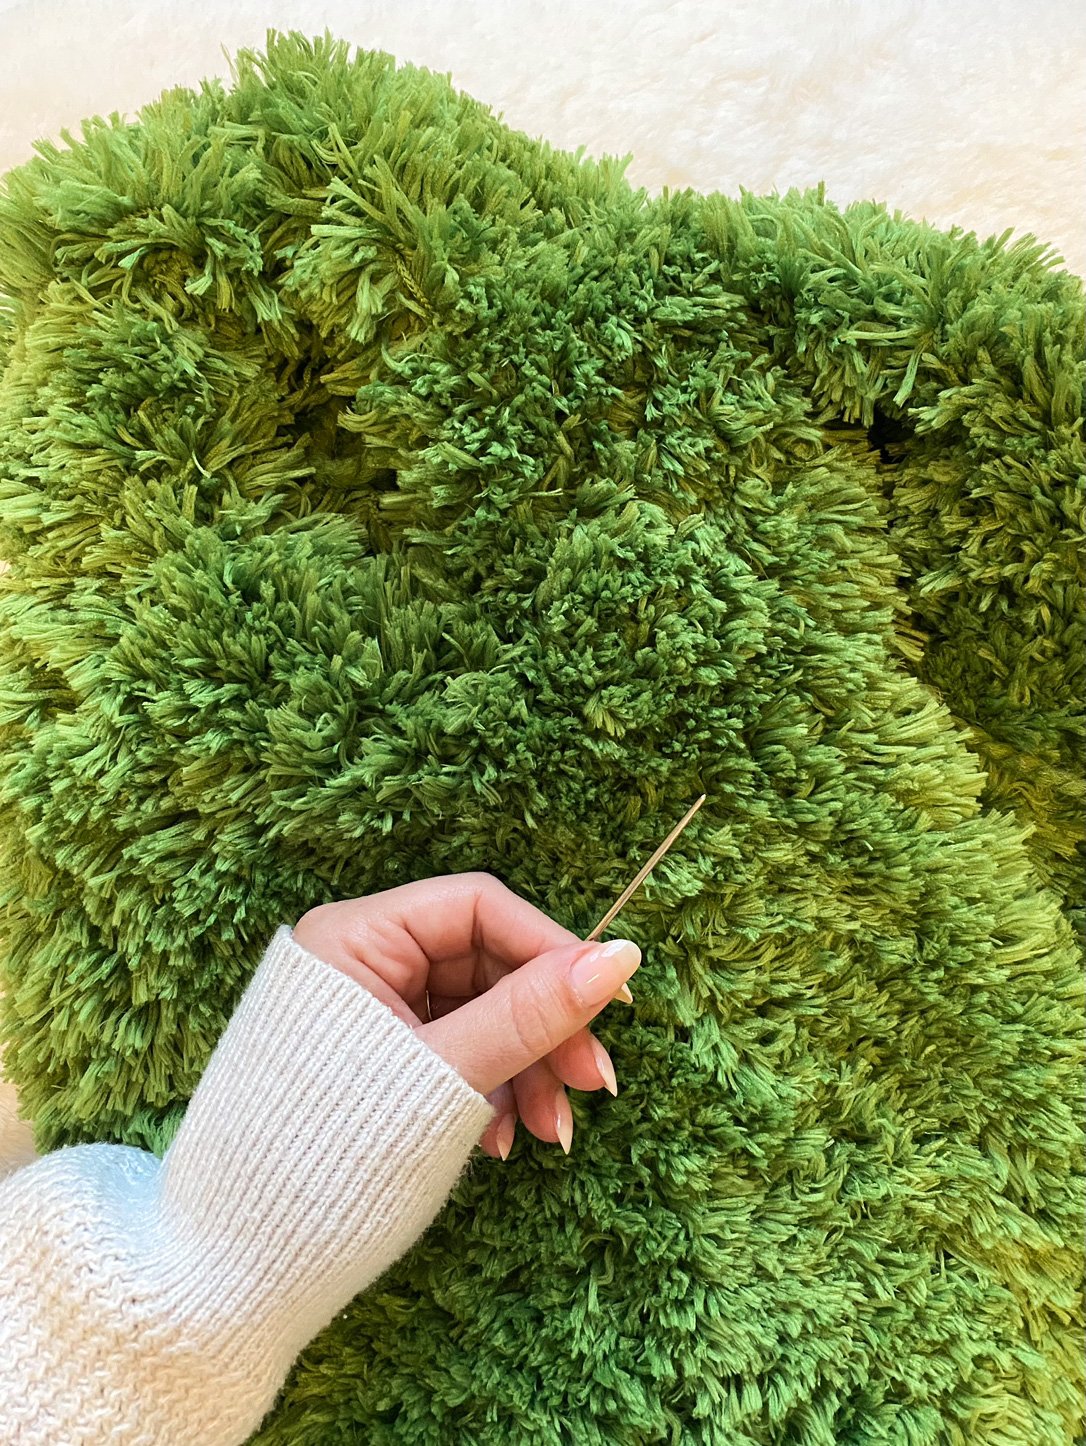
This yarn is technically a #7 but when you hear that don’t think of the weight a #7 can sometimes have. This yarn is WEIGHTLESS!!! The yarn’s weight is all made up of fluff! It’s held together with a cord in the center so I haven’t gotten any shedding as I made this, and did I mention it feels weightless?!?
As a mom I loved knowing how light this new garment would be as well as comfortable. This makes the perfect extra layer now that the cold weather is setting in. As soon as the yarn arrived my kids loved how soft it was, so I set out quickly to get these made and done :) happy kiddos, happy mama! This handmade with love garment will get plenty of wear. I also added a matching rib band using Wool Ease Thick and Quick at the bottom to add a modern vibe to this fun and funky furry vest! You can match your band or go for a contrast, I think both would be super cute! You’ll have plenty of T and Q left over to make a hat too, if you want.
It also comes in lots of cute character colors! Take a look :) You can see the one highlighted that I used and I bet you can guess the other characters just by the colors right? So cute!!!
30% off the kit all weekend 12/22/22, and other sales that may apply throughout the year!

“ I just wanted to do another quick thank you for all your love and support of my designing. I am very excited to announce this design is available as a Kit thanks to Lion Brand Yarn. Each and every Kit purchase you’ve ever made means me collaborating more and more with a company and yarn I find so dear to me. I can’t even begin to add up all the projects I’ve made through the years with their yarn. Order the kit, pick your combo, and happy stitching! If you reach out to me via email or IG, I’m happy to help give my thoughts on colorways to help you pick your perfect kit!” - Angie. (Now more from me below… haha!)

Brisk Fur Vest
Grab the crochet kit! Select any colorway and the pattern is free from Lion Brand Yarn.
Match your favorite character!
The other cool thing about this design is you can add buttons without the exta fuss of making a button hole. The toggle buttons I used tie down on one side, and to close the vest up you just place it through a space between dc’s on the other side. Easy Peasy!!

Brisk Fur Vest on Etsy
Crochet

Get the ad-free printable PDF
Brisk Fur Vest
Heres whats good to know about working with fur yarn! I have a video on my Instagram too to show how it’s easier then you think and once you get going, you’ll be off and running.
Level: Easy, advanced beginner. Due to not being able to see the yarn, we need to feel for the stitches so once you’re comfortable knowing where the post would be in proximity to the next stitch, you’re good to go.
This is worked up in dc’s too, which I find makes working with fur so much easier! You can easily feel for the dc post compared to other stitches.
This yarn is very fluffy, so working the body in a dc made it super light and the fur fills in any and all gaps.
Use a stitch marker to help you with the right and wrong side as a visual. They will look identical.
I counted every stitch for the row to make sure I didn’t miss or add any. This yarns so fluffy it would be forgiving if you missed or added one but the dc post is easy to find and count for accuracy.
OPTIONAL: I used 2 (1 ¾) buttons from Joann’s by the brand La Mode. Any toggle button that size would easily substitute. I attached it to one side and just slipped it through dcs on the following front panel for an easy closure.
This yarn isn’t available in store yet either so it’s a great way to pick up the kit and get the pattern free!!! It’s 30% off opening weekend too, making it starting $17.

Brisk Fur Vest
METHOD
Crochet
DIFFICULTY
Easy/Adv. Beginner
SIZES
Childrens 2 (4, 6, 8, 10, 12)
DESCRIPTION
A super soft vest worked up in dc’s so the rows fly off your hook. This new yarn by LB is full of lightweight fluff that creates a soft and fluffy vest to style up your kiddos outfit, which is the perfect accessory when the weather is brrrr!
YARN
Yarn A: Wool Ease Thick and Quick in “Grass”, 6oz, 106yd, #6
Yarn B: Sesame Street Fuzzy Friends Yarn in “Oscar Green”, 3.5oz, 33yd, #7
Yarn needed:
Yarn A: 20-40 yd
Yarn B: 2 (3, 3, 3, 4, 5) skeins
HOOK
N Hook (10mm) + Q Hook (15mm)
NOTIONS
(optional) Toggle buttons, see NOTES on pg. 2
GAUGE
Blocked, Yarn A:
10 mm Hook
8 sts x 8.5 rows = 4” of sc in the blo
See NOTES on pg. 2
Thank you so much for your shop support! I hope you love it! Contact me for any help or questions you might have along the way.
**This Pattern is a copyright of Whistle and Wool© so you may not copy, alter, adjust, share, record, redistribute or resell my Pattern. No tutorials or any kind of demonstrations may be made using any information contained in my Pattern. I do not mind if you wish to sell a completed HANDMADE item and you are a small independently owned business, however, you do not have permission to use ANY of my photos. If you do sell a completed item, please list credit of the design belonging to me, Whistle and Wool and a link to my shop. www.WhistleandWool.etsy.com
NOTES
Chain does not count as a stitch.
GAUGE: you will need to feel for the edge of your fur stitches to count them. Yarn B gauge approx. 7 sts x 4 rows = 6” of dc. Pattern also has inches written for section lengths to make matching sizes easier.
Level: Easy, advanced beginner. Due to not being able to see the yarn, we need to feel for the stitches so once you’re comfortable knowing where the post would be in proximity to the next stitch, you’re good to go.
This is worked up in dc’s too, which I find makes working with fur so much easier! You can easily feel for the dc post compared to other stitches.
This yarn is very fluffy, so working the body in a dc made it super light and the fur fills in any and all gaps.
Use a stitch marker to help you with the right and wrong side as a visual. They will look identical.
I counted every stitch for the row to make sure I didn’t miss or add any. This yarns so fluffy it would be forgiving if you missed or added one but the dc post is easy to find and count for accuracy.
OPTIONAL: I used 2 (1 ¾) buttons from Joann’s by the brand La Mode. Any toggle button that size would easily substitute. I attached it to one side and just slipped it through dcs on the following front panel for an easy closure.
How the vest works up.
The two front panels are on the edges of the Body Panel.
The back panel is in the center. There will be 2 sts of space between them, for more underarm room.
GAUGE
**Please check your gauge before you start this pattern to match the finished measurements:
It’s best to make your swatch slightly bigger than what the pattern states it should measure, so you can measure it in the center of your square, getting an accurate reading. You can do this by adding 2 additional stitches and working 2 additional rows. Do not count the first and last stitch in your measurement or the first and last row.
Hook Size Suggestions:
If your swatch has less stitches, swatch again using a smaller hook.
If your swatch has more stitches, swatch again using a larger hook.
Finished measurements (in inches)
Sample Size: 26” at chest. Will have stretch when worn.
Chest: Find the correct size to make based off these chest measurements: Childrens 2 (4, 6, 8, 10, 12)
Finished Chest Measurements: 21 (23, 25, 26, 28, 31)”
0” ease included: may appear slightly wider due to the yarns fluff
Shoulder to bottom Hem:
14 (17, 17, 20, 24.5, 24.5)”
Stitches to Know
blo Back loop only
ch Chain
dc Double Crochet
RS Right side of the project
sc Single Crochet
sk Skip the indicated amount of stitches
st(s) Stitches
PATTERN
Bottom Hem Ribbing
Ch 5, use 10mm Hook and Yarn A
Row 1: In the 2nd ch from the hook, sc4 - (4 sts)
Row 2: Ch1, turn, sc4 into the blo
Repeat Row 2, for 44 (48, 53, 55, 59, 64) rows, ending on a RS facing row
Measures: 21 (23, 25, 26, 28, 30)” in length
Hem measures 2” in height
Using 15mm Hook and Yarn B
Note: Now we will turn to dc along the top of the ribbing row ends, to work on the body.
Row 1: (RS) Beginning in the first row ending, then every other one (adjust as needed), ch2, dc 23 (25, 28, 29, 31, 34)
Row 2-4 (6, 6, 8, 10, 10): Ch2, turn, dc the row - [23 (25, 28, 29, 31, 34) sts]
With hem and fluff, should measure: 8 (11, 11, 14, 17, 17)”. Add length as needed. Underarm to Shoulder rows will add, 6 (6, 6, 6, 7.5, 7.5)” in length.
Front Panel
Row 1: (RS) Ch2, turn, dc 4 (4, 5, 5, 6, 7) - [4 (4, 5, 5, 6, 7) sts]
Row 2-4 (4, 4, 4, 5, 5): Ch2, turn, dc the row
Add/Remove rows as needed to customize.
Cut yarn
Back Panel
Next: (RS) Rejoin yarn with a ch2 after skipping 2 sts away from where your front panel left off on the body, continue to Row 1. See diagram pg 5.
Row 1: Dc 11 (13, 14, 15, 15, 16) sts
Row 2-4 (4, 4, 4, 5, 5): Ch2, turn, dc the row - [11 (13, 14, 15, 15, 16) sts]
Cut yarn
Front Panel
Next: (RS) Rejoin yarn with a ch2 after skipping 2 sts from where your Back Panel left off on the body.
Row 1: Dc 4 (4, 5, 5, 6, 7) - [4 (4, 5, 5, 6, 7) sts]
Row 2-4 (4, 4, 4, 5, 5): Ch2, turn, dc the row
Cut yarn
Both sides will look the same, select your WS and weave in all your ends.
Shoulder Seaming
Lay the Vest down, RS facing you, fold the front panels onto the back panel.
Line up the shoulder stitches, add stitch markers in the sts for a good visual if you need them.
With Yarn A, thread your yarn needle with a piece of yarn 2X the shoulder width, and Whip Stitch the shoulder seam, working from the outside inwards.
My yarn was so fluffy you couldn’t see the yarn, and Yarn A makes a sturdier seam.
OPTIONAL: You can attach toggle buttons on one side, and the button just slides through a dc on the other front panel for a closure.
Weave in all ends.
Steam block the garment.

