
Embers Scarf Set

NEW - Available as a Kit through Lion Brand Yarn, PDF in my Ravelry, Etsy and LoveCrafts shops!
A bit of inspiration behind the name: Embers Scarf Set
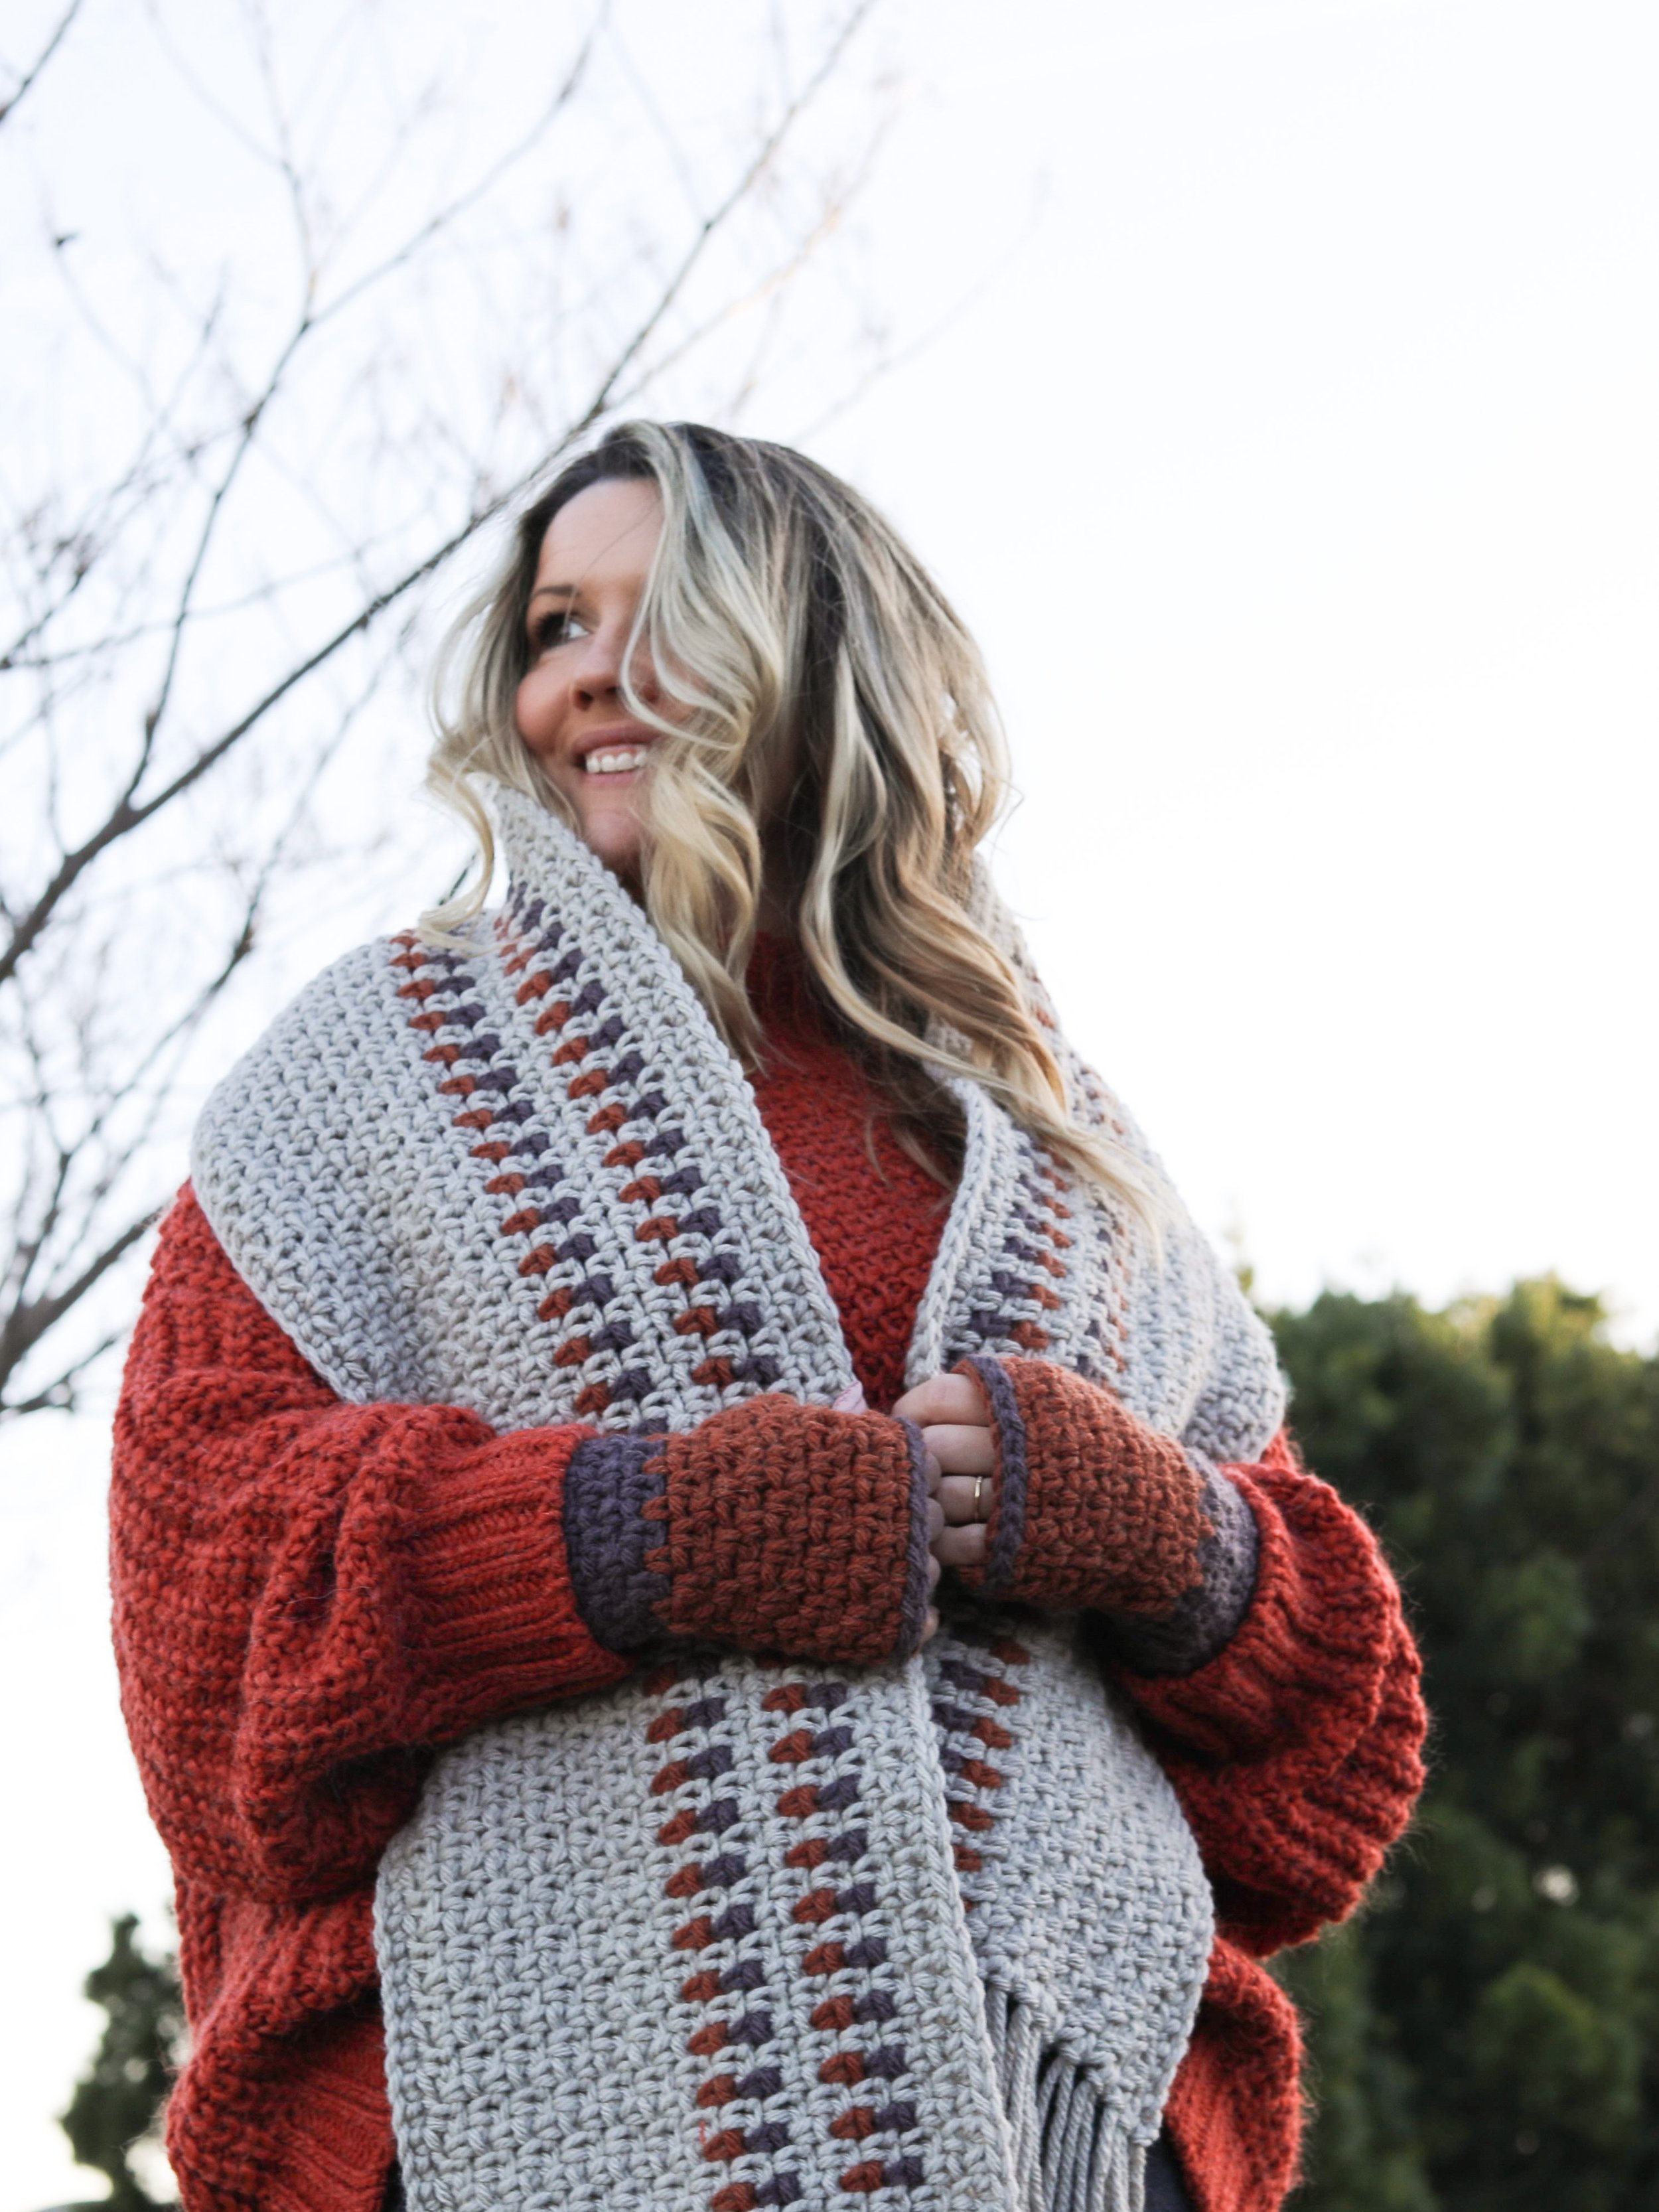
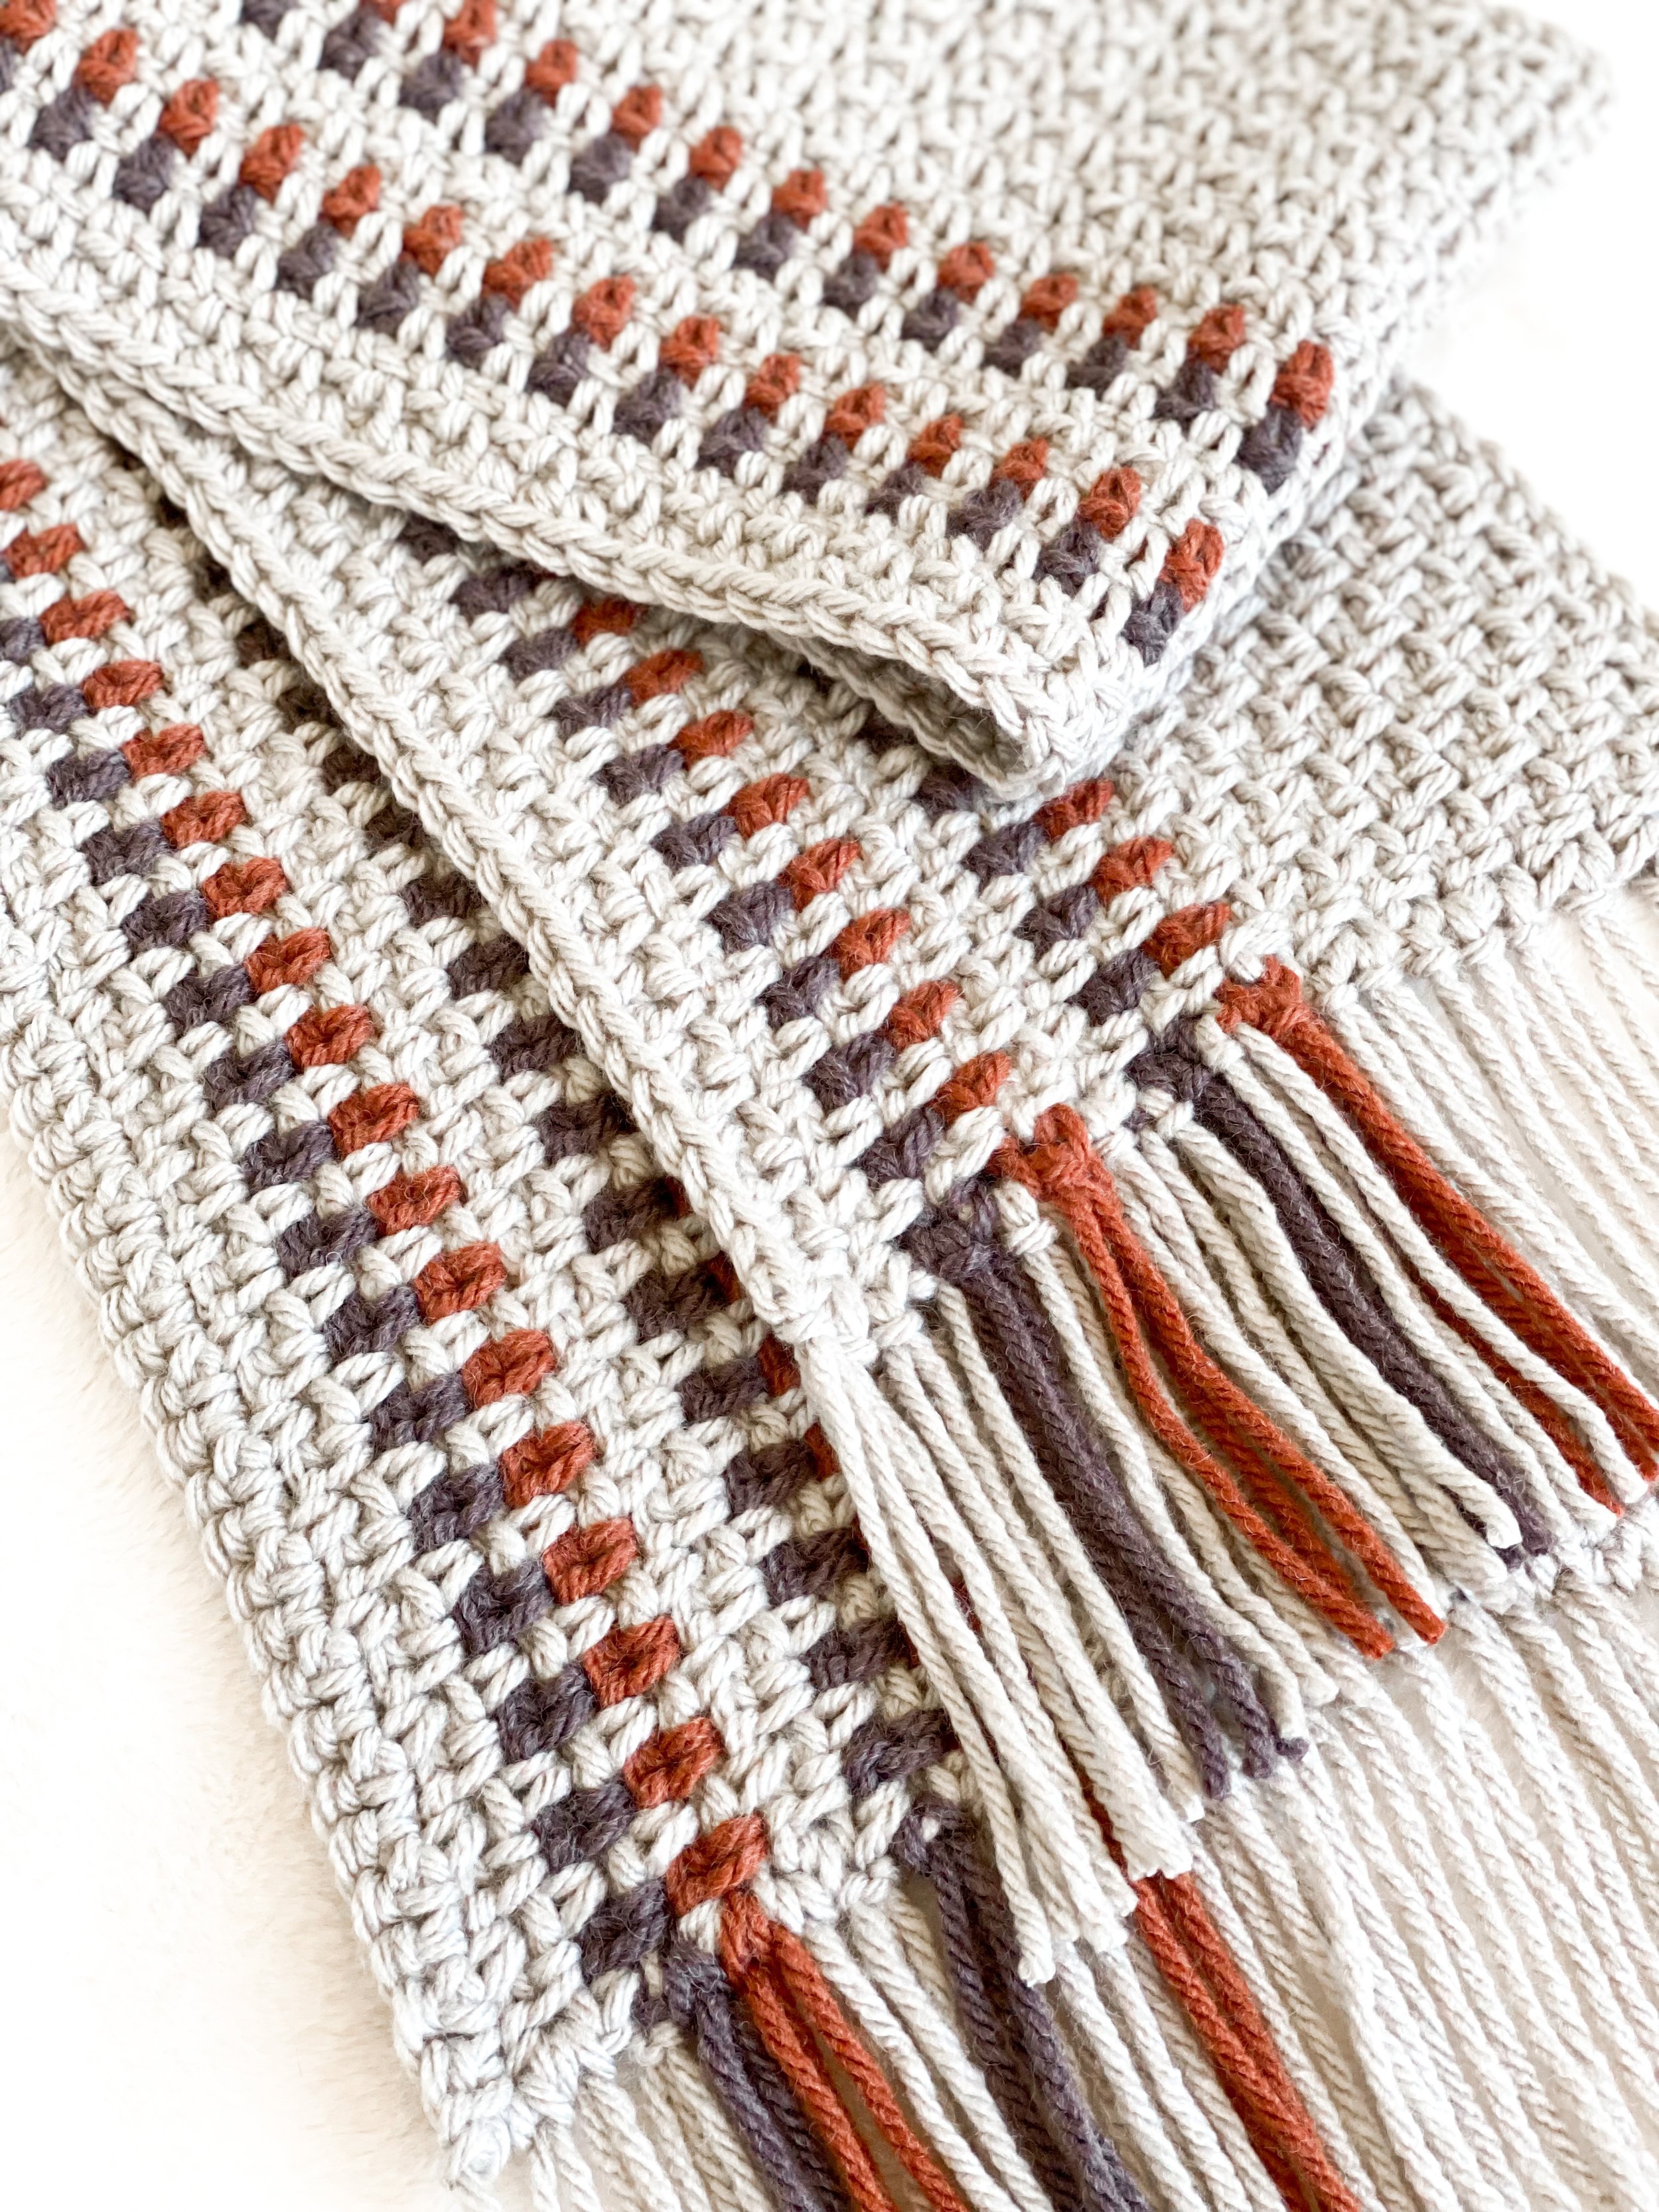
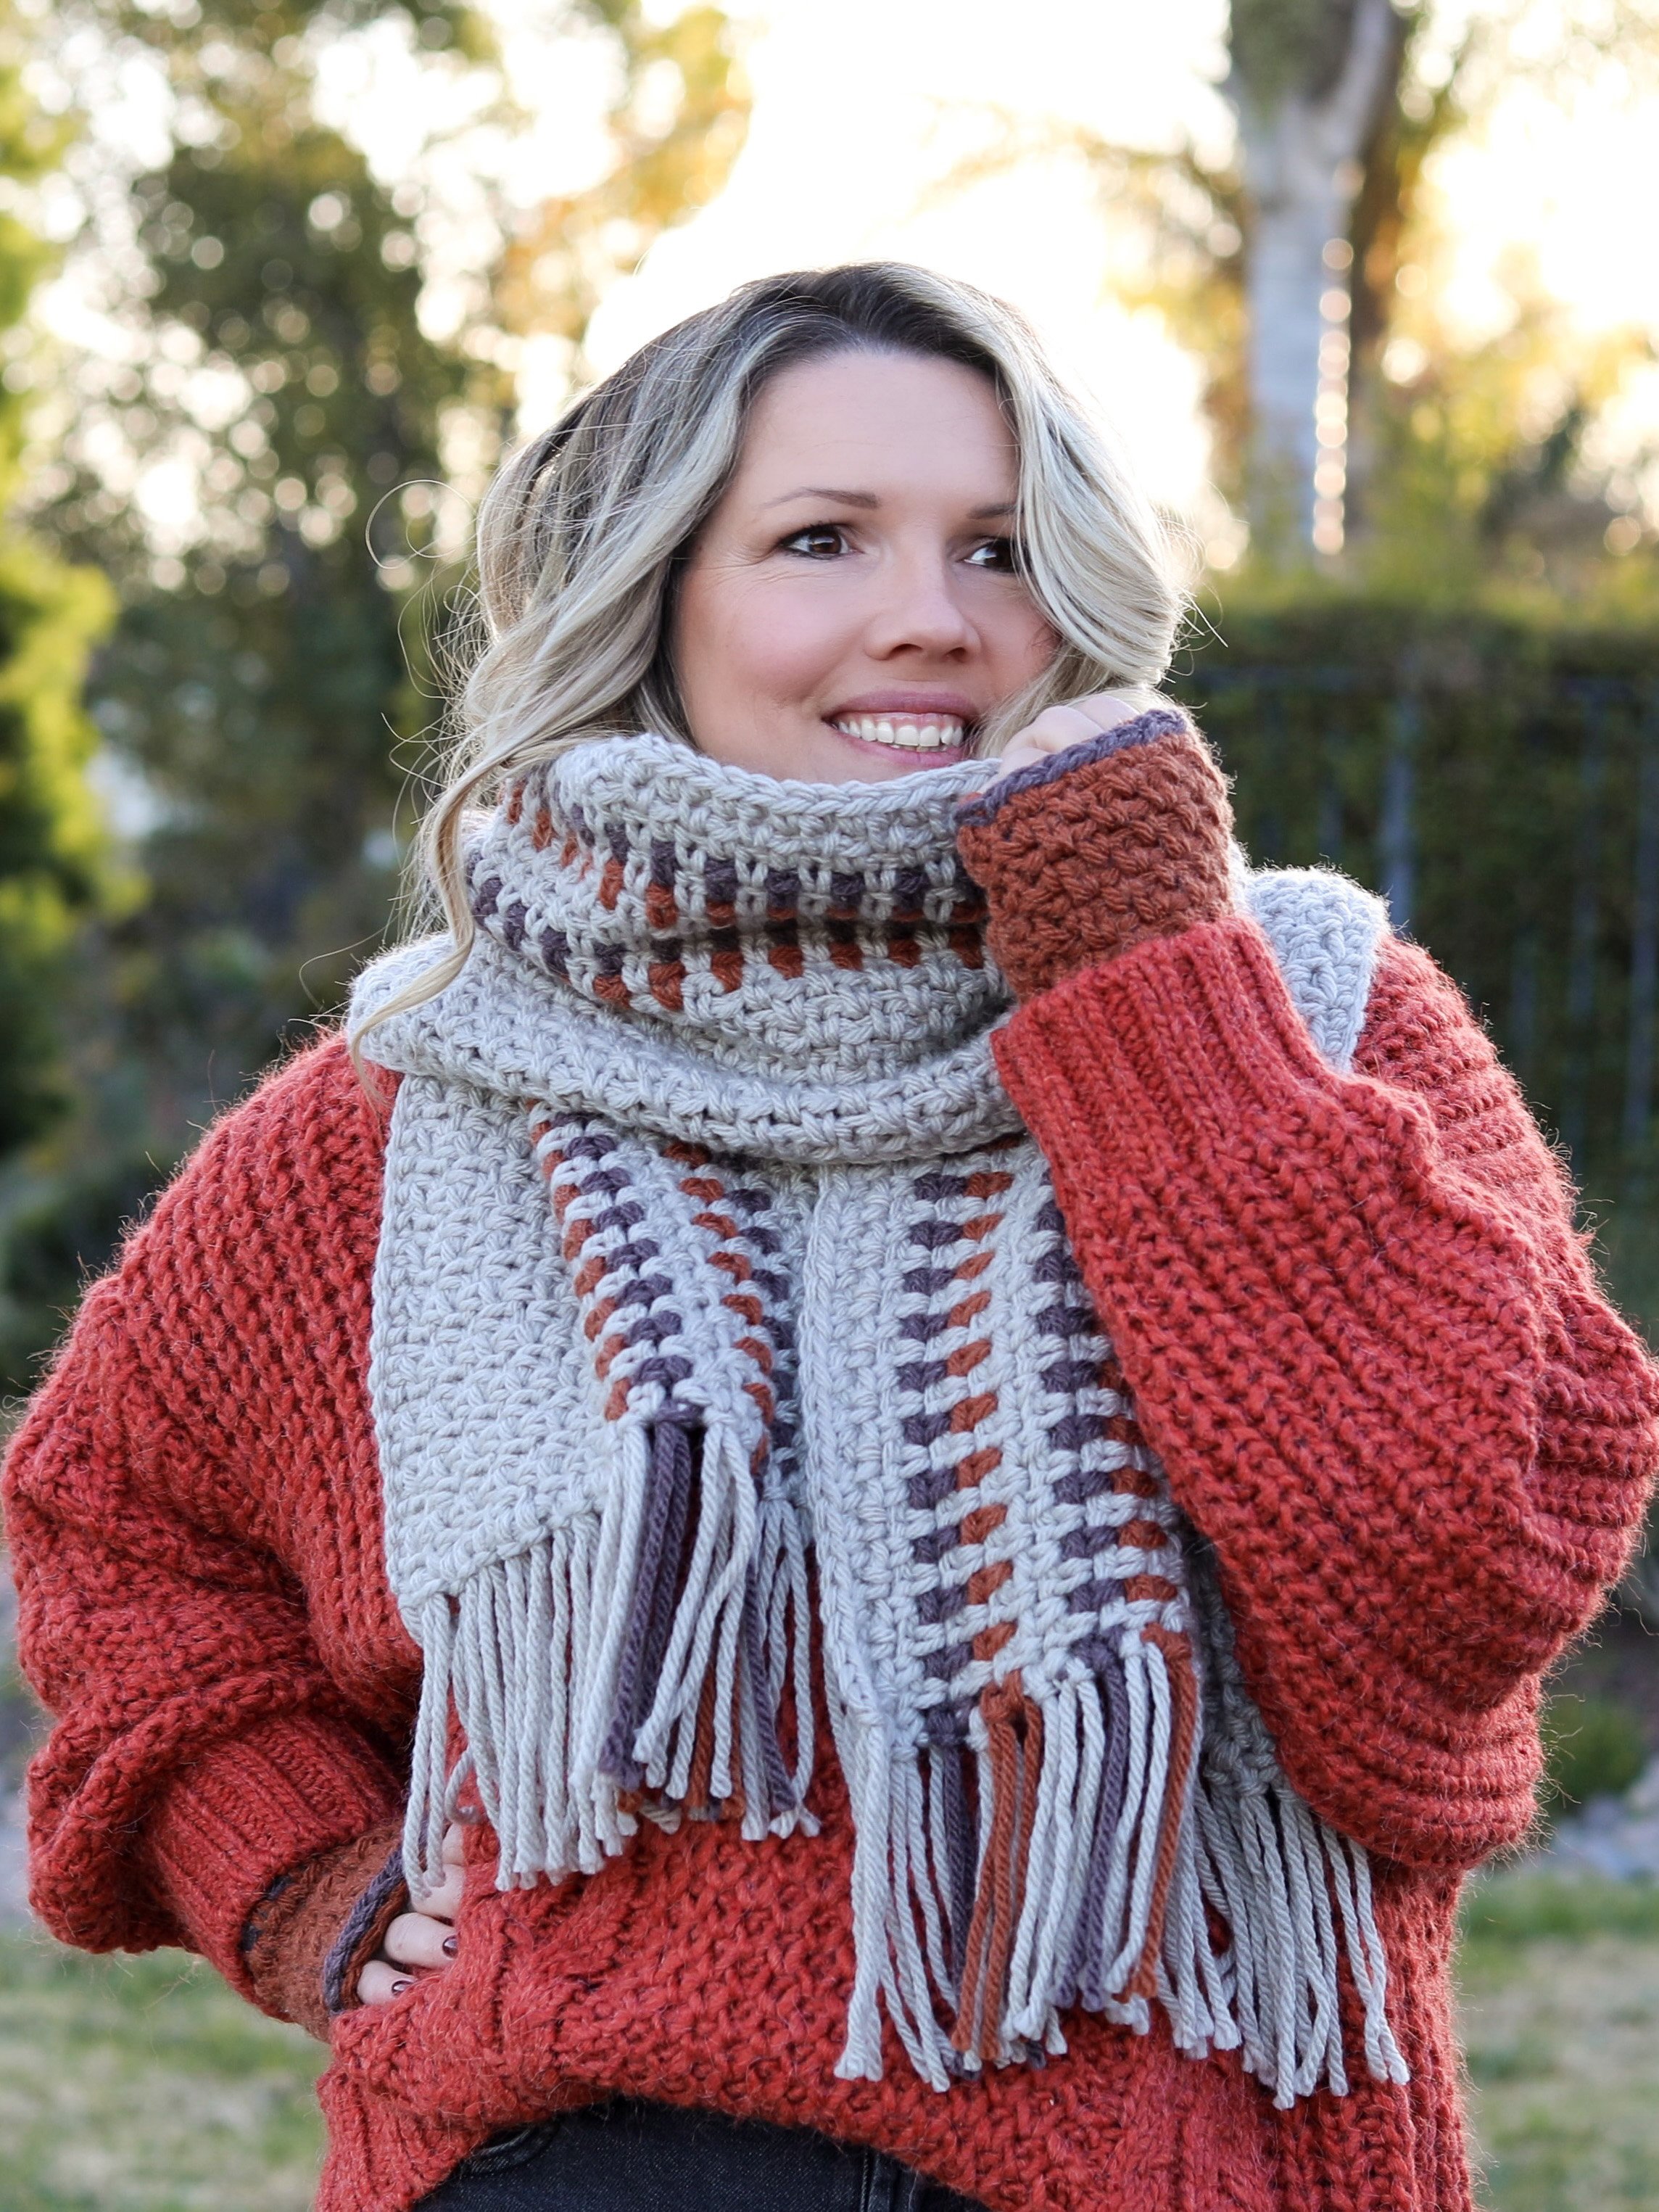
I love a Linen Stitch! Not only does it fly off the hook, but I love the interlacing look of the stitches. This scarf popped into my mind when rain storms were hitting my area and it was so cold outside. I was eager for a set of gloves to me keep cozy too!! The colorways I paired up were comfy winter vibes reminding me of the browns and oranges you get from a cozy fire. I hope you enjoy pairing up your favorite color combos with this one, and create your own beautiful overlapping tones.
“ I just wanted to do another quick thank you for all your love and support of my designing. I am very excited to announce this design is available as a Kit thanks to Lion Brand Yarn. Each and every Kit purchase you’ve ever made means me collaborating more and more with a company and yarn I find so dear to me. I can’t even begin to add up all the projects I’ve made through the years with their yarn. Order the kit, pick your combo, and happy stitching! If you reach out to me via email or IG, I’m happy to help give my thoughts on colorways to help you pick your perfect kit!” - Angie. (Now more from me below… haha!)

Embers Scarf Set
Grab the kit! Select any colorway and the pattern is free from Lion Brand Yarn.
Match mine or make your own Fall inspo!!
With cold winter days coming upon us rather quickly, I found myself struggling to get on with daily activites and not be reminded of how cold my hands were! When a lot of my job as a desinger involves hours of computer work too, I need warmth but also a hands free option to keep me warm!
This set popped into my mind when I stepped outside and the cold winds reminded me that I needed more layers then gloves to get through these storms. A fun idea began to swirl and my love for a coordinating aesthetic began to take shape. I went through a few different versions to get the wearability and coordination between the set right… but it was a worthwhile journey!
I couldn’t be happier with how this turned out. The linen stitch gives this a solid fabric-like finish BUT also has a fluid flexibitly with the chains in it. That is needed for any chunky piece. You want your pieces to move with you and be comfortable after all!
Another last minute change was also needing a separate glove for the left and right hand. Sometimes I love a one glove fits all, but the custom spacing for the thumb really made the saying “it fits like a glove” come to life! This moves and flows with you like you don’t even have them on, you’re just warm!
This set has great coordination between the colorways too since were not using much of B and C on the scarf, I made a cute coordinating pair without being too matchy-matchy. With this yarn line you can customize a spring set, blues, warm pinks like some of my testers did, and the options are truly endless! These also work up in a few hours so you can make multiple sets!

Embers Scarf Set on Etsy
Beginner, Bulky Weight, Crochet
This texture is so fun to work up and is a perfect stitch for all levels of crochet. The pattern of where the stitch falls, repeats for each row and when you select your favorite color combo you’ll see this fun layering pop up as the rows add on. The yarn line I used in this project by Hue+Me really packs some warmth too! I love the lightness of the skeins but warmth you can get from it!

Embers Scarf Set on Ravelry
Beginner, Bulky Weight, Crochet
Love a cute coordinating set!!

Got your yarn? Just pick up the easy to print and store PDF from your favorite platform. I have it available in my Etsy, Ravlery and Love Crafts!
PATTERN: Embers Scarf Set
METHOD
Crochet
DIFFICULTY
Beginner
SIZE
One size
DESCRIPTION
I love a linen texture, it flies off the hook! The way these colors play off of each other make combos endless, and to keep you extra warm it has matching fingerless gloves!
YARN
Lion Brand, Hue and Me
137 YD, #5, 4.4 oz.
80% Acrylic, 20% Wool
Skeins needed:
3 - Color A- Whisper
1 - Color B- Saffron
1 - Color C- Shadow
HOOK
Clover Amour M (9 mm)
NOTIONS
Yarn Needle
GAUGE
(blocked)
10 sts x 10 rows = 4” in Linen Stitch
NOTES
GAUGE
**Please check your gauge before you start this Pattern to match the finished measurements:
It’s best to make your swatch slightly bigger than what the pattern states it should measure, so you can measure it in the center of your square, getting an accurate reading. You can do this by adding 2 additional stitches and work 2 additional rows. Do not count the first and last stitch in your measurement or the first and last row.
Hook Size Suggestions:
If your swatch has less stitches, swatch again using a smaller hook.
If your swatch has more stitches, swatch again using a larger hook.
PATTERN INFO
Thank you so much for your shop support! I hope you love it! Contact me for any help or questions you might have along the way.
**This Pattern is a copyright of Whistle and Wool© so you may not copy, alter, adjust, share, record, redistribute or resell my Pattern. No tutorials or any kind of demonstrations may be made using any information contained in my Pattern. I do not mind if you wish to sell a completed HANDMADE item and you are a small independently owned business, however, you do not have permission to use ANY of my photos. If you do sell a completed item, please list credit of the design belonging to me, Whistle and Wool and a link to my shop. www.WhistleandWool.com
Finished measurements (in inches)
Gloves : Circ. of palm 7.5” x 8” L
Scarf : 68” x 10” (length will stretch a bit with wear)
Stitches to Know
beg Beggining
Ch Chain
ch sp Chain Space
sk Skip the indicated amount of stitches
sc Single Crotchet
st(s) Stitch(es)
RS Right Side of the project
WS Wrong Side of the project
PATTERN
SCARF
Ch 171 with Color A
Row 1: In the 2nd chain from hook, sc the row - (170 sts)
Row 2: Ch1, turn, (ch1, sk1, sc1) for the row - (170 sts)
Row 3-14: Repeat Row 2
NEXT: Repeat Row 2 in the following colors
Row 15: Color B
Row 16: Color A
Row 17: Color C
Row 18: Color A
Row 19: Color A
Row 20: Color A
Row 21-26: Repeat Rows 15-20, once more
Final Row: (RS) ch1, turn, sc the row
Cut yarn and weave in ends
Finishing
Cut 12” pieces of yarn to match row endings and attach as a fringe at the short sides of the scarf (rows beginning and endings). I matched mine to the color of the row for a fun look!
Cut yarn and weave in ends
GLOVES
Beginning instructions are for both gloves, left and right specific instructions will follow this section
Ch 21 with Color C
Row 1: In the 3rd Ch from hook, sc1, (ch1, sk1, sc1) for the remaining row - (20 sts)
The 2nd chain from the hook we skipped over for the 3rd counts as a stitch for this final count, it’s the first (ch1, sk1) in the “ch1, sk1, sc1” linen stitch texture.
Row 2: Ch1, turn, (ch1, sk1, sc1) for the row (the last sc goes between the previous rows starting chain and first sc made)
Row 3-8: Repeat Row 2
Cut yarn but leave a long tail for seaming at the end
Row 9-11: Color B, Repeat Row 2
Right Glove Only - continue with Color B
Row 12: (RS) Ch1, turn, [(ch1, sk1, sc1) 5 times], (ch1, sc1 again in the last worked stitch for an increase), sk1, in the next st [(ch1, sc1) twice, for another increase], (ch1, sk1, sc1) for the remaining row - (24 sts)
Row 13: Repeat Row 2
Row 14: Ch1, turn, [(ch1, sk1, sc1) 3 times], sc6, (ch1, sk1, sc1) for the remaining row
Row 15: Ch1, turn, [(ch1, sk1, sc1) 6 times, 6 sc’s worked], ch4, sk5, sc1, (ch1, sk1, sc1) for the remaining row - (23 sts)
Row 16: Ch1, turn, [(ch1, sk1, sc1) 3 times], sc1 in the st before the thumb ch sp, sc3 into the ch sp, after the ch sp sc2, (ch1, sk1, sc1) for the remaining row - (22 sts)
Row 17: Ch1, turn, [(ch1, sk1, sc) 6 times], sc4, (ch1, sk1, sc) for the remaining row
Left Glove Only - continue with Color B
Row 12: (RS) Ch1, turn, [(ch1, sk1, sc1) 5 times], (ch1, sc1 again in the last worked stitch for an increase), sk1, in the next st [(ch1, sc1) twice, for another increase], (ch1, sk1, sc1) for the remaining row] - (24 sts)
Row 13: Repeat Row 2
Row 14: Ch1, turn, [(ch1, sk1, sc1) 5 times], sc6, (ch1, sk1, sc1) for the remaining row
Row 15: Ch1, turn. [(ch1, sk1, sc1) 4 times, 4 sc’s worked], ch4, sk5 sts, sc1, (ch1, sk1, sc1) for the remaining row - (23 sts)
Row 16: Ch1, turn, [(ch1, sk1, sc) 5 times], sc1 in the st before the thumb ch sp, sc3 into the ch sp, after the ch sp sc2, (ch1, sk1, sc1) for the remaining row - (22 sts)
Row 17: Ch1, turn, [(ch1, sk1, sc) 4 times], sc4, (ch1, sk1, sc) for the remaining row
All Gloves
Row 18-20: Color B, ch1, turn, (ch1, sk1, sc1) for the row - (22 sts)
Cut your end but don’t pull it through, we have one more row after this, leave a long 12” tail for seaming.
Row 21: Color C, ch1, turn, Sl St the row
Cut yarn
NEXT: Thumb SC finishing row
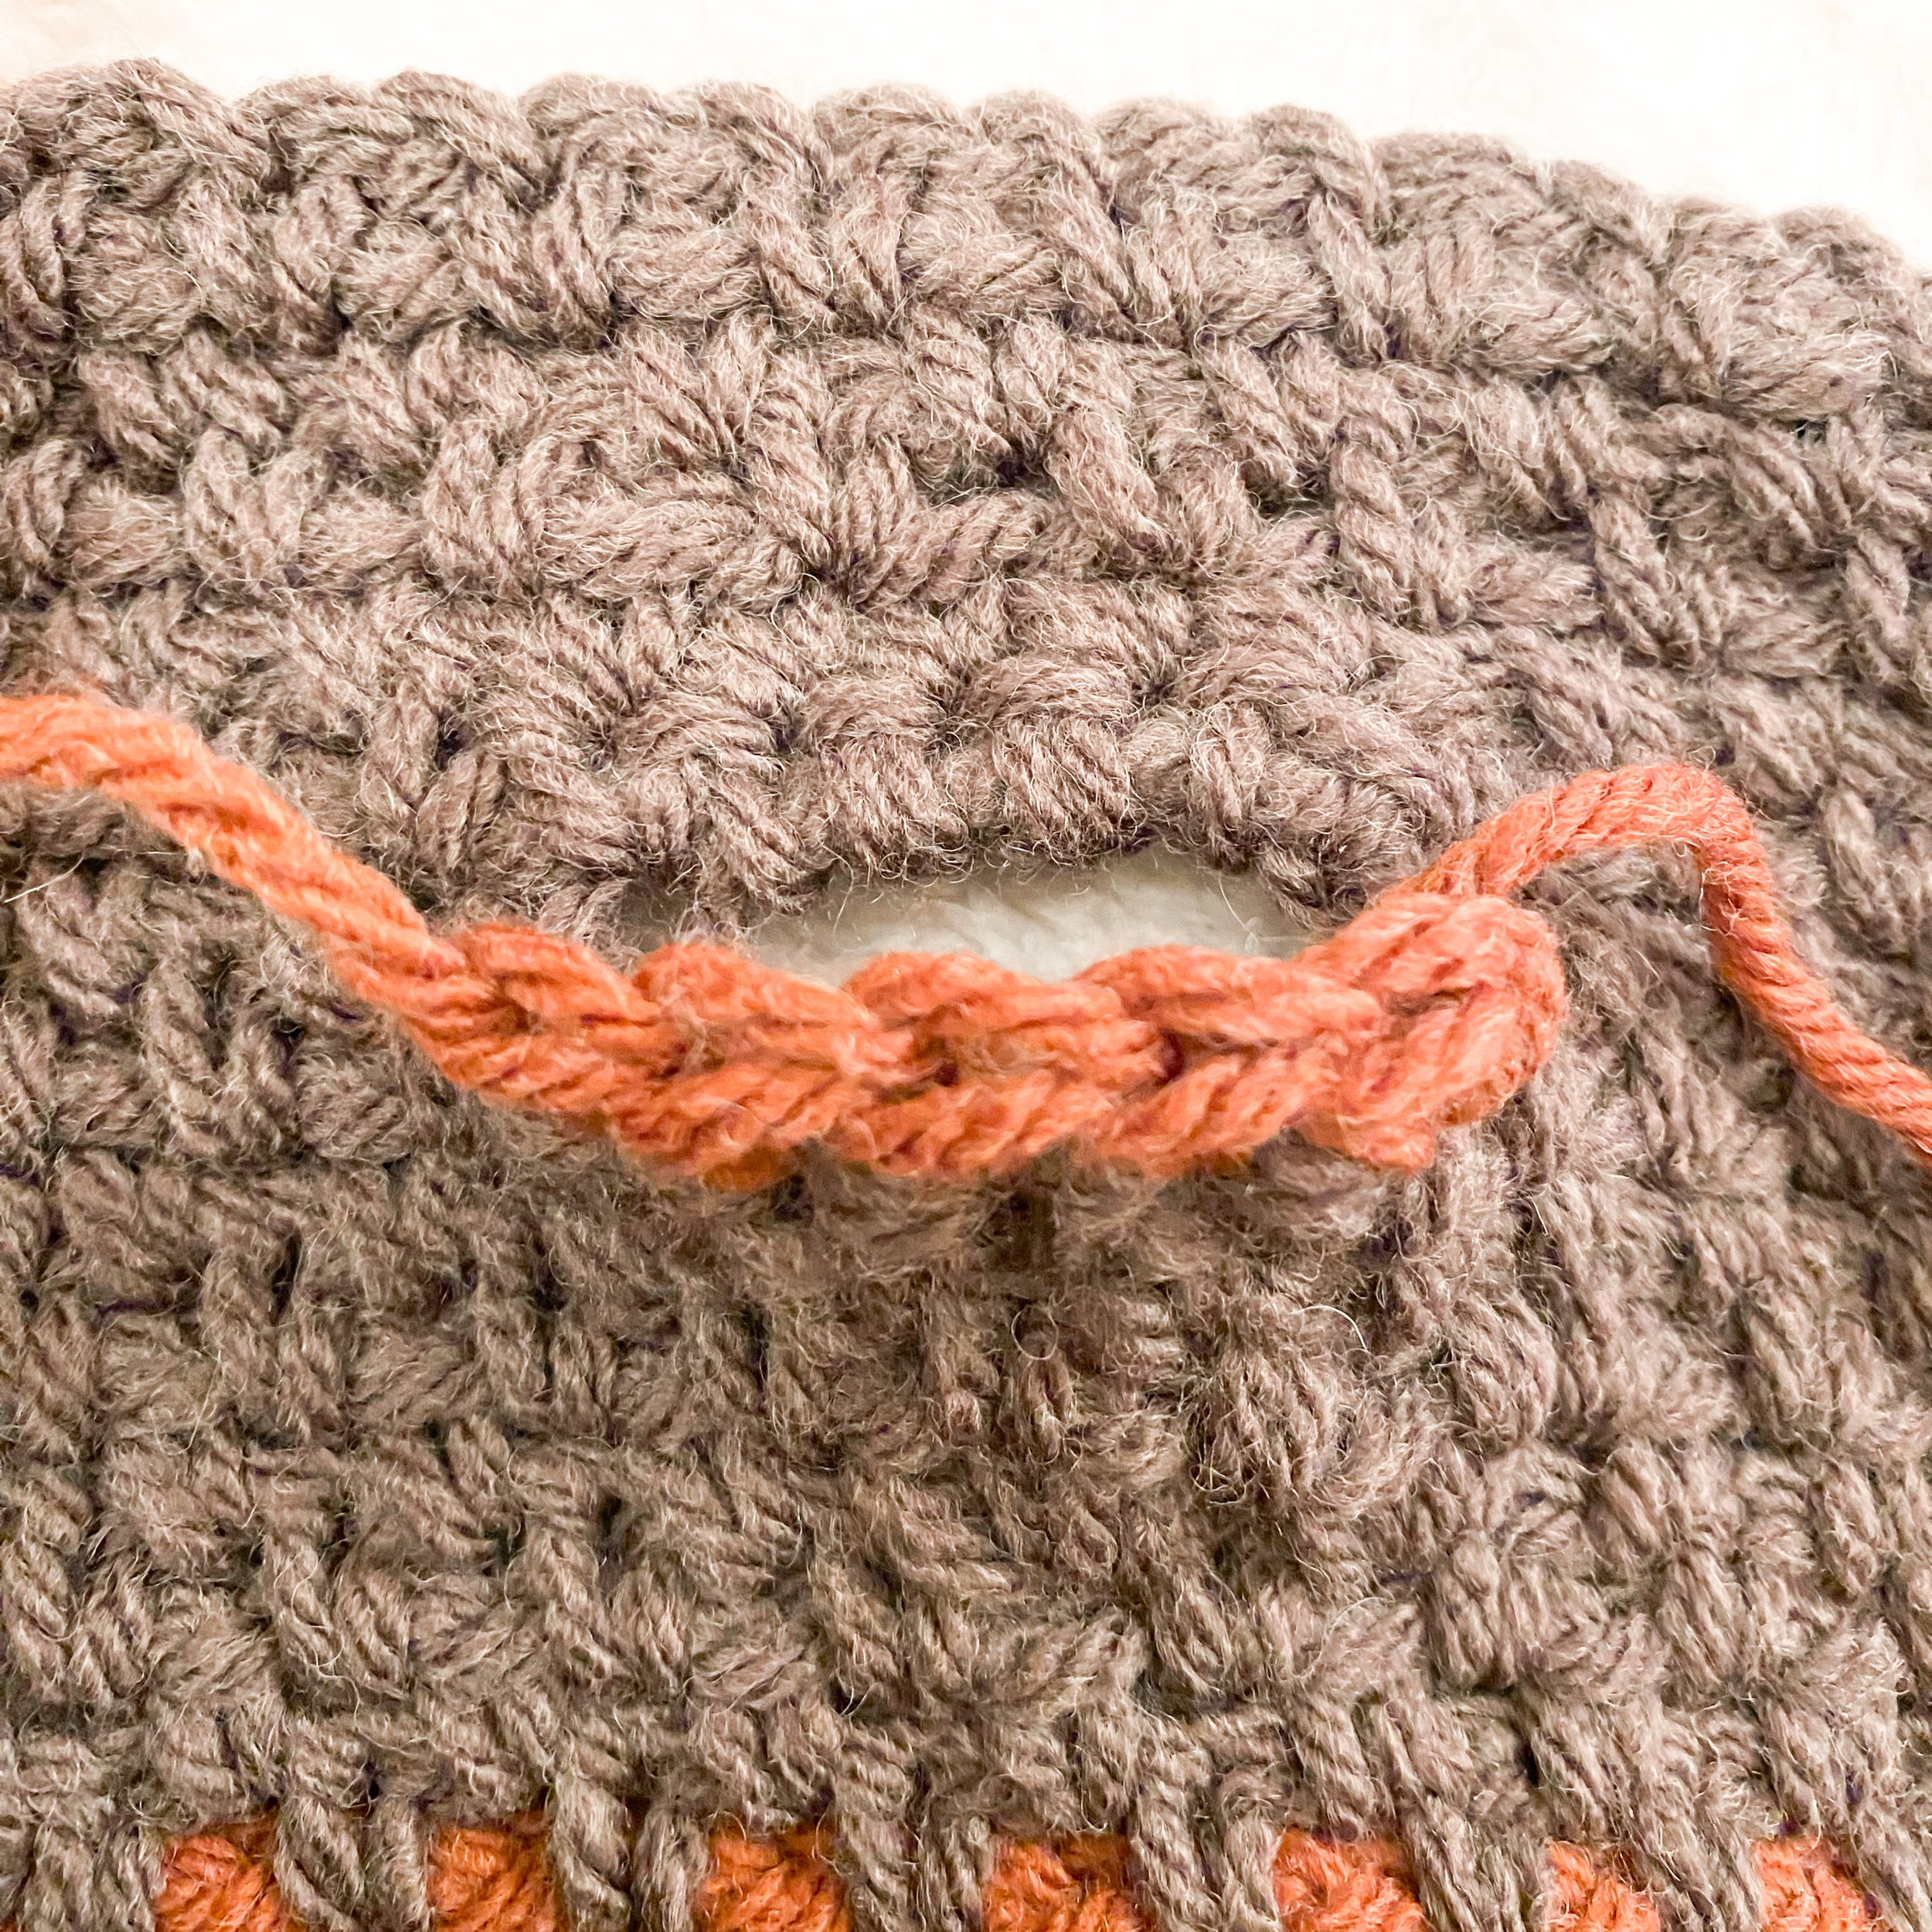
Before seaming the glove up we will add a sc detail row along the skipped stitch for the thumb for a clean edge. Repeat for both.
Step 1: RS facing you, attach yarn with a ch1 at the right bottom edge of the thumb opening, sc 5 sts along the stitches.
Weave in ends well on the inside to secure it (See pic, different colors were used for a better visual).
Seaming
With the RS of the project facing you, fold the gloves in half so the WS is now facing you to seam up the long side. Use the matching yarn tails to match each section for a clean seam.
Weave in all your ends.
Voila! You’re done! Block and enjoy!

