
Lore Cardigan
A bit of inspiration behind the name:
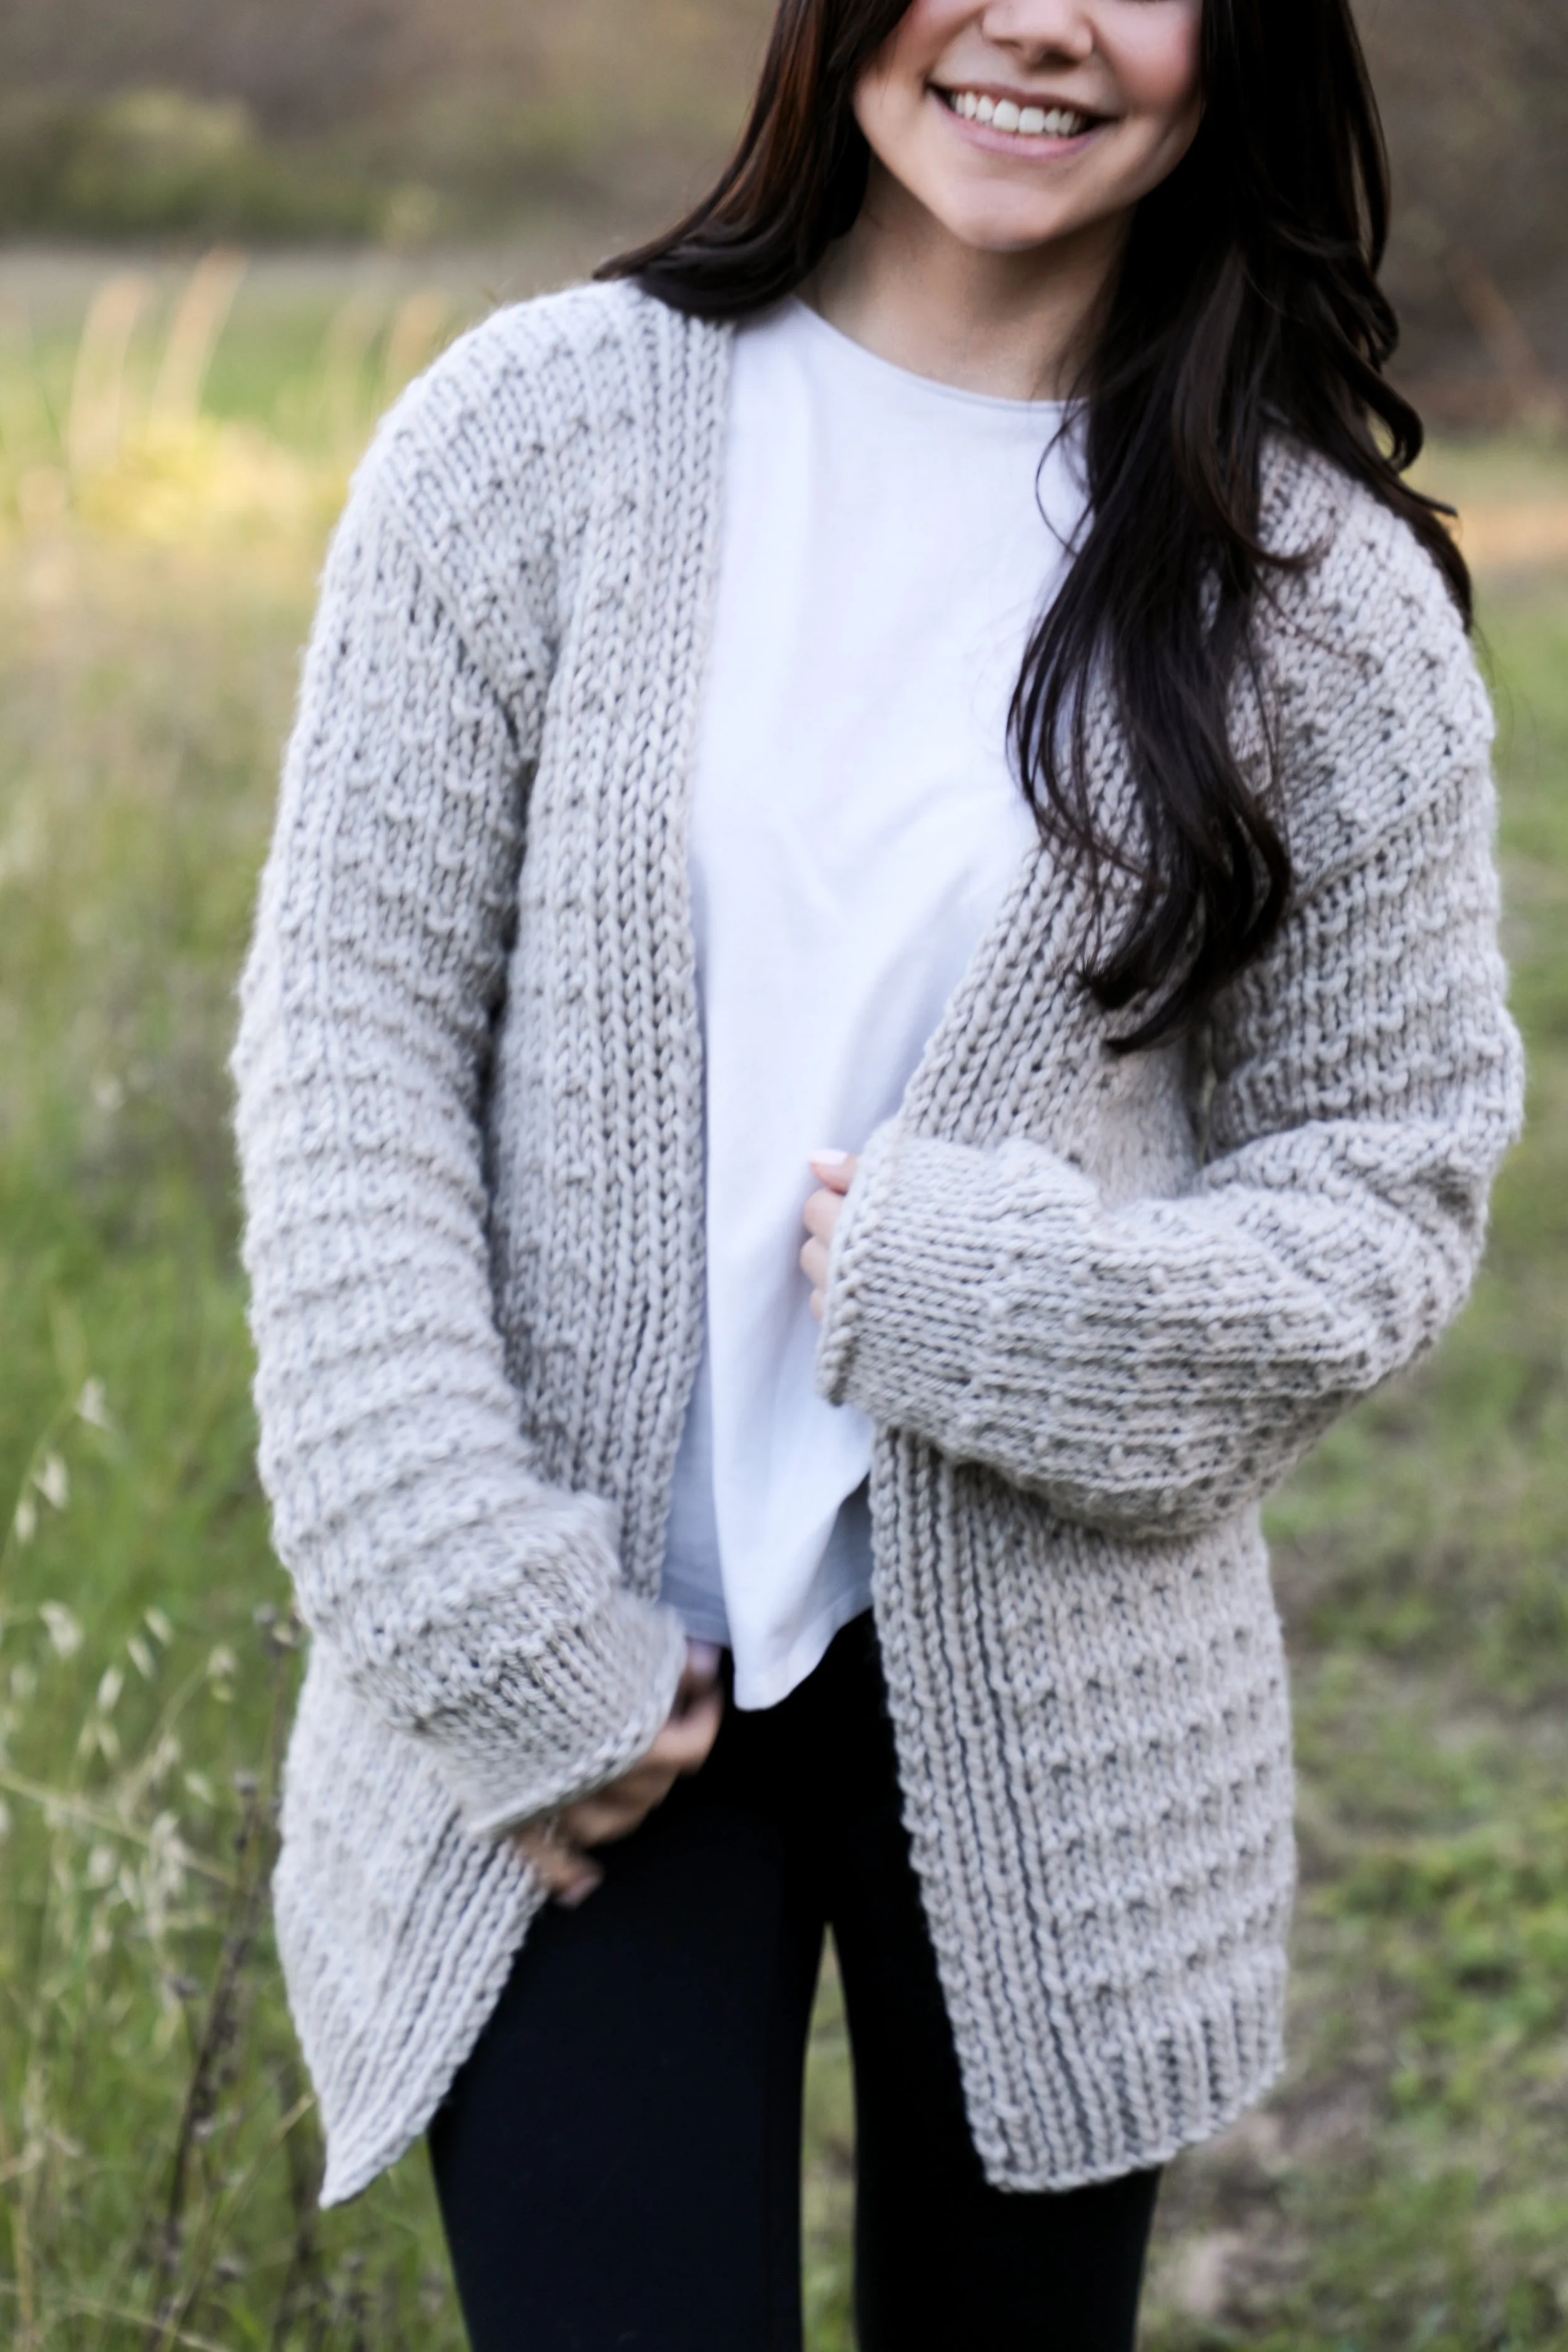
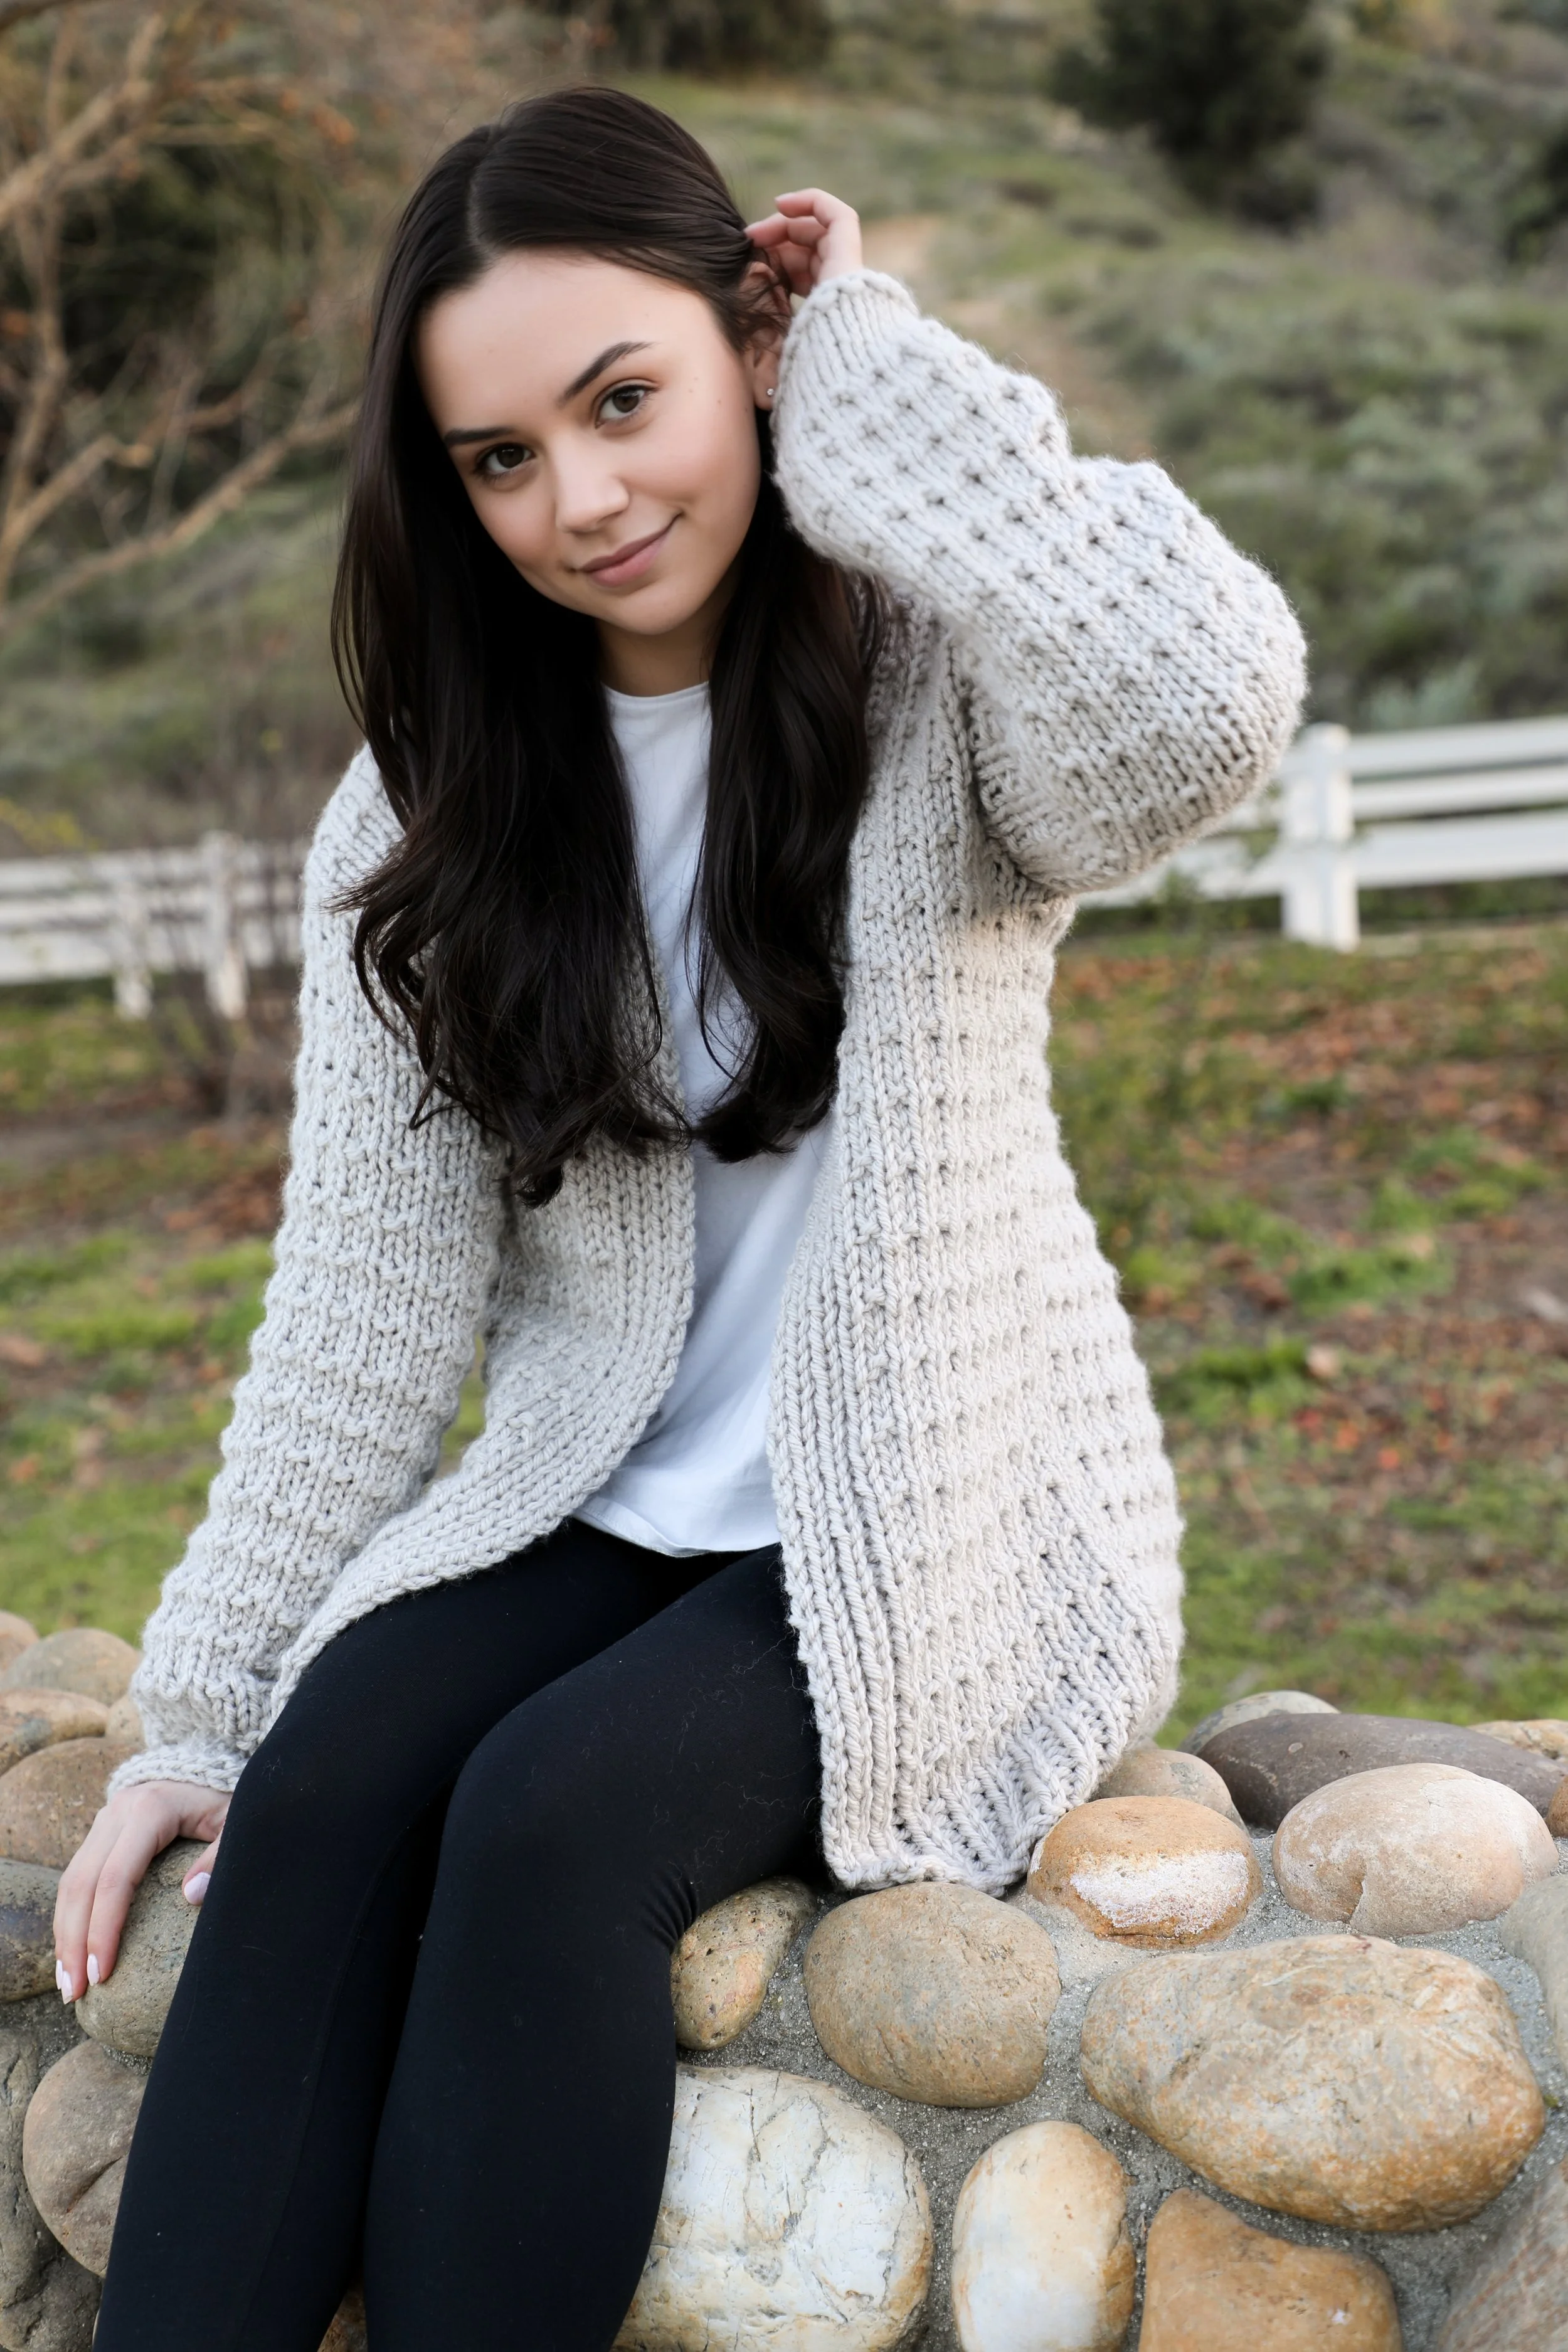
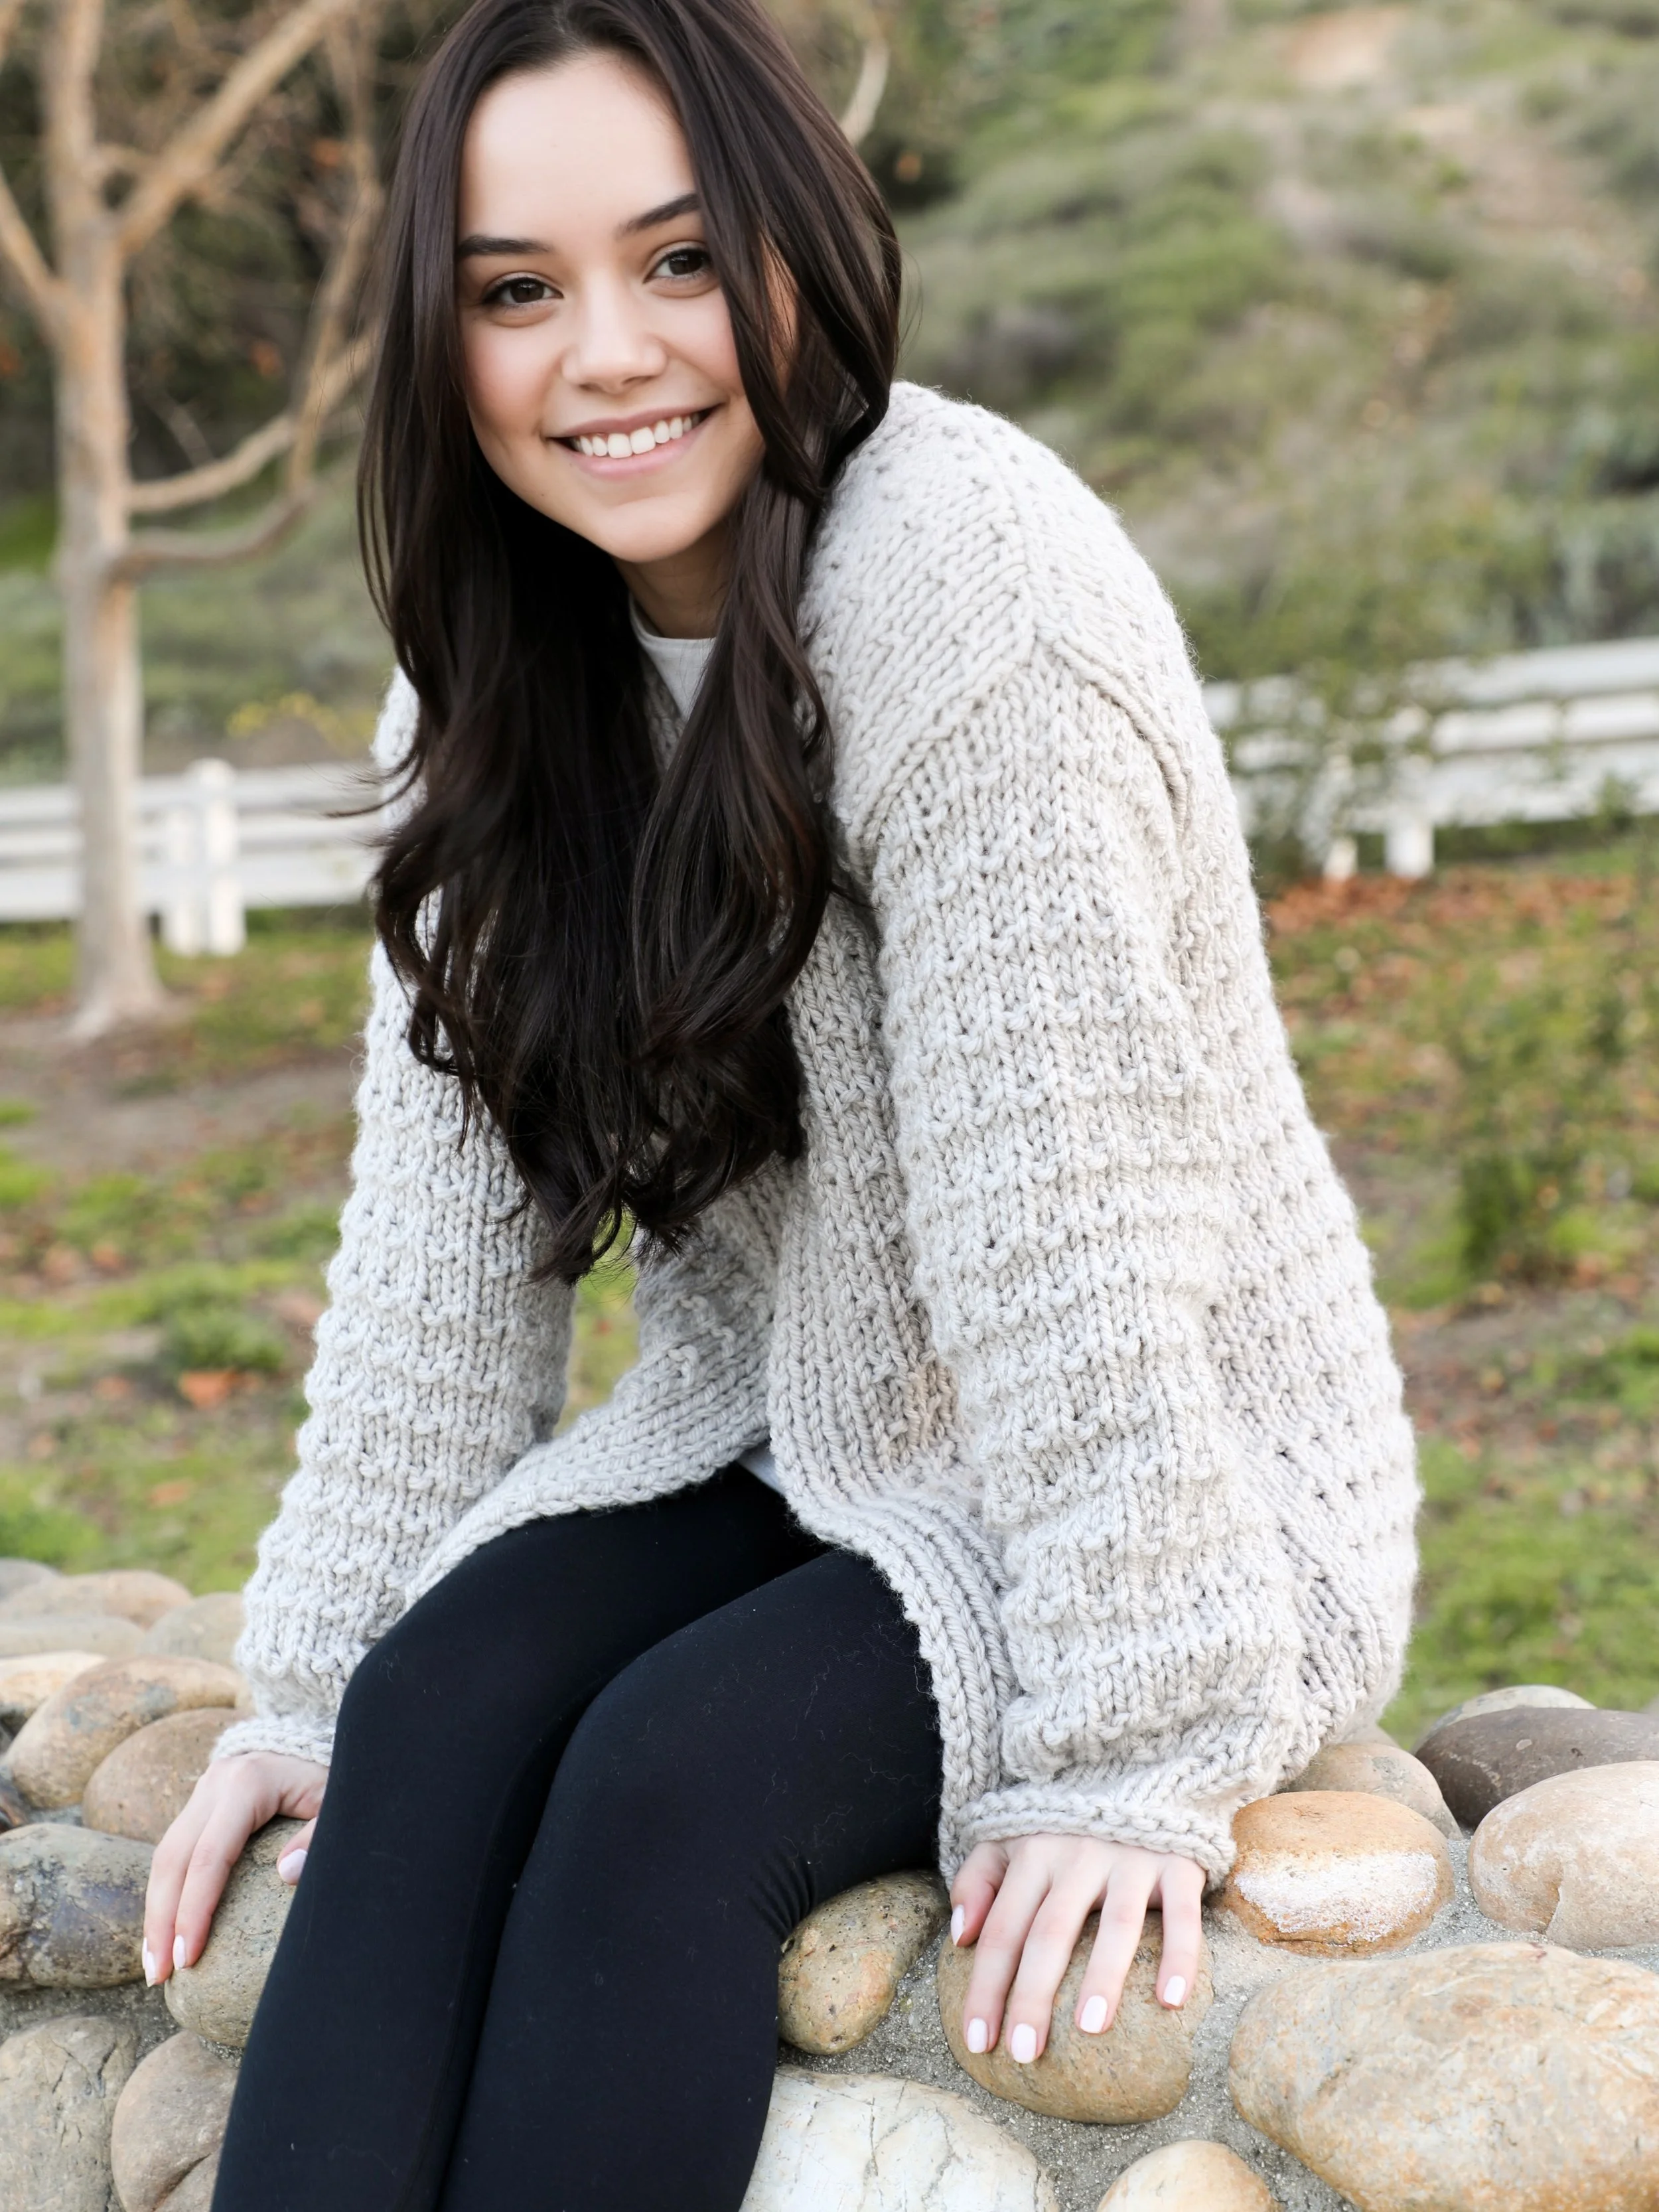
As you know, I love my simple but timeless stitches. I love how simple a quick change-up of a knit and purl can create a beautiful fabric! One day last December, I was enjoying some knit time and as I was chatting with my mum this texture just popped in my head. After a quick swatch, I LOVED it! While I have a worsted version currently on one set of needles I decided I loved it so much we needed an oversize coziness to get us through Winter! The quilt like texture is so cute to me, I hid the pockets on the inside. So don’t worry, we still have a snack spot!

METHOD Knitting
DIFFICULTY
Beginner
SIZES XS (S, M, L, XL) (2X, 3X, 4X, 5X)
DESCRIPTION
This cardigan has a quilt like texture that is an easy knit and purl repeat. The entire cardigan works up in panel pieces with simple shaping at the underarm for a fantastic fit! The lapel works up with the front so there’s no picking up of stitches. And yes, we have pockets! They’re cutely hidden on the inside so the texture shines from all angles.
YARN
Lion Brand Yarn, Hue+Me in “Whisper”, #5 Bulky, 4.4oz/125g, 137yd/125m, 80% Acrylic/20% Wool
Skeins needed:
5 (6, 6, 7, 7) ( 8, 8, 9, 10)
NEEDLES
US 11 (8 mm)
NOTIONS
Yarn Needle, Scissors
GAUGE
10 sts x 16 rows = 4” (10cm) in pattern, blocked

This fun texture is an easy repeat of just knits and purls, so it’s a perfect place to start if you want to make a cardigan. From pro to beginner this repeat is enjoyable to work up!

This cardigan has a lapel that works up at the same time you knit the front panels. This is a great alternative to picking up stitches, which can be tricky or just tiring if you’re wanting to relax with your knits. Sometimes I’m in the mood for different things and as you can probably notice with this one, I just wanted it to be seamless in regards to that. It’s perfectly aligned, without me needing to do anything extra at the end. When you finish the front panel, you’re all set + done! Ready for seaming.
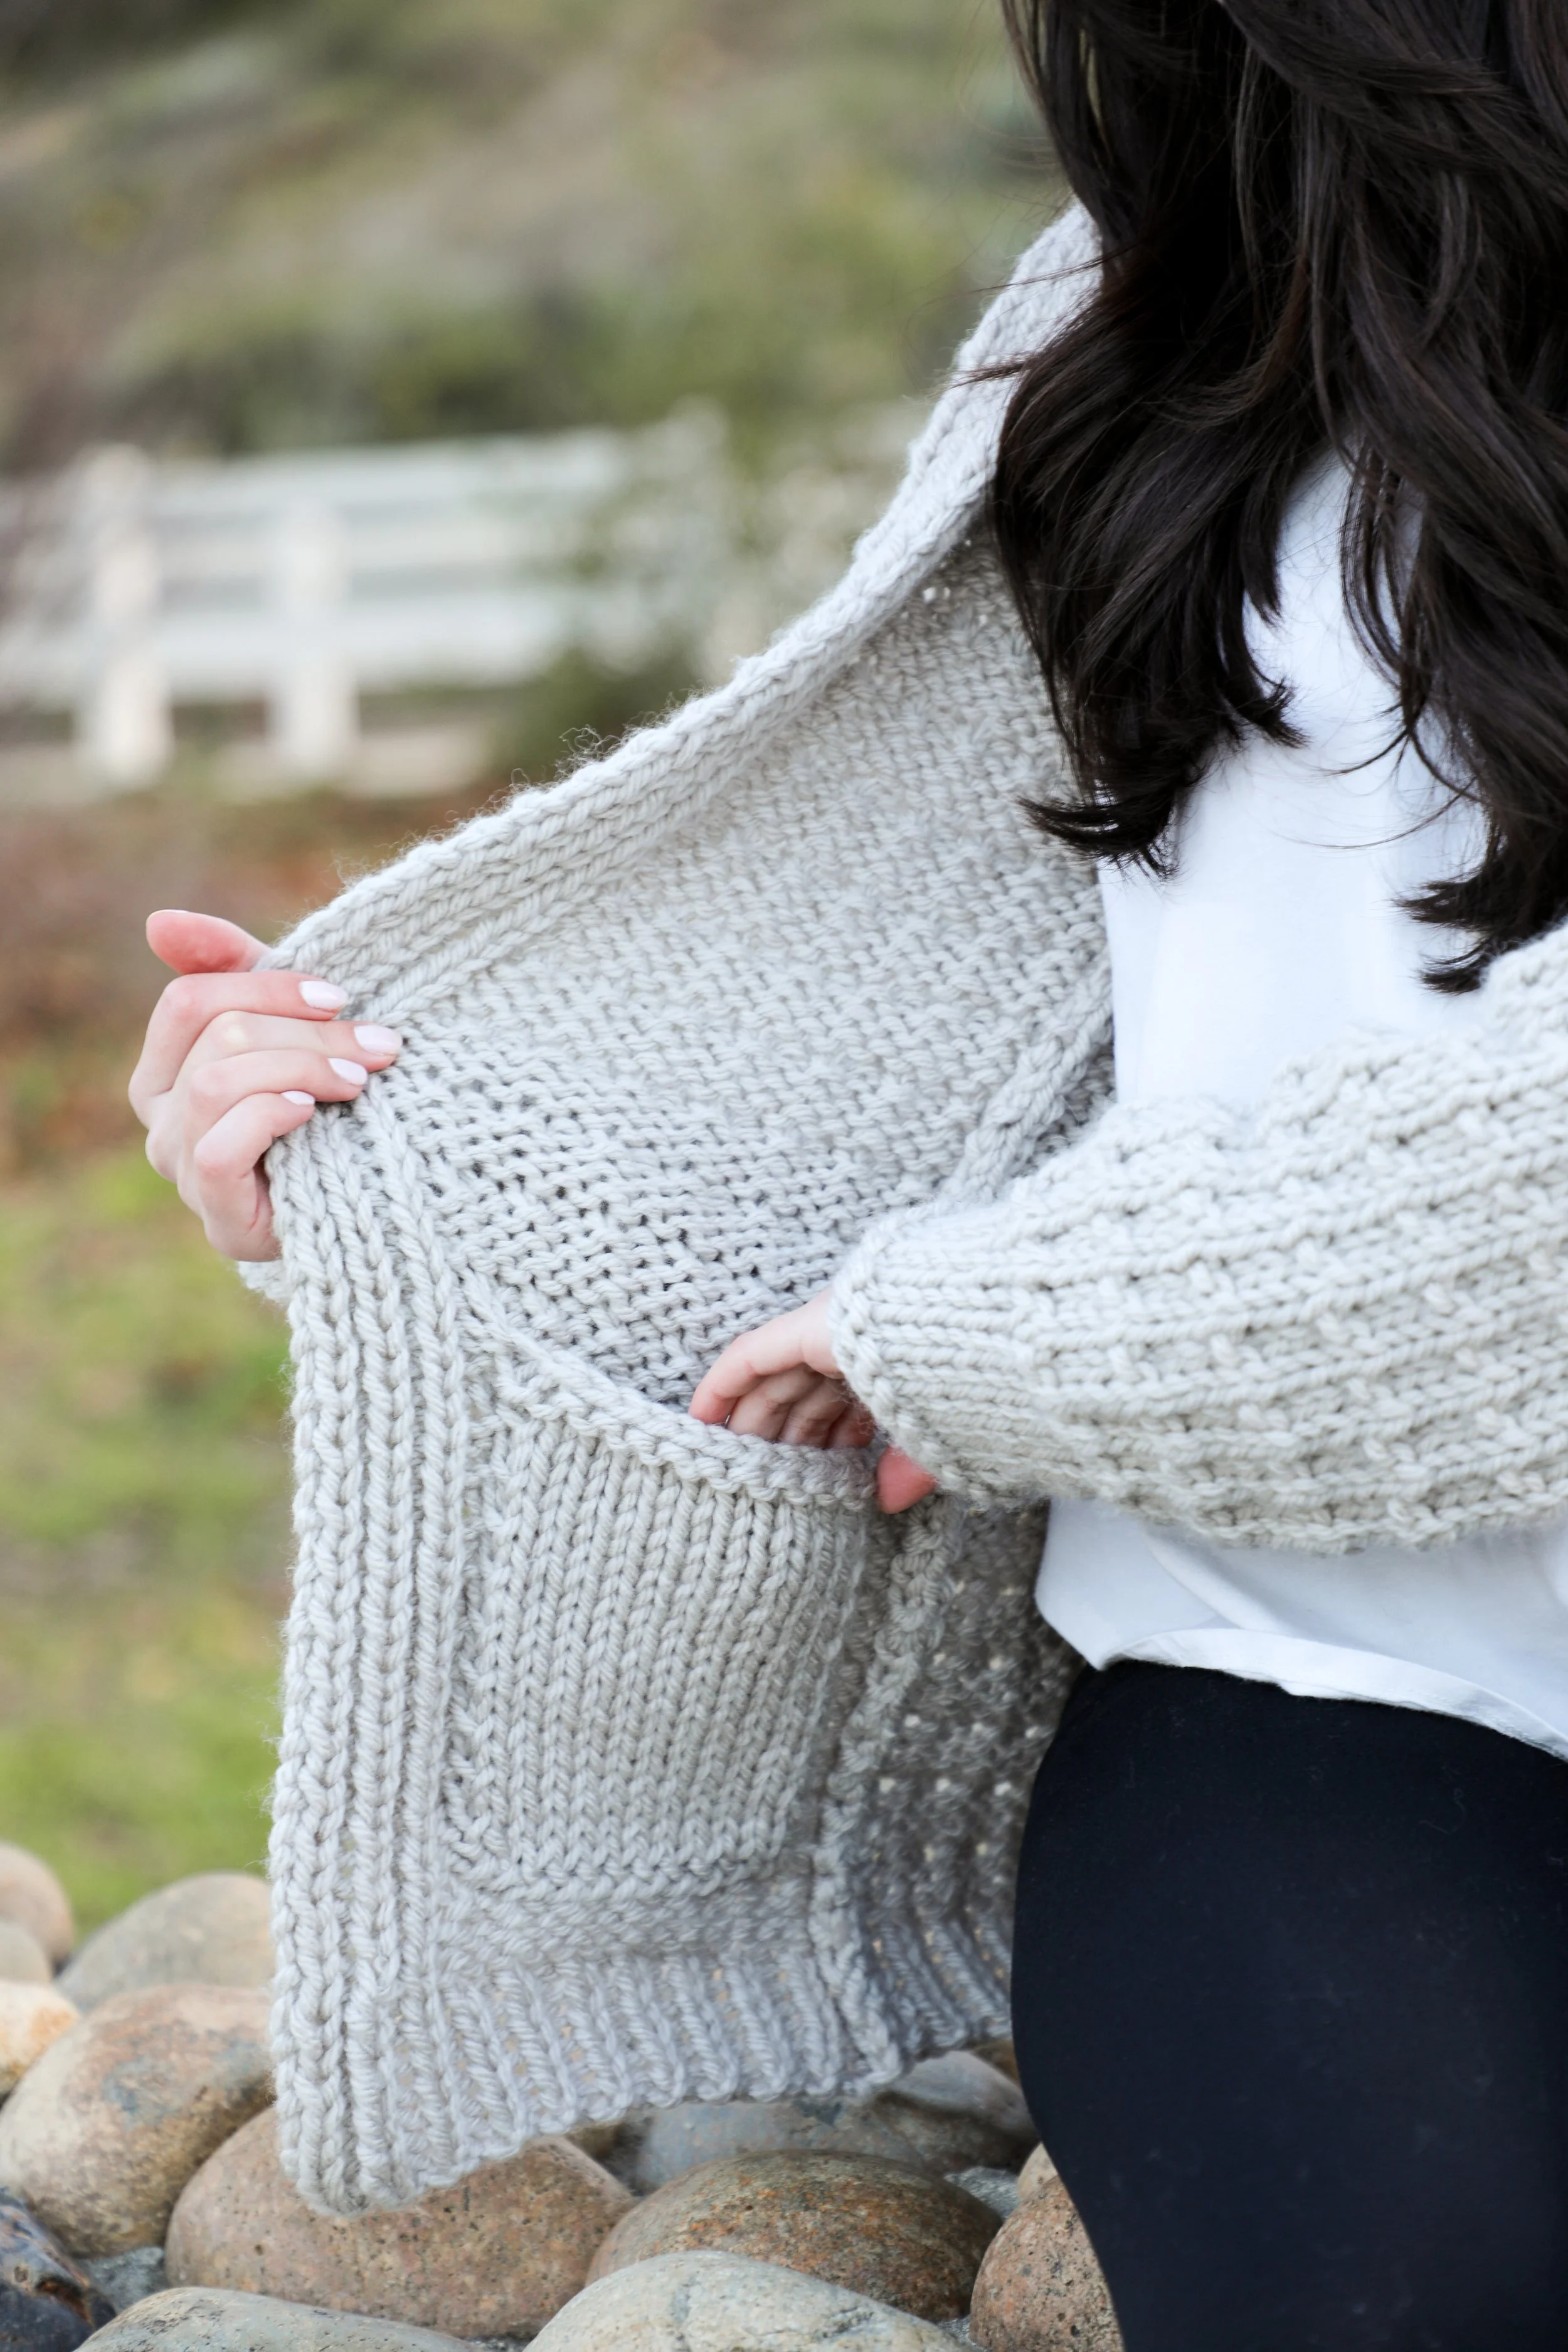
We have pockets! I didn’t want to disrupt the pretty outside quilt vibe BUT we need a place for all the things right? (snacks for me) So these after-thought pockets get sewn-in right on the inside of the cardi!

This uses a bulkier of bulkies, Hue and Me. I just wanted to mention not all bulkys are as bulky as the others so if you need to sub the yarn, try matching them up via the labels to see if the machine gauges match etc and you can always use Yarnsub.com to see how they match up!
NOTES
Check Stitches to Know on pg. 7 for all abbreviations and terms.
What size are you making? For example, if you’re making a L, you’ll work the same spot in the parenthesis for the entire pattern.
XS (S, M, L, XL) (2X, 3X, 4X, 5X) = X ( X, X, L, X) (X, X, X, X)
Choose a size that is 8-10" (20-25cm) larger than your actual body measurements.
This Cardigan is worked up in panels. (A back, 2 fronts and 2 sleeves) They’re seamed together at the end and pockets are added. Reference photos for how each section works up will be to the left of the instructions.
The lapels are worked at the same time you make the front panels, [(k1, p1) x 3] are the lapels.
Adding length will require more yarn:
Cardigan: The length is determined by the row count from the underarm to the bottom hem. The model is 5’1” (155cm) wearing a size S. To add/remove length, every full repeat of Rows 1-4 will be 1” (2.5cm).
Sleeves: To add/remove length to the sleeves adjust the row count before working your cuffs.
GAUGE
Please check your gauge before you start this pattern to match the finished measurements: Matching stitches per inch will get your width to match, rows will match up the length.
It’s best to make your swatch slightly bigger than what the pattern states it should measure, so you can measure it in the center of your square, getting an accurate reading. You can do this by adding 2 additional stitches and work 2 additional rows. Do not count the first and last stitch in your measurement or the first and last row.
Needle Size Suggestions:
If your swatch has less stitches, swatch again using a smaller needle.
If your swatch has more stitches, swatch again using a larger needle.
Finished Measurements
CHEST Based on Standard Measurements of:
30 (34, 38, 42, 46)(50, 54, 58, 62)” / 76 (86, 96.5, 106.5, 117)(127, 137, 147, 158) cm
Model is 5’1” (155cm) wearing a Small
Chest. With 8-10” (20-25 cm) of positive ease
38 (42, 46, 50, 54) (58.5, 62.5, 66.5, 70.5)” / 96.5 (106.5, 117, 127, 137) (148.5, 159, 169, 179) cm
Upper Arm Width. With 4” (10 cm) of positive ease
14 (14, 15, 16, 17.5) (19.5, 21, 22.5, 22.5)” / 35 (35, 37.5, 40, 44) (49, 52.5, 56, 56) cm
Underarm to Bottom Hem 17” (42.5 cm)
Arm Inseam 18” (45 cm)
Stitches to Know
k Knit
k2tog Knit two stitches together
P Purl
RS Right Side
st(s) Stitches
WS Wrong Side
Techniques
In Pattern texture Work 3 rows in Stockinette, (k1, p1) the 4th row
Stockinette Knit the RS rows, purl the WS rows
1 x 1 Rib (k1, p1) repeating
Please see my YouTube for pattern/stitch tutorials

**This Pattern is a copyright of Whistle and Wool© so you may not copy, alter, adjust, share, record, redistribute or resell my Pattern. No tutorials or any kind of demonstrations may be made using any information contained in my Pattern. I do not mind if you wish to sell a completed HANDMADE item and you are a small independently owned business, however, you do not have permission to use ANY of my photos. If you do sell a completed item, please list credit of the design belonging to me, Whistle and Wool and a link to my shop. www.WhistleandWool.com
Pattern
NOTE: Diagram photos for each section are included on the PDF with the kit and paid PDF version.
Back Panel
Cast on
48 (54, 58, 64, 68) (74, 78, 84, 88) sts
Ribbing
Row 1-6: (k1, p1) for the row.
Body
Row 1: (RS) Knit.
Row 2: (WS) Purl.
Row 3: Knit.
Row 4: (k1, p1) for the row.
Row 5-60: Repeat Rows 1-4.
Add/remove length as preferred, see notes on pg 2.
Underarm to Shoulder
Row counts start over for easy counting
Row 1: (RS) Bind off in knit 4 (4, 6, 6, 6) (8, 8, 8, 8) sts, knit for the row. [44 (50, 52, 58, 62) (66, 70, 76, 80) sts]
Row 2: (WS) Bind off in purl 4 (4, 6, 6, 6) (8, 8, 8, 8) sts, purl for the row. [40 (46, 46, 52, 56) (58, 62, 68, 72) sts]
Row 3: Knit.
Row 4: (k1, p1) for the row.
Row 5-28 (28, 32, 32, 36) (36, 40, 40, 44): Repeat Rows 1-4 of the Body Section above.
Section measures: 7 (7, 8, 8, 9) (9, 10, 10, 11)” / 17.5 (17.5, 20, 20, 22.5) (22.5, 25, 25, 27.5) cm.
Ends on a WS row.
Bind off: (RS) Bind off in knit. Fasten off and weave in the ends.
Front Panel - (Right side when worn)
Cast on 20 (22, 24, 26, 28) (30, 32, 34, 36) sts
Ribbing
Row 1-6: (k1, p1) for the row.
Body
Row 1: (RS) [(k1, p1) x3], knit for the row.
Row 2: (WS) Purl until the last 6 sts, [(k1, p1) x 3].
Row 3: Repeat Row 1.
Row 4: (k1, p1) for the row.
Row 5-60: Repeat Rows 1-4.
Match the rows worked on the Back Panel until the Underarm Section.
Underarm to Shoulder
Row counts start over for easy counting
Row 1: (RS) [(k1, p1) x3] knit for the row.
Row 2: (WS) Bind off 4 (4, 6, 6, 6) (8, 8, 8, 8) sts in purl, purl until the last 6 sts, [(k1, p1) x 3]. [16 (18, 18, 20, 22) (22, 24, 26, 28) sts]
Row 3: Repeat Row 1.
Row 4: (k1, p1) for the row.
Row 5-28 (28, 32, 32, 36) (36, 40, 40, 44): Repeat Rows 1-4 of the Body Section above, keeping your lapel going.
Ends on a WS row.
Bind off: (RS) Bind off in knit. Fasten off and weave in the ends.
Front Panel (Left side when worn)
Cast on 20 (22, 24, 26, 28) (30, 32, 34, 36) sts
Ribbing: Row 1-6:
Body
Row 1: (RS) Knit until the last 6 sts, [(p1, k1) x 3].
Row 2: (WS) [(p1, k1) x 3], purl for the row.
Row 3: Repeat Row 1.
Row 4: (p1, k1) for the row
Row 5-60: Repeat Rows 1-4.
Matching the rows worked to the other Panels.
Underarm to Shoulder
Row counts start over for easy counting.
Row 1: (RS) Bind off 4 (4, 6, 6, 6) (8, 8, 8, 8) sts in knit, knit until the last 6 sts, [(p1, k1) x 3]. [16 (18, 18, 20, 22) (22, 24, 26, 28) sts]
Row 2: (WS) [(p1, k1) x 3], purl for the row.
Row 3: Repeat Row 1.
Row 4: (p1, k1) for the row.
Row 5-28 (28, 32, 32, 36) (36, 40, 40, 44): Repeat Rows 1-4 of the Body Section above, keeping your lapel going.
Ends on a WS row.
Bind off: (RS) Bind off in knit. Fasten off and weave in the ends.
Sleeves - Make 2
Cast on 35 (35, 39, 41, 45) (49, 53, 57, 57) sts
Row 1: (RS) Knit.
Row 2: (WS) Purl.
Row 3: Knit
Row 4: (k1, p1) for the row, ends in a k1.
Row 5-64: Repeat Rows 1-4.
Add/remove length as needed before the cuff. decrease. Cuff adds 2” (5cm)
Cuff
Row 1:
XS + S size only: k2tog, (k1, k2tog) for the row.
M size only: (k1, k2tog) for the row.
L size only: k2tog, (k1, k2tog) for the row.
XL size only: (k2tog) x 4, (k1, k2tog) x 9, (k2tog) x 5.
2X size only: k5, (k2tog) for the row.
3X + 4X only: k1, (k2tog) for the row.
5X size only: k2, (k2tog) for the row, ends in a k1.
[23 (23, 26, 27, 27) (27, 27, 29, 30) sts]
Row 2-7: Work in stockinette.
Row 8: (WS) Knit.
Bind off: (RS) Bind off in knit. Fasten off leaving a tail 2 times the length of the sleeve for seaming later.
Pockets (make 2)
Cast on: 12 (12, 12, 14, 14) (14, 14, 14, 14) sts
Row 1-19: Work in stockinette.
Row 20: (WS) Knit.
Bind off: (RS) Bind off in knit. Fasten off leaving a 30” (75cm) long tail for sewing.
Placement: (RS) I sewed mine on the inside of the Cardigan for hidden pockets. Pin in place, approx. 4 rows above the bottom hem, 2 sts in from the lapels - adjust as preferred. Sew the Pockets to the Body. See pics below for how I sewed mine.
Weave in the ends.
Finishing
Shoulder Seams
Step 1: Lay the Back Panel down, RS up. Place the Front Panels onto the back panel so the RSs are facing each other. Line up the outer shoulders and have the lapels in the center.
Step 2: Using a length of yarn 1.5 times the width of the shoulders, Whip Stitch the shoulders together. Begin at the outer edge and work inwards.
Sleeves Attachment
Step 1: Diagram A. Lay the cardigan open and flat, RS up. Pin the Sleeve evenly along the sleeve opening, from the underarm decrease to the other underarm decrease.
Step 2: Using a piece of yarn twice the width of the sleeve opening, Mattress Stitch the sleeves to the cardigan.
Sub any seaming with your preferred method.
Seaming up the Sleeves
Step 1: Diagram B. Garment RS facing you.
Step 2: Using the tail on the sleeve, Mattress Stitch from the cuff to the underarm. Repeat for both.
Side Seams
Step 1: Diagram B. Lay your cardigan down in front of you, RS up.
Step 2: Using a piece of yarn twice the length of your side seam measurement, working from the bottom hem to the underarm, Mattress Stitch the two panels together.
Weave in all the ends.
