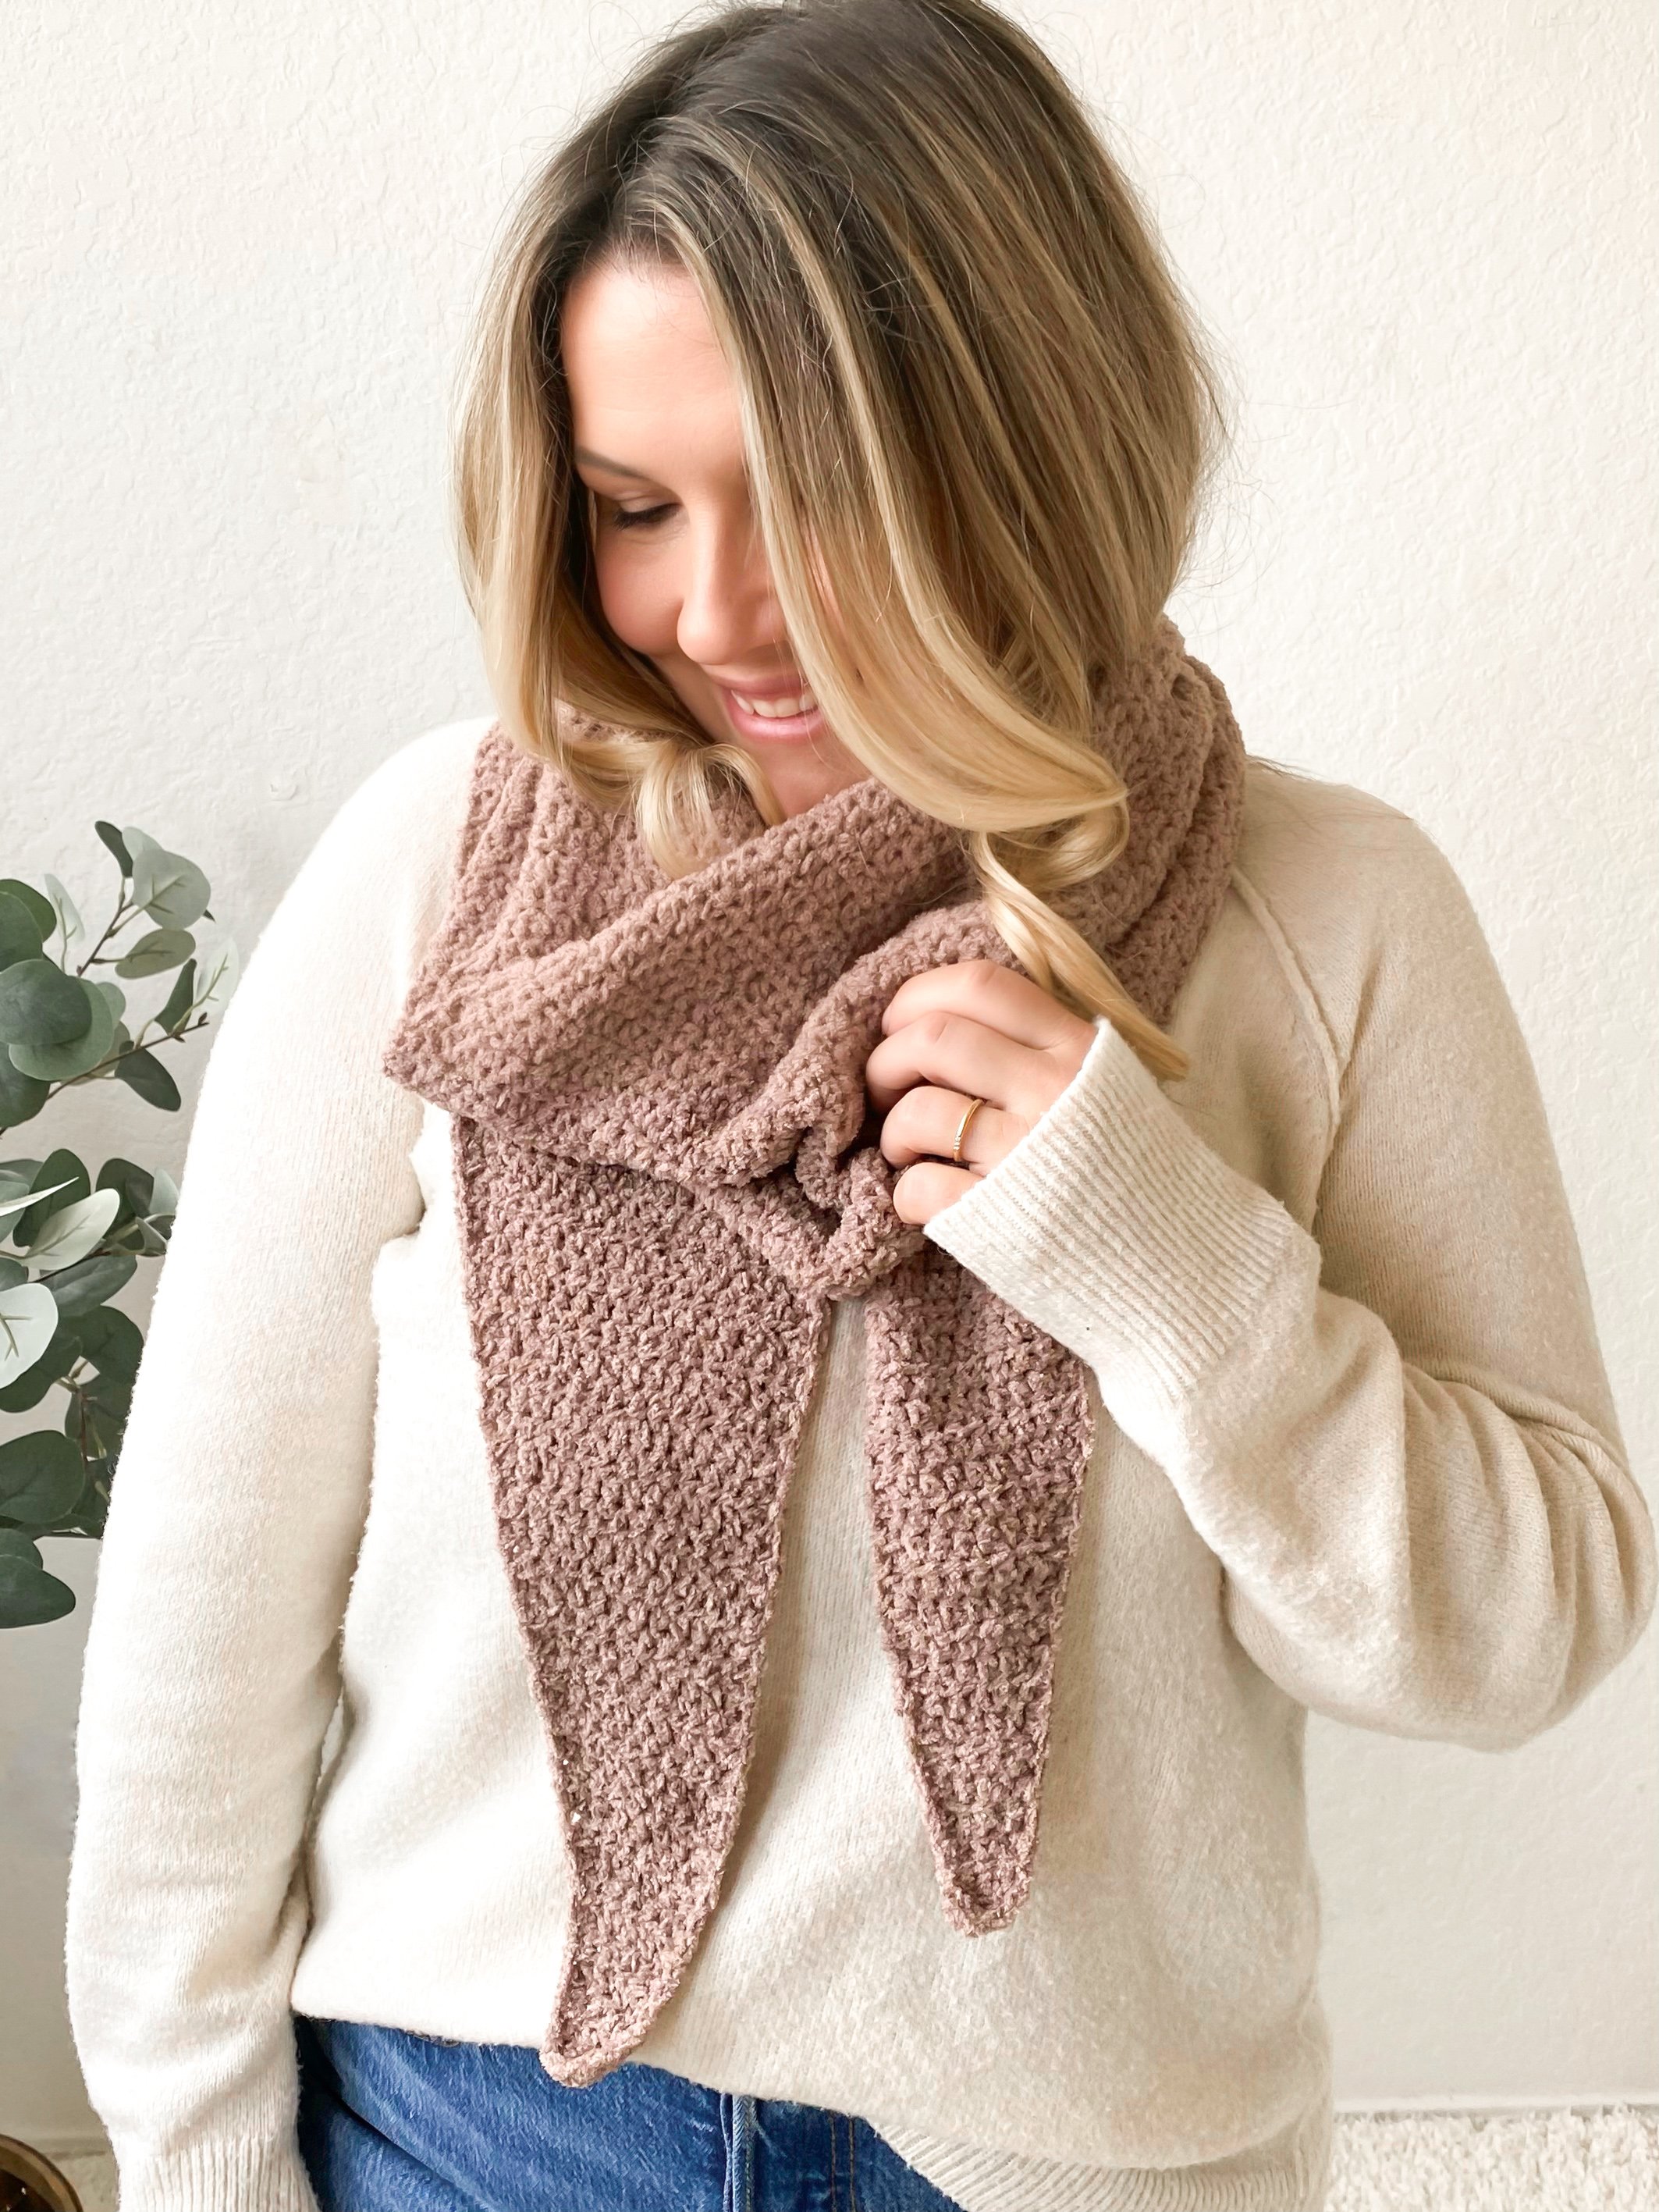
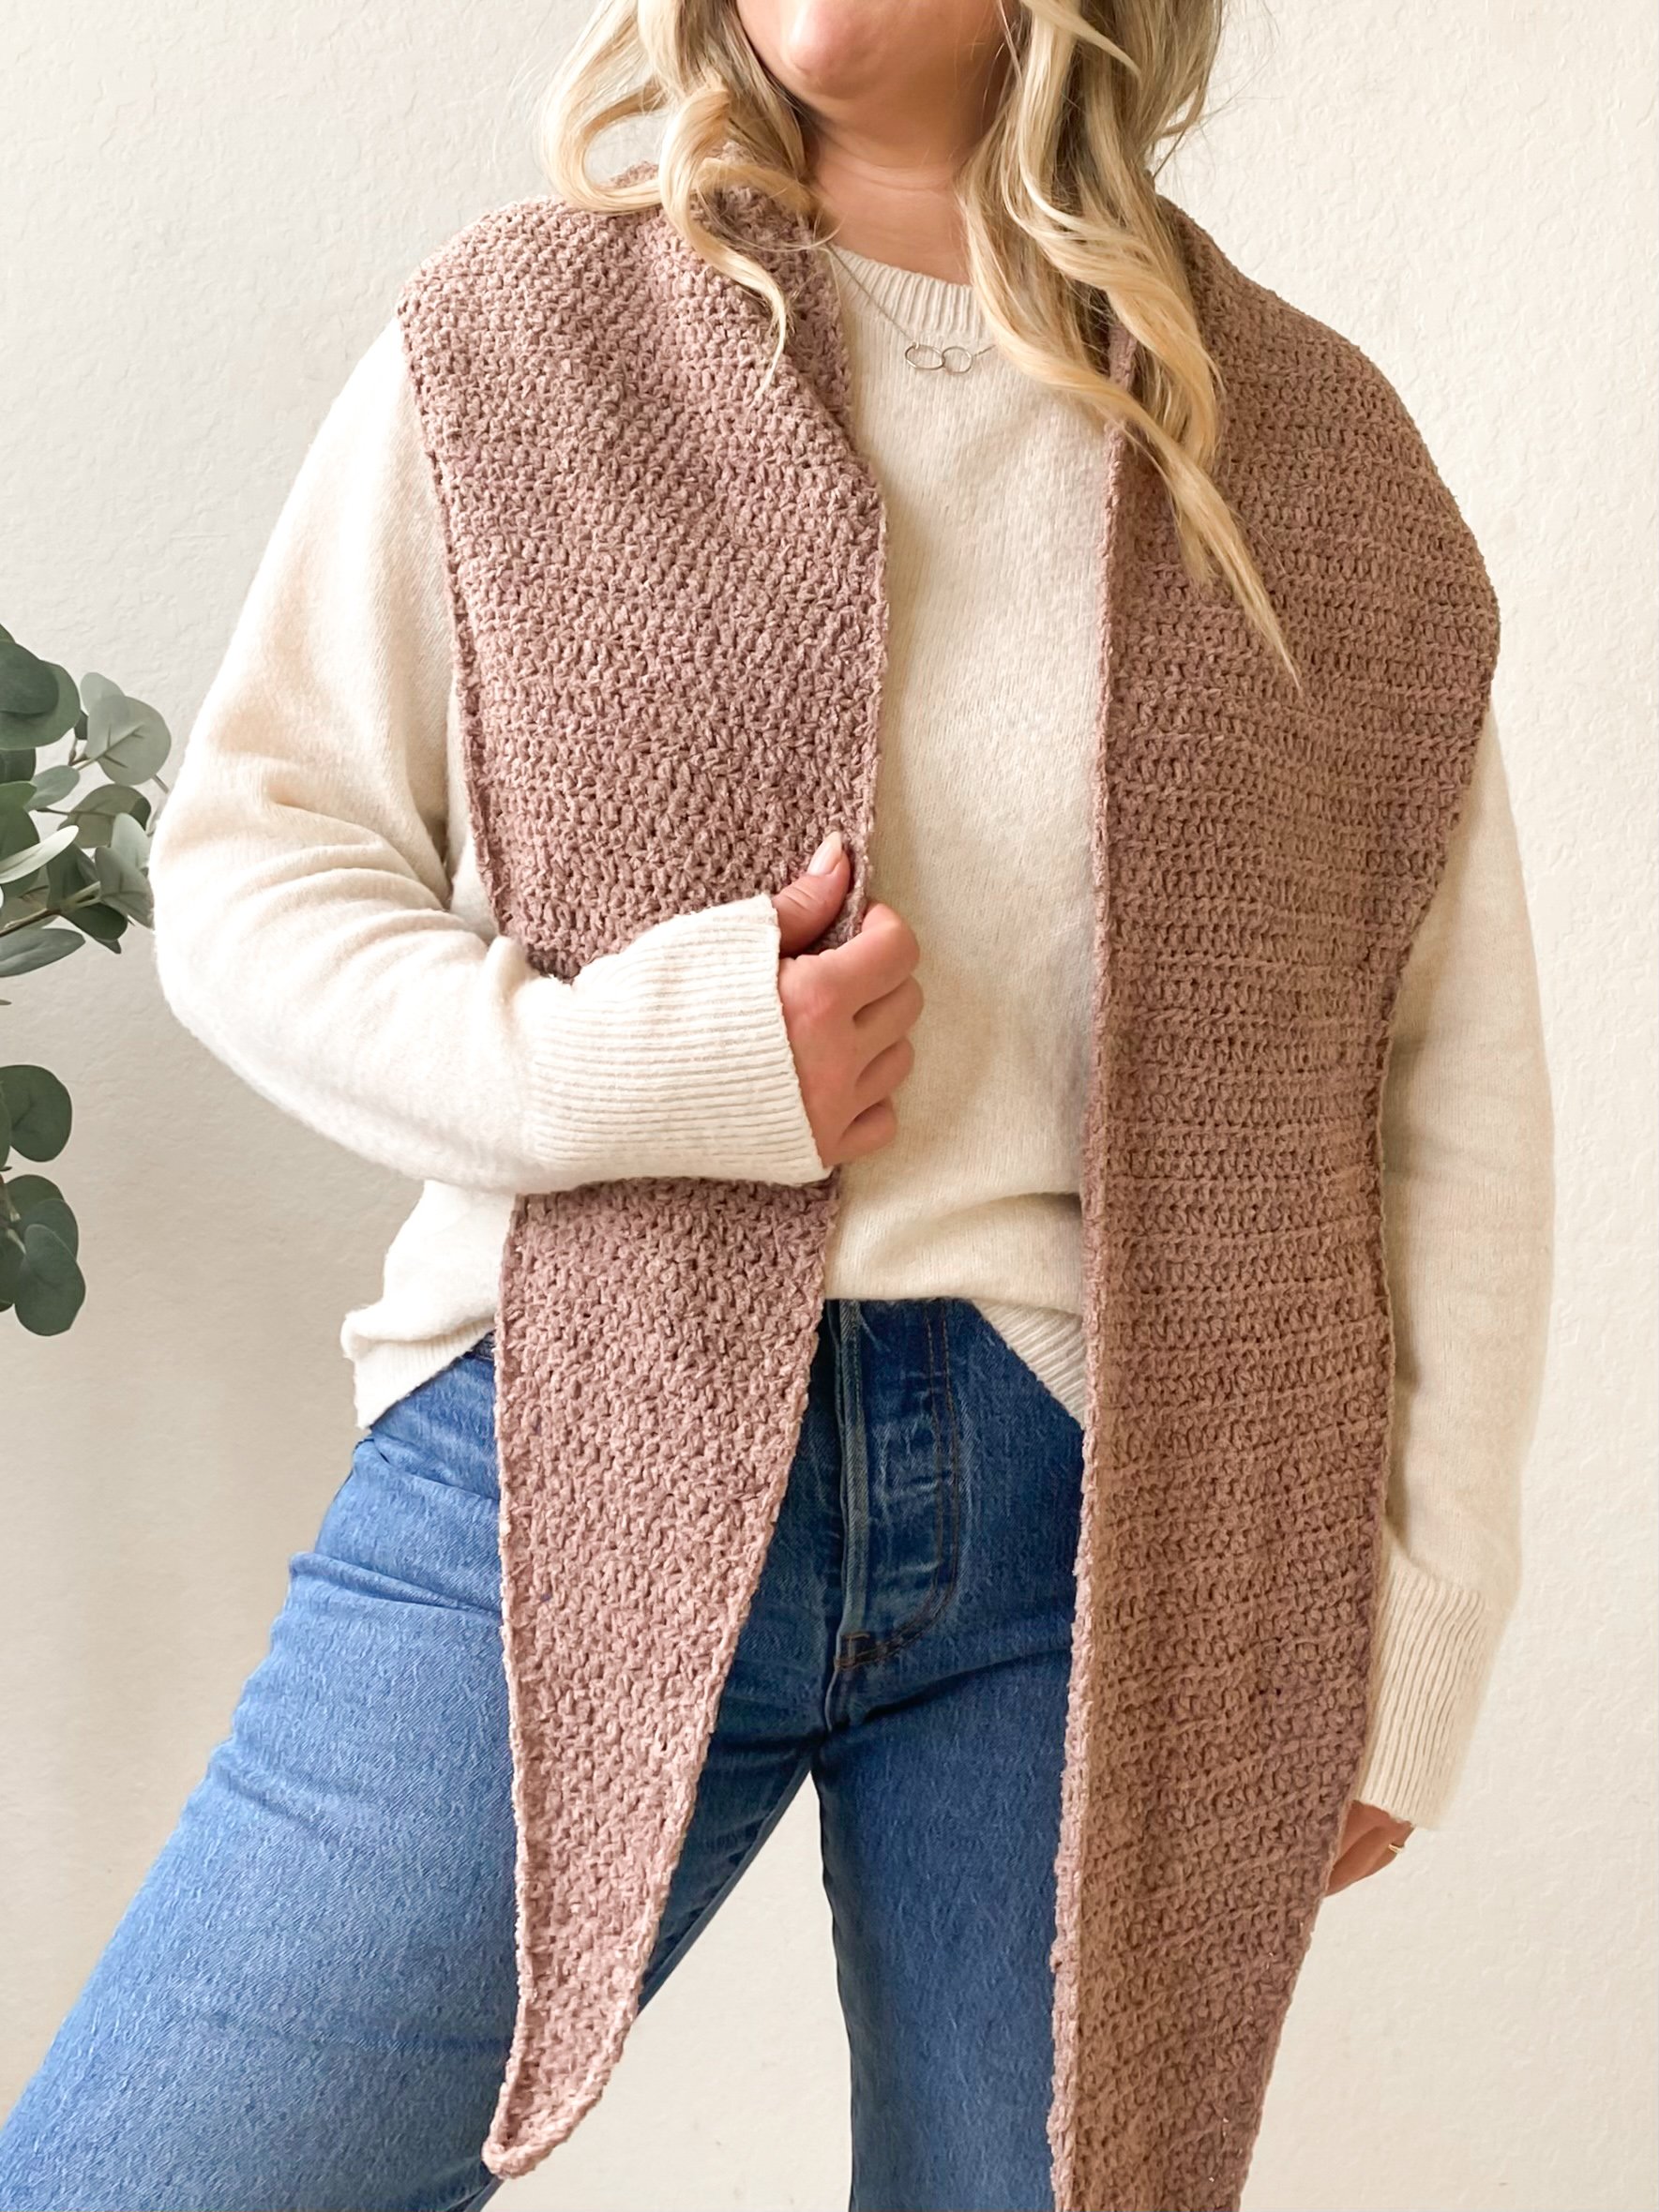
Windfall Shawl
When I first saw this yarn it looked so soft and fuzzy I just needed to try it. As soon as I held the skein I realized how lovely this would be on the skin and instantly pictured a cozy shawl wrapping around the neck to combat those winter winds. I also pictured a slender design so that it could wrap and tie around your neck and fit under your jacket, and would be versatile enough to transition you into a loose fit for Spring.

The loviliest part of this yarn is how soft it is! It’s got the texture of the inside of cozy slippers, but imagine it with a silkiness added. When you add in that softness you get an incredible drape! This drape is what made me think I could make a slender design to avoid that under jacket bulkiness. This allows you to wrap it mutiple times or tie it in a bow anytime you want! The best part about this, is how it won’t just be for winter. When something takes time to make you want to get some wear time out of it right? Well this will be that piece. It will easily be your go-to when the weather warms up and you need that pretty accent to a dress or to toss over a sweater like I have here. ALSO, think inside! Do you get cold inside? I know I do some days… So throw this one on and keep toasty as the day goes!
A quick to make comfy and chunky throw! Perfect to cozy up in!

This shawl works up using a “flow off the hook” hdc with evenly spaced repeats. You’ll have these memorized after doing it just once, so easy! I like to use stitch markers to mark an increase or decrease row. This makes it even easier to know what row you are on in a repeat. Thsi is beginner friendly AND I have videos on my Youtube for help on the edging.
Get the printable version
Also, there should be plenty of yarn left on your second skein to do some adjustments to this one. It works up by increases until you’re halfway and then you work your decreases. If you want your shawl longer or with more depth at the center point, keep working your increases until the desired halfway length, then continue to the second half which is your decreases.


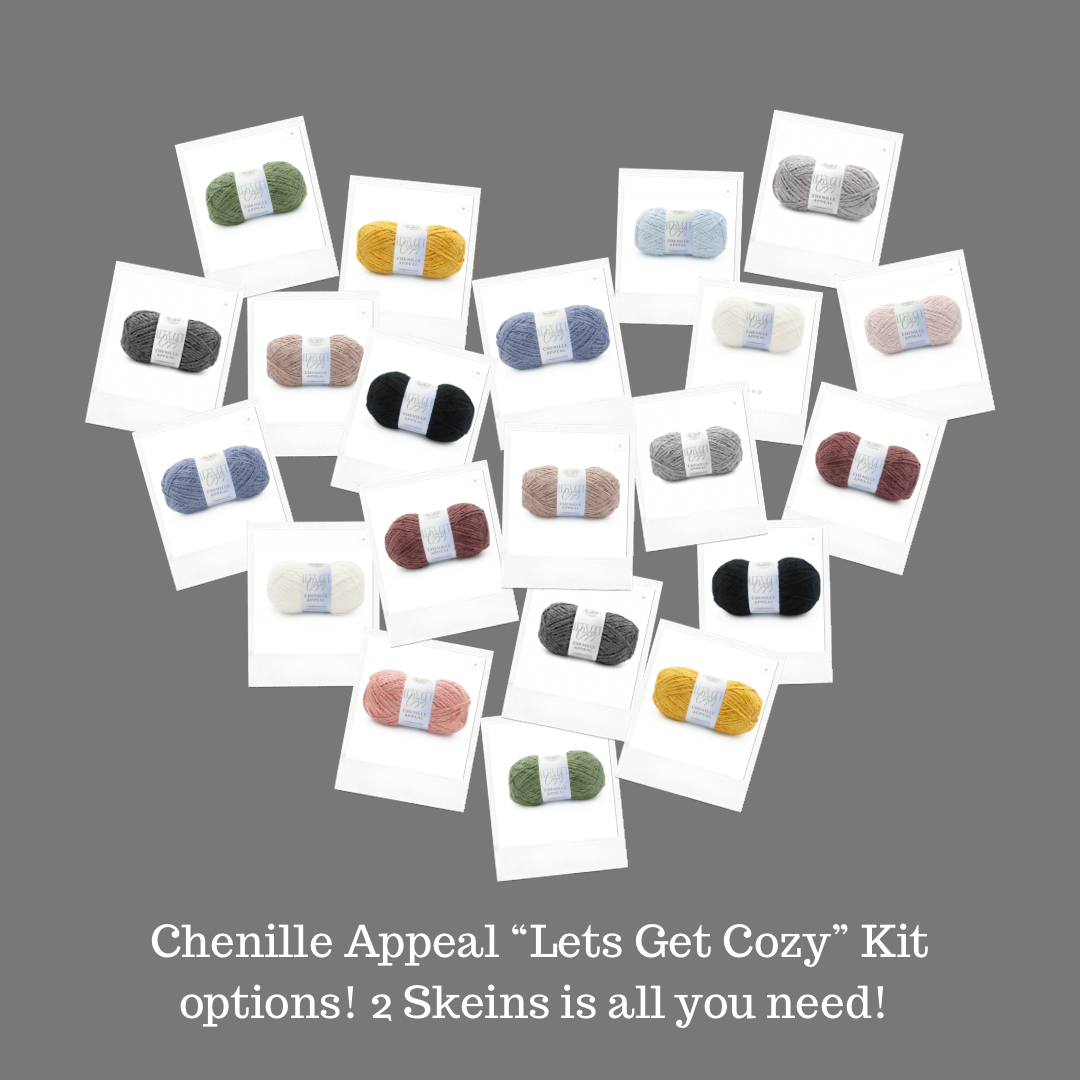
Here’s a peak at the other colors in this “Lets Get Cozy” line if you want to pick up the kit which is on sale at times for up to 30% off. The kit includes my printable PDF pattern for FREE!
Happy crocheting!
It’s super SQUISHY and COZY!
PATTERN
METHOD
Crochet
DIFFICULTY
Beginner
SIZES
One Size
DESCRIPTION
A sleek and slender shawl that has the soft skin-loving softness a shawl needs! Wrap and tie around your neck and tuck under your winter coat for the coldest months or go for a loose wrap across the shoulders as you move into Spring!
YARN
Lion Brand Yarn, Chenille Appeal “Let's Get Cozy”, 100% polyester, #4 weight, in Stucco. 3.5oz/100g, 284yd/260m
Skeins needed: 2
HOOK
US I (5.5mm)
or hook needed to obtain gauge
NOTIONS
Yarn Needle, Scissors
GAUGE
15 sts x 10.5 rows = 4” (10cm) of hdc
Thank you so much for your shop support! I hope you love it! Contact me for any help or questions you might have along the way.
**This Pattern is a copyright of Whistle and Wool© so you may not copy, alter, adjust, share, record, redistribute or resell my Pattern. No tutorials or any kind of demonstrations may be made using any information contained in my Pattern. I do not mind if you wish to sell a completed HANDMADE item and you are a small independently owned business, however, you do not have permission to use ANY of my photos. If you do sell a completed item, please list credit of the design belonging to me, Whistle and Wool and a link to my shop. www.WhistleandWool.etsy.com
NOTES
Beginning chain doesn’t count as a stitch in this pattern.
Increase and decrease are all worked on the RS rows so the shawl develops a long triangular shape.
I recommend attaching a stitch marker at the beginning of increase/decrease rows for easy counting and knowing exactly where you are in the repeats with just a glance.
In the beginning your work will increase every other row, followed by increases every 4th row until the halfway point. Then we mirror it, decreases worked every 4th row, and decreases worked every other row to close out the shawl.
If you’d like to add length and width to your shawl, continue working your increase repeat until the half length or width is met and then begin the second half of the shawl.
Don’t miss my tutorial for stitching the edging on my Youtube.www.youtube.com/@whistleandwool
GAUGE
**Please check your gauge before you start this Pattern to match the finished measurements:
It’s best to make your swatch slightly bigger than what the pattern states it should measure, so you can measure it in the center of your square, getting an accurate reading. You can do this by adding 2 additional stitches and work 2 additional rows. Do not count the first and last stitch in your measurement or the first and last row.
Hook Size Suggestions:
If your swatch has less stitches, swatch again using a smaller hook.
If your swatch has more stitches, swatch again using a larger hook.
Pattern
Shawl
Ch 3
Row 1: (RS) In the 3rd chain from the hook, hdc1. [1 st]
Row 2: (WS) Ch2, turn, 2hdc. [2 sts]
Row 3: Ch2, turn, 2hdc, hdc1. [3 sts]
Row 4: Ch2, turn, hdc the row.
Row 5: Ch2, turn, 2hdc, hdc the row. [4 sts]
Row 6: Ch2, turn, hdc the row.
Row 7-38: Repeat Rows 5+6. [20 sts]
Increases worked every other row.
Row 39: Repeat Row 5. [21 sts]
Row 40-42: Repeat Row 6.
Row 43-110: Repeat Rows 39-42. [38 sts]
Increases worked every 4 rows.
Halfway Mark
Row 111: Ch2, turn, hdc2tog, hdc the row. [37 sts]
Row 112-114: Ch2, turn, hdc the row.
Row 115-178: Repeat Rows 111-114. [21 sts]
Decreases worked every 4 rows.
Row 179: Ch2, turn, hdc2tog, hdc the row. [20 sts]
Row 180: Ch2, turn, hdc the row.
Row 181-216: Repeat Rows 179-180. [2 sts]
Decrease worked every other row.
Row 217: (RS) Ch2, turn, hdc2tog. Do not cut your yarn, continue to the edging. [1 st]
Edging: (YouTube Video available) At the end of the row, let’s begin working a hdc edge around the entire perimeter of the shawl.
(RS) Ch1, work one hdc per row ending, at the end of this side hdc twice into the same st space to help the end point curve, work one hdc per row ending until you’re back where you started, Sl St into the ch1 to join in the round.
Fasten off and weave in your ends.