
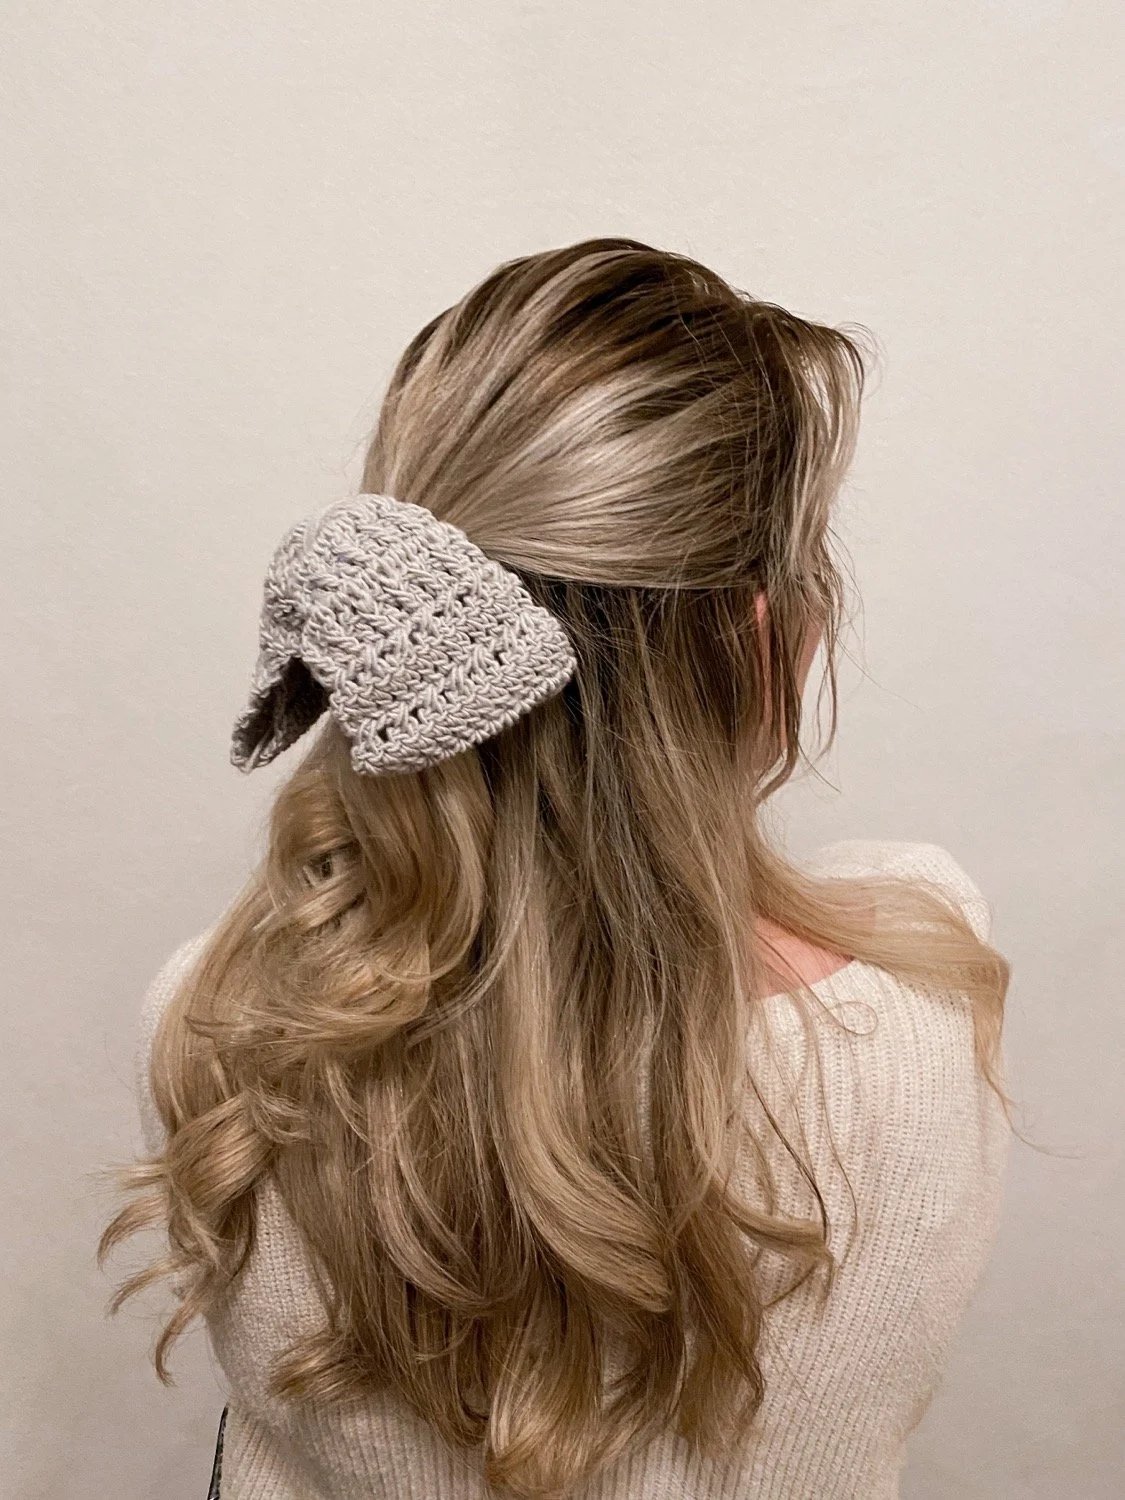
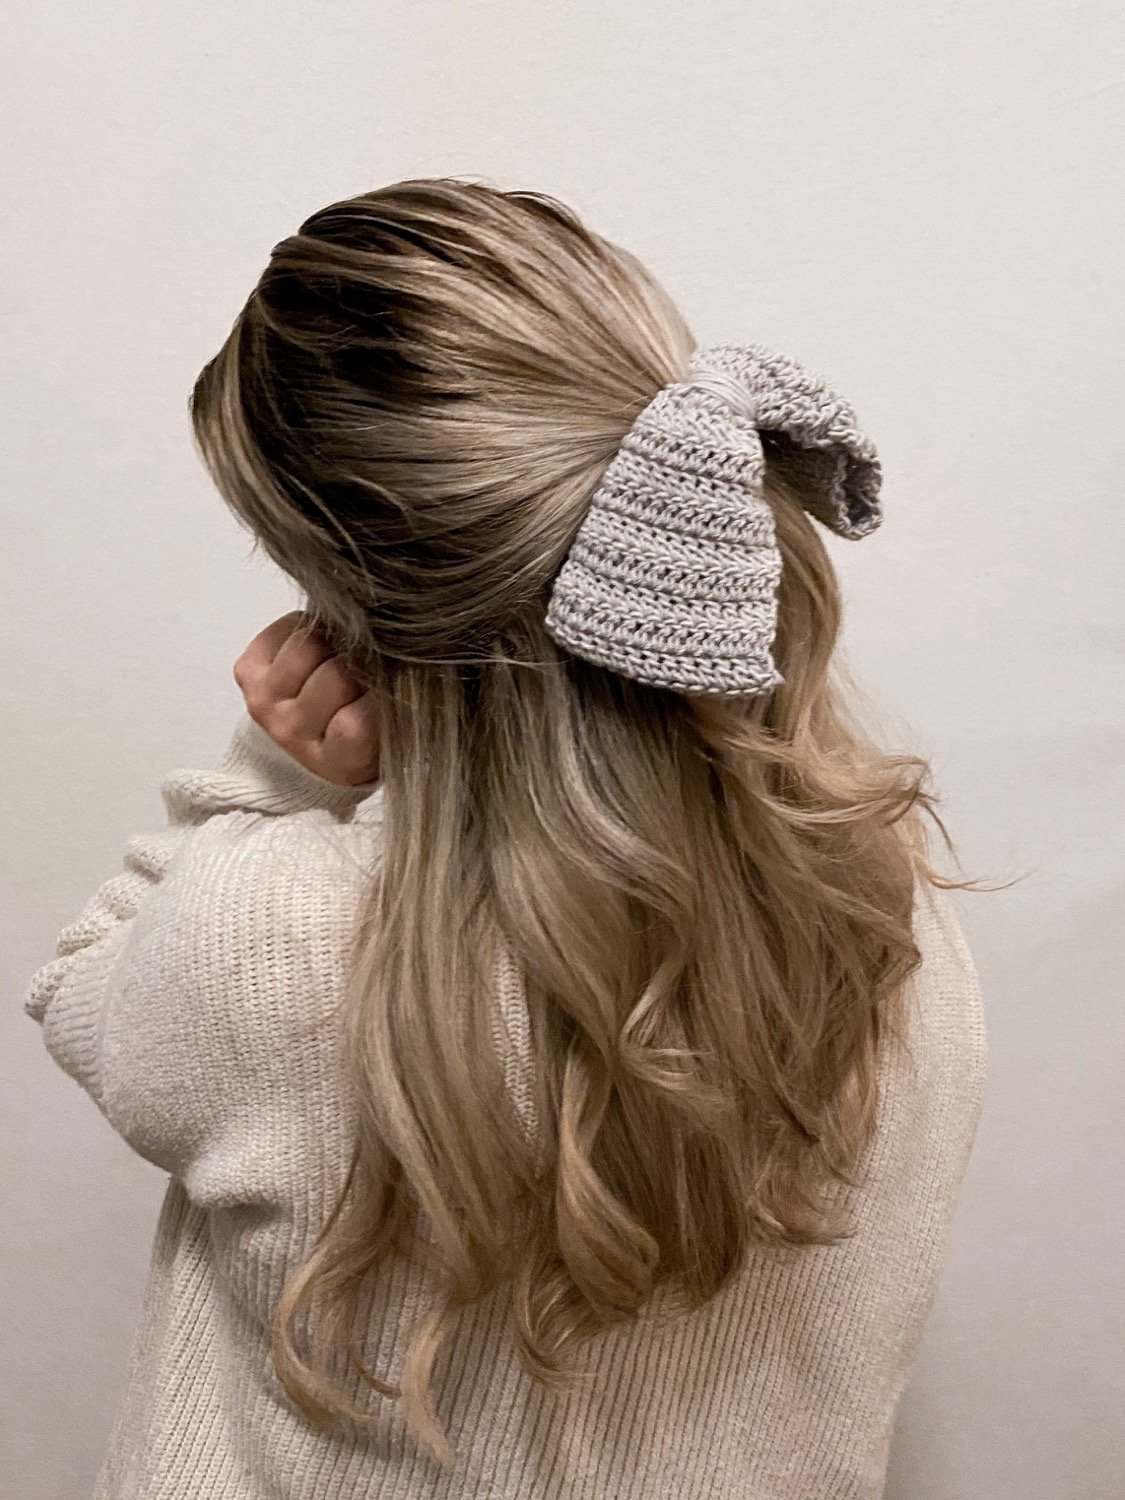
Brighton Bow
Hello! If you would love a quick and fun new crochet project, I have a new pattern for you :) I hope you enjoy this FREE pattern as a lovely wee project for your Summer!
It’s so full of gorgeous drape and an elegant boho relaxed style, I hope you love it as much as I do!

If you can snag a skein of this, I highly recommend it. I’m already dreaming up a cardigan design that will be perfect with this yarn, because I think this silky yarn would make lovely garments.
ENJOY!
Brighton Bow
By Whistle & Wool
Ravelry-Whistle and Wool
Join me on Instagram and tag your projects to @whistleandwool, #brightonbow
CROCHET PATTERN
Sizes: One size
A bit of History behind the name:
Brighton, England: Brighthelmstone (or Brighthelmston) was the standard rendering between the 14th and 18th centuries. Brighton" was originally an informal shortened form, first seen in 1660; it gradually supplanted the longer name and was in general use from the late 18th century, "London-by-the-Sea" is well-known, reflecting Brighton's popularity with Londoners as a day-trip resort. The first settlement in the Brighton area was Whitehawk Camp, a Neolithic encampment on Whitehawk Hill which has been dated to between 3500 BC and 2700 BC. After the Romans left in the early 4th century AD, the Brighton area returned to the control of the native Celts. Anglo-Saxons then invaded in the late 5th century AD, and the region became part of the Kingdom of Sussex, founded in 477 AD by king Ælle.
Please see “www.wikipedia.com” for more history behind the name.

Thank you so much for your shop support! I hope you love it!! If you need any help or have questions along the way, please contact me via Email.
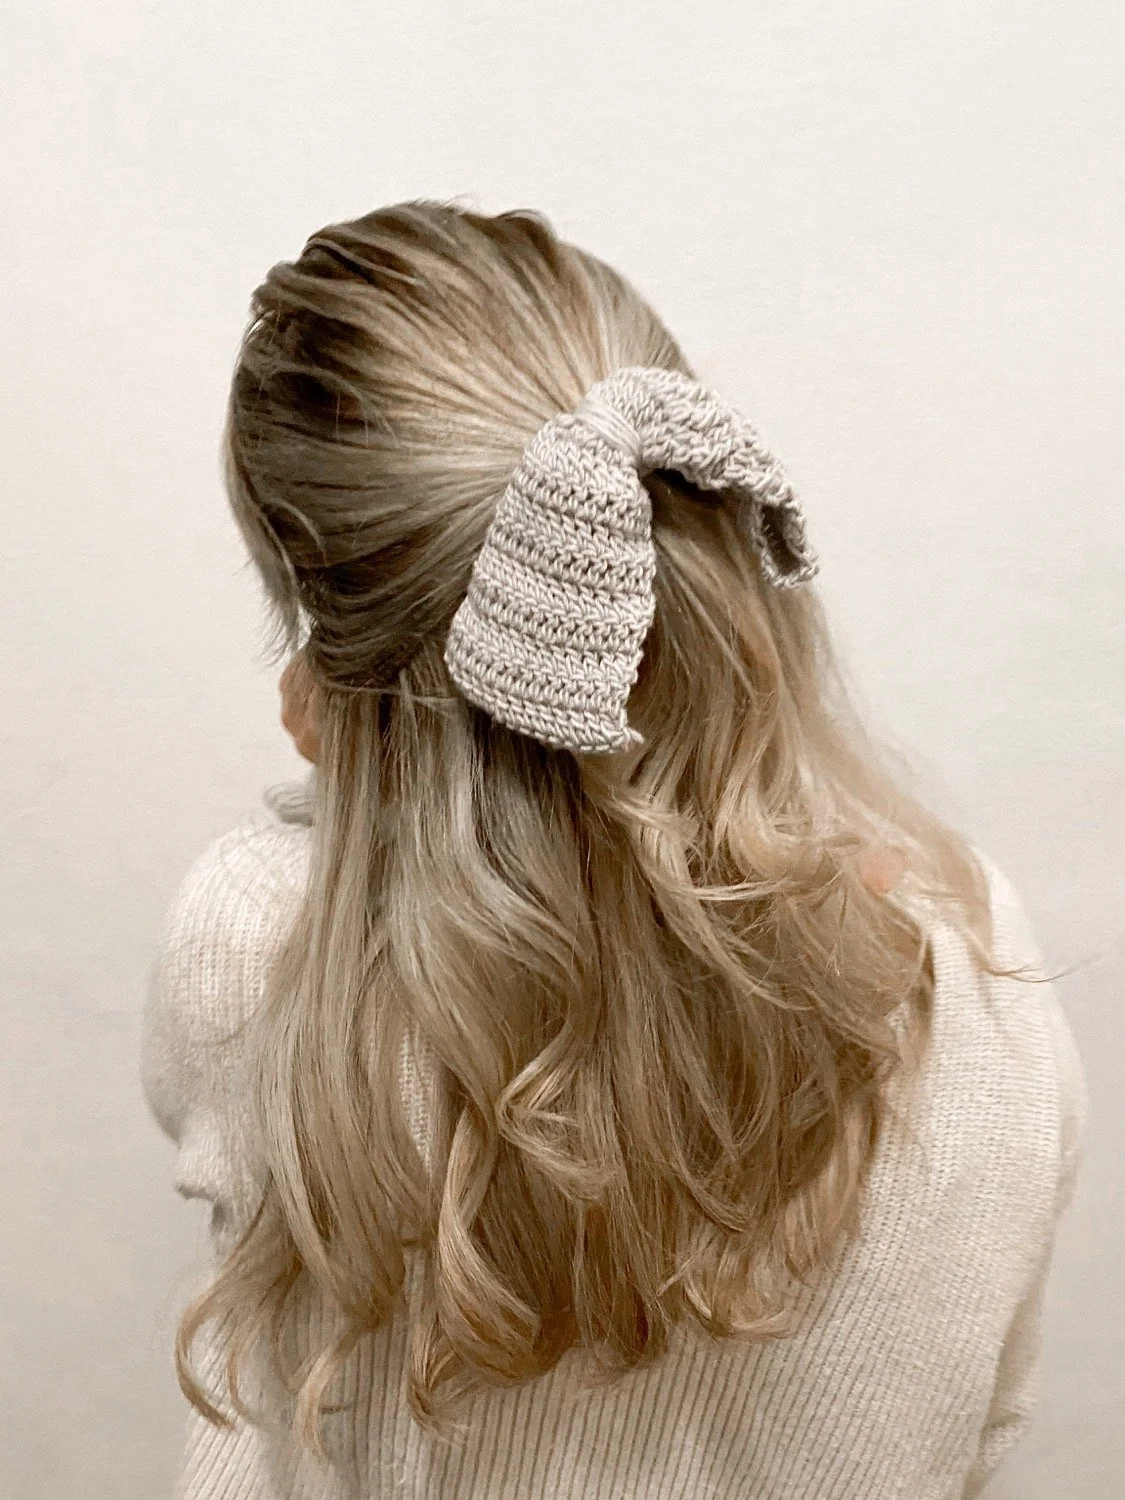
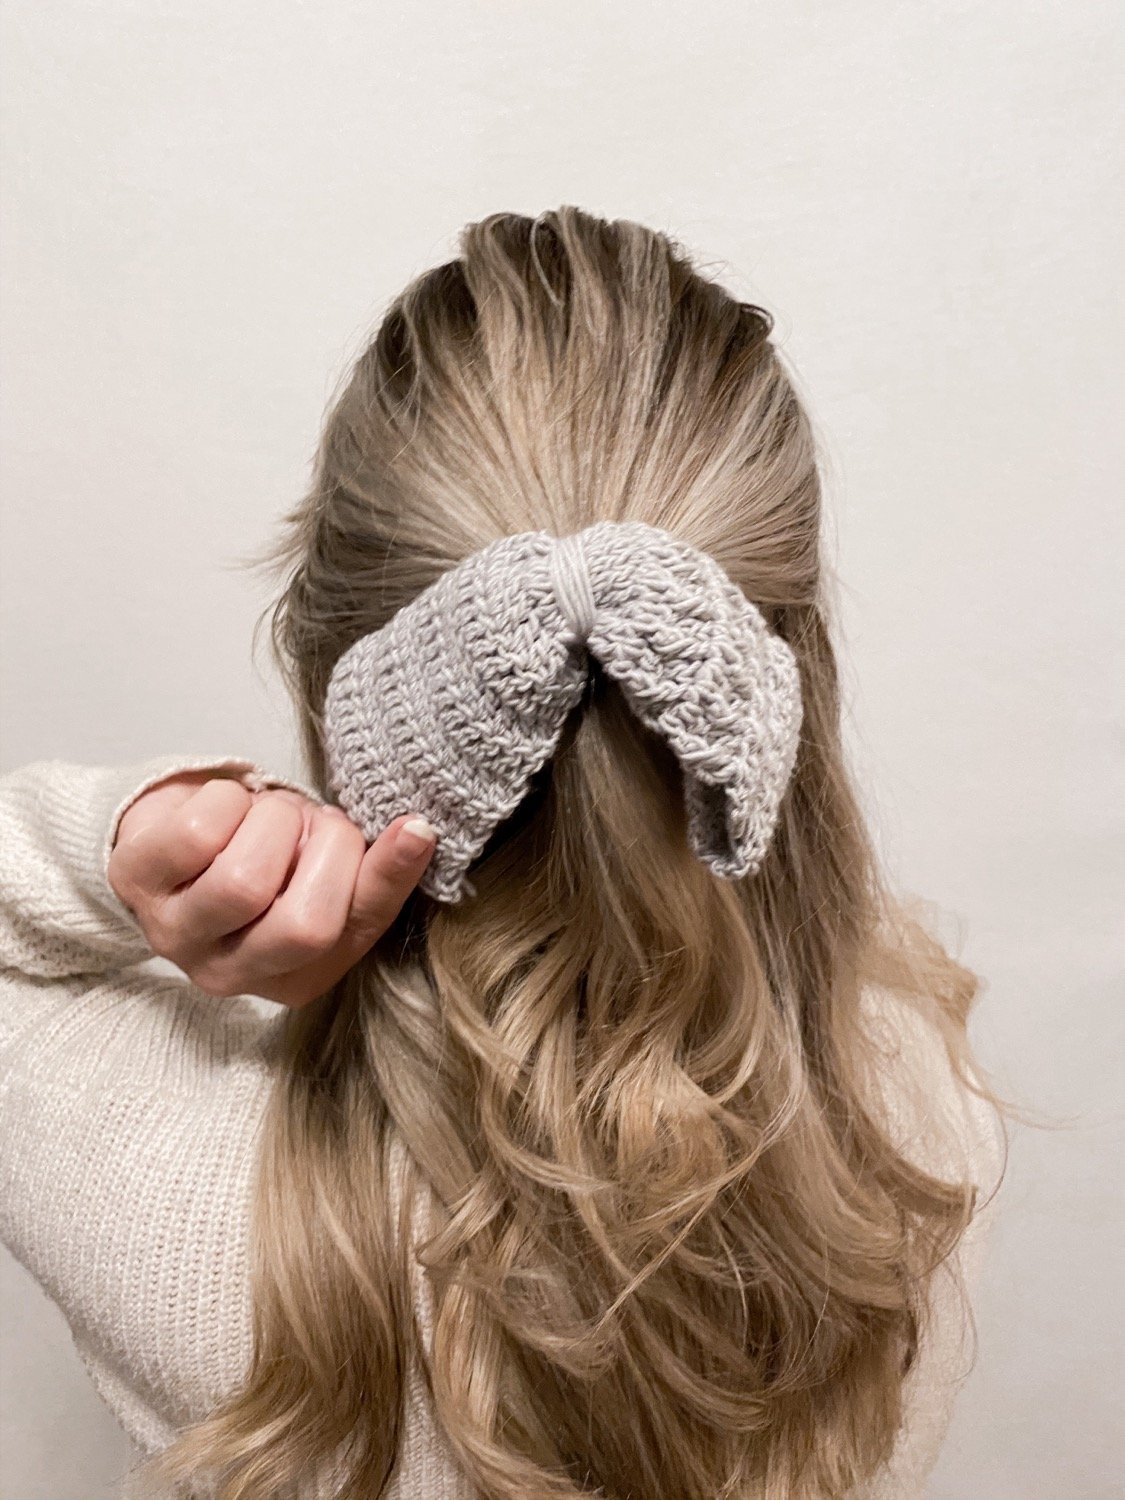
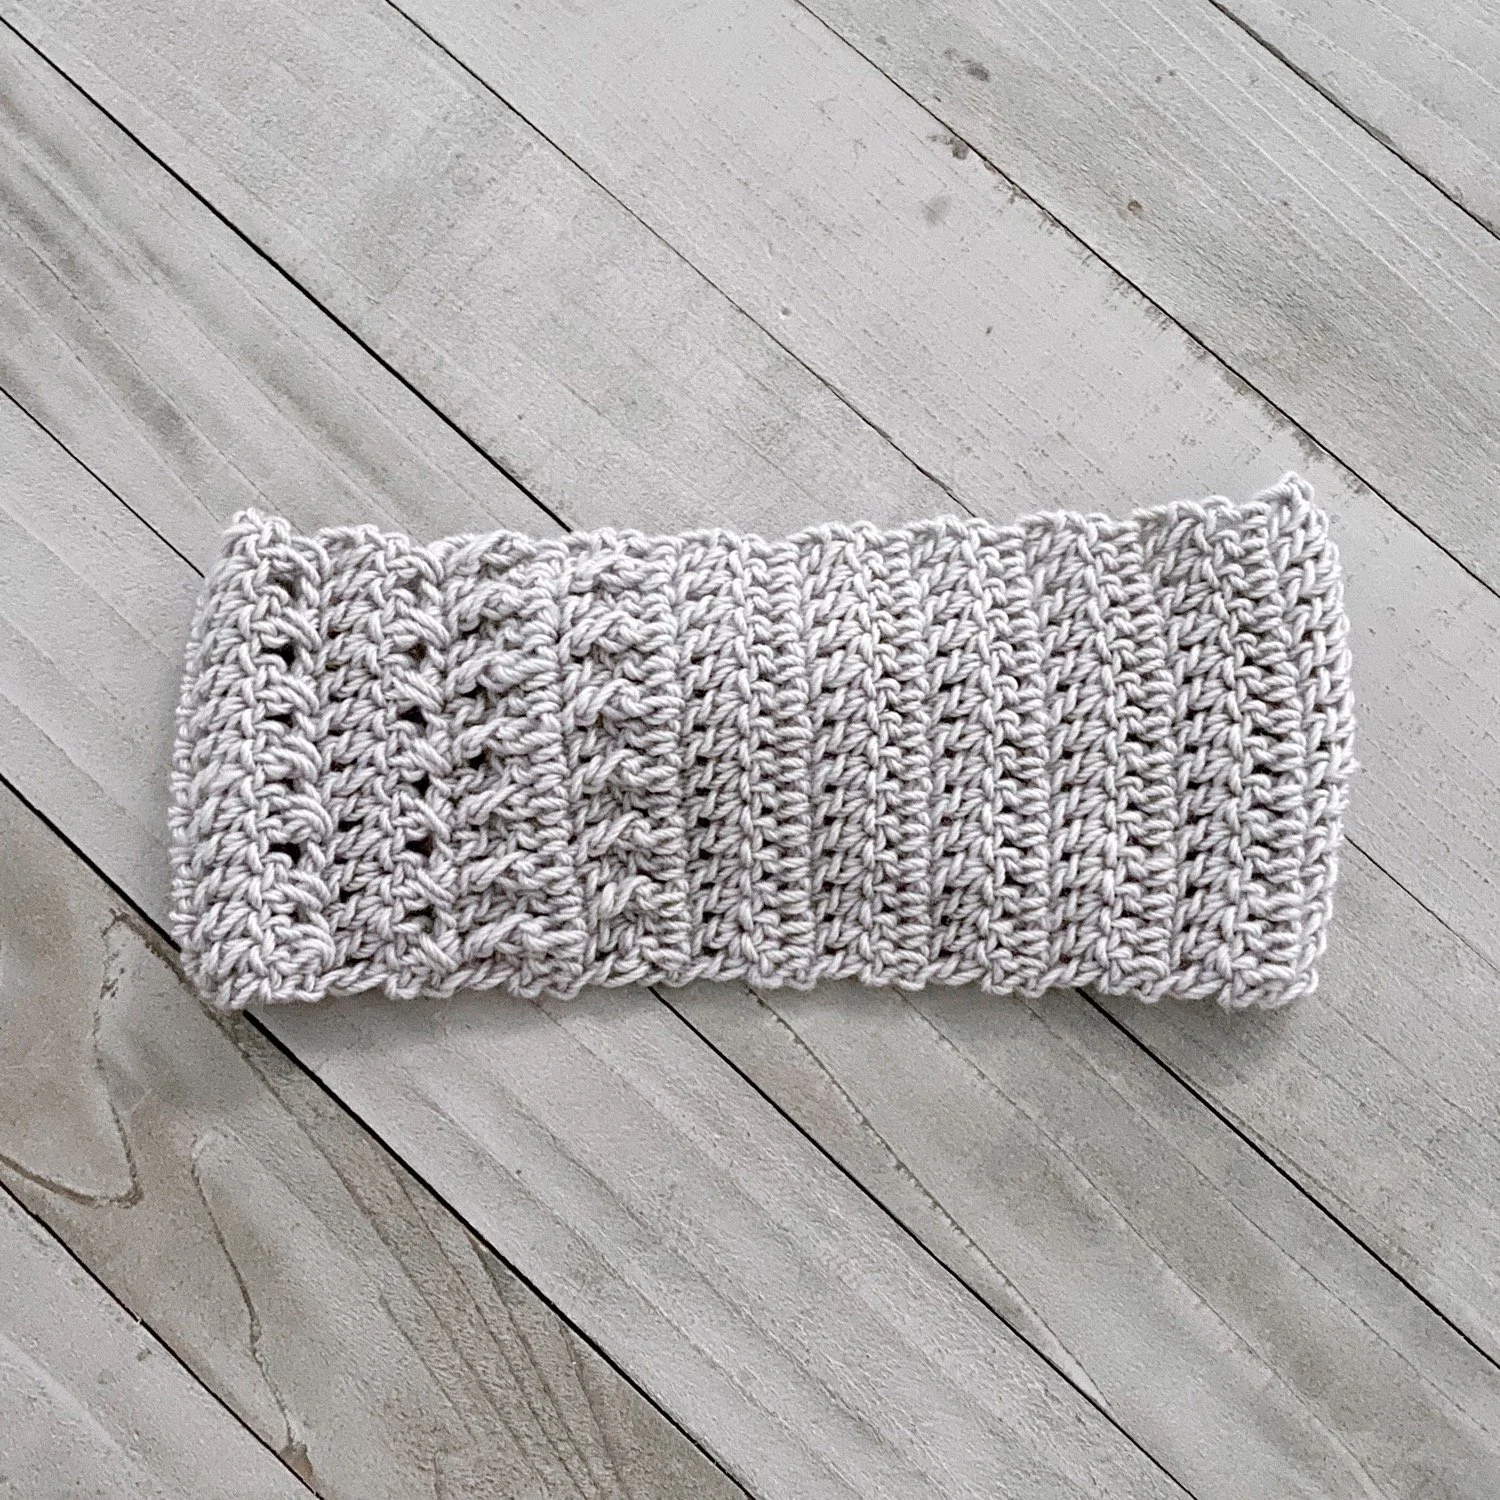
This bow has a wonderful lightweight, stylish drape and wear. Add to any hairstyle for an effortless luxury boho flair.
Bow constructed in one piece.
The decreased ends will be on alternate ends so when you create the bow, it gives it a subtle twisted, elegant drape.
Ch does not count as a stitch in this pattern.
**Please check your gauge before you start this Pattern: Swatching for gauge is very important. It does take a few minutes to do but it ensures that the finished size of your piece will match the sizes given in the pattern. A change in your stitches per inch can affect your overall width measurements. A difference in your rows can affect your length for this piece.
*Start with the suggested hook size:
If your swatch per inches is larger, then you need to swatch again using a smaller hook.
If your swatch per inches is smaller, then you need to swatch again using a larger hook.
Getting a close and accurate swatch will get you to the exact measurements given for the pattern.
***This Pattern is a copyright of Whistle and Wool© so you may not copy, alter, adjust, share, record, redistribute or resell my pattern. No tutorials or any kind of demonstrations may be made using any information contained in my pattern. I do not mind if you wish to sell a completed HANDMADE item and you are a small independently owned business, however, you do not have permission to use ANY of my photos. If you do sell a completed item, please list credit of the design belonging to me, Whistle and Wool and a link to my shop. www.WhistleandWool.etsy.com

Pattern Size: One size
Materials needed:
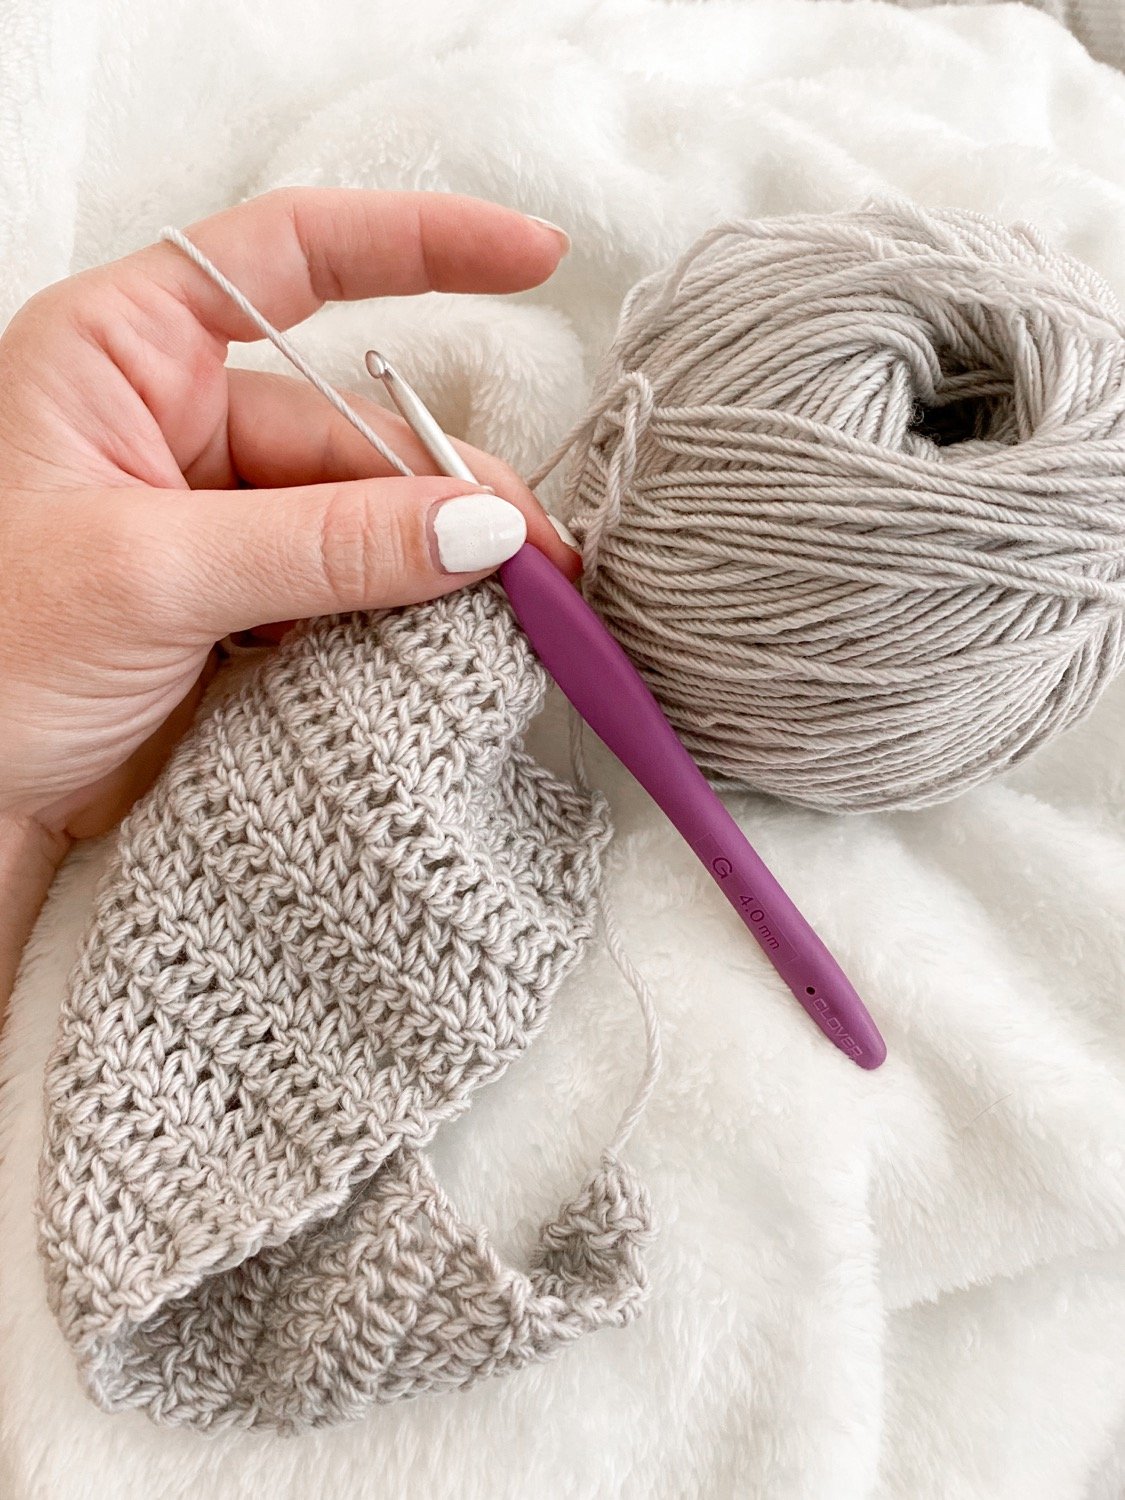
Furls Whims Merino: Light Grey, #3 weight, 196 yards
Skein: 1 - you can make multiple bows with one skein
Hair Tie: 1 (I used Goody, Ouchless elastic hair tie)
Hook: Clover Amour, G (4mm)
Large-eyed blunt Needle for yarn (Seaming & Weaving in your ends)
Gauge:. 8.5sts x 5rows = 2 inch square of dc
Finished measurements in inches: W 7.5 x H 3.5
Stitches to Know: Standard American Terms
*-repeat the stitches indicated in the pattern
RS- Right Side
ch- Chain
st- Stitch
Sl St- Slip stitch
dc- Double Crochet
FPdc- Front post double crochet
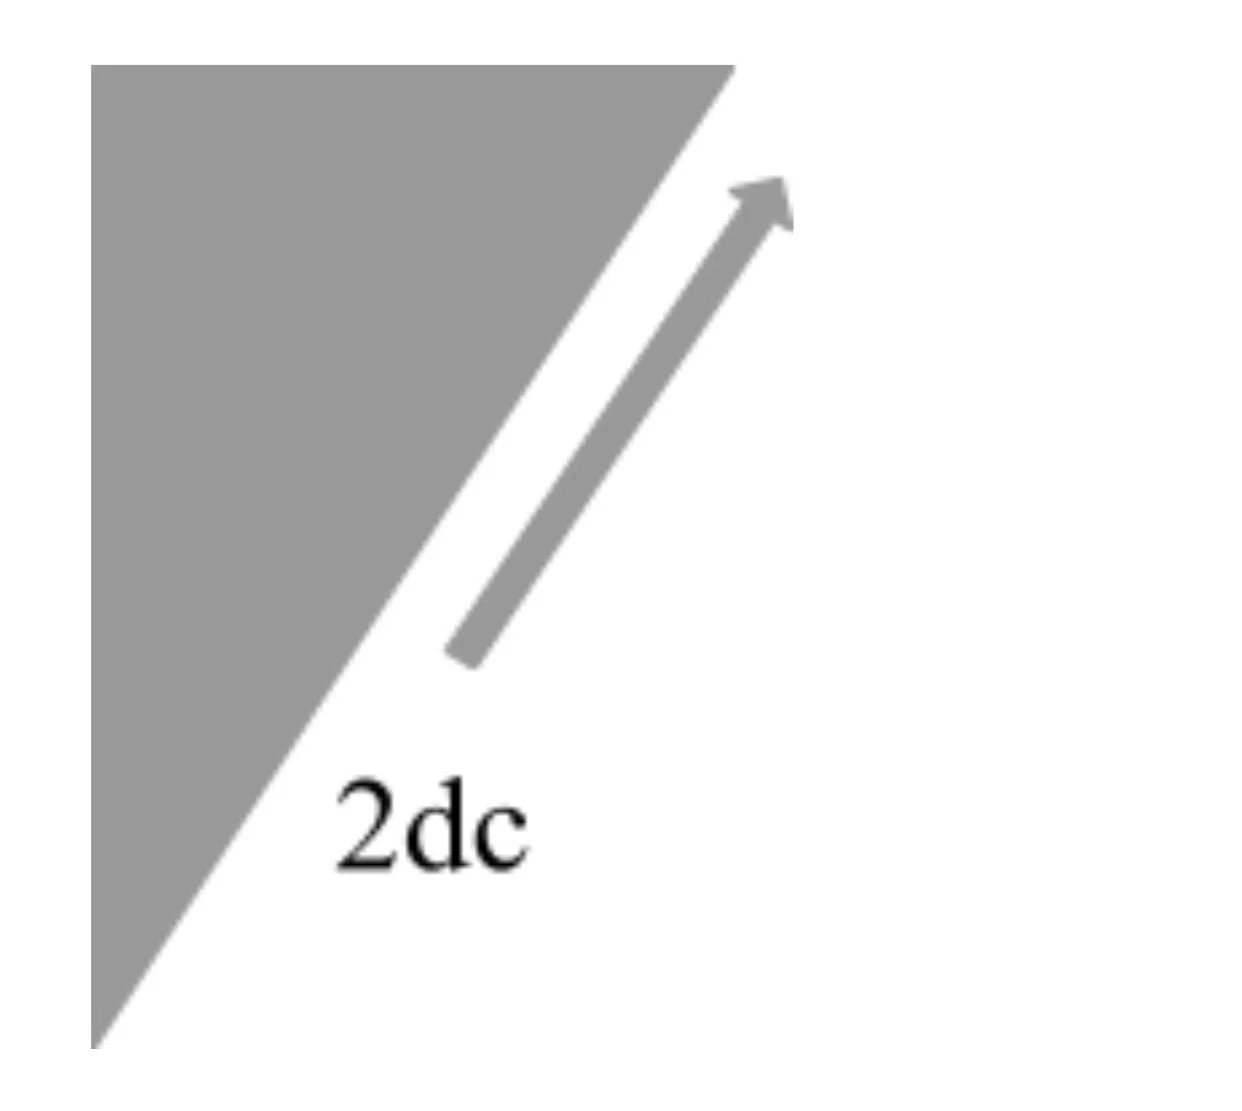
2dc - Double Crochet twice into the same stitch (increase)
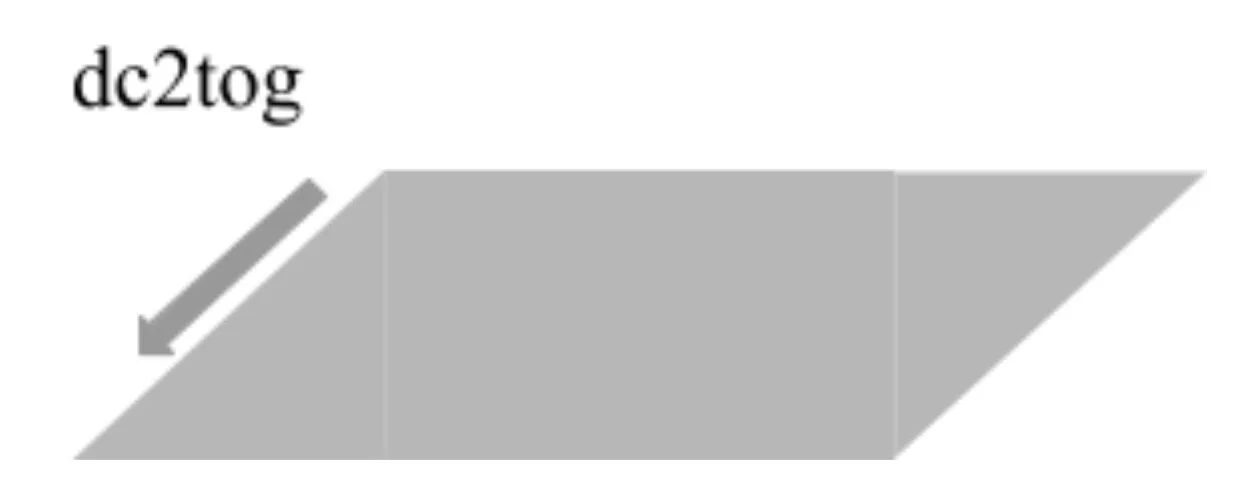
Dc2tog- Double Crochet two stitches together (decrease)
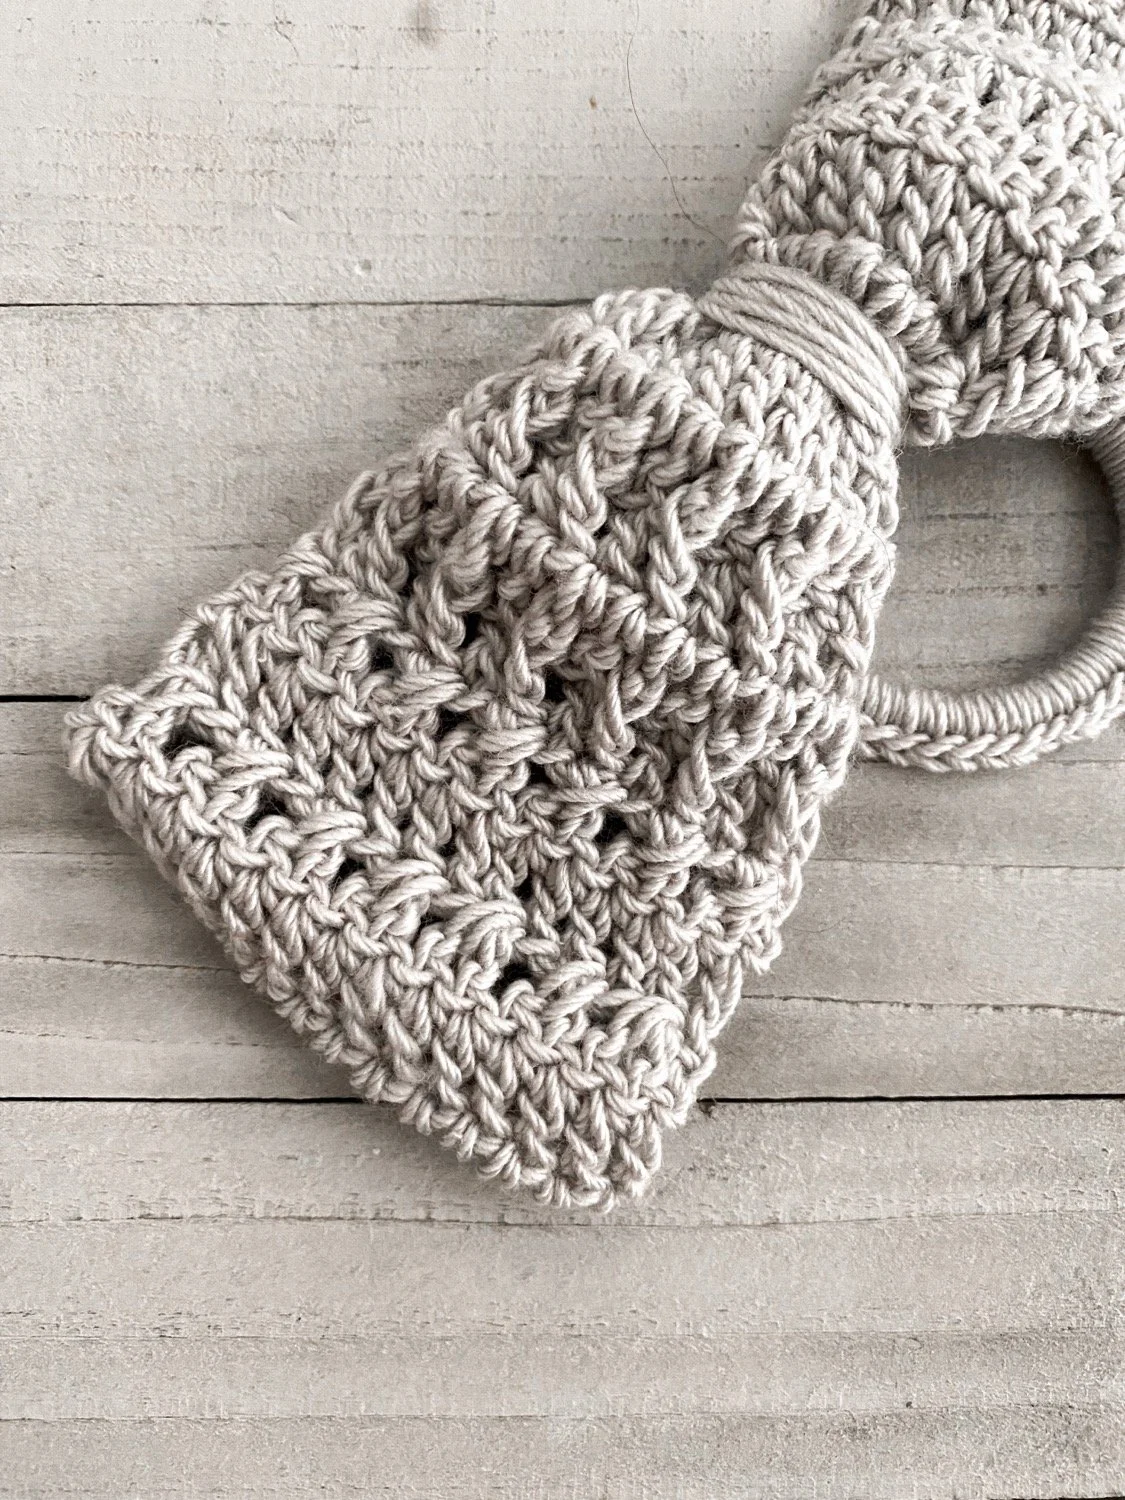
X stitch- skip the first stitch, double crochet in the following stitch, then go back and double crochet your skipped stitch. Continue for the row.
It creates a cross crossed, x stitch pattern.
Pattern
Ch3
Row 1: in the 3rd loop from the hook, 2dc (inc.) -2sts
Row 2: ch2, turn, 2dc into the same stitch, dc1 -3sts
Row 3: ch2, turn, dc2, 2dc -4sts
Row 4: ch2, turn, 2dc, dc the rest of the row -5sts
Row 5: ch2, turn, dc till last stitch, 2dc -6sts
See diagram. All of your increases should be on the same side. You can attach a stitch marker to this side as a visual aid, to know you’re increasing on the correct side.
Repeat rows 4 & 5 (increasing) until you’ve reached 14 sts
Mid section
Row 1-12: ch2, turn, dc the entire row
Row 13: ch2, turn, *dc1, FPdc1, repeat after * for the row
Row 14: ch2, turn, dc the row
Row 15: ch2, turn, *FPdc1, dc1, repeat after * for the row
Row 16: ch2, turn, x stitch for the entire row
Row 17: ch2, turn, dc row
Row 18: repeat row 16
Row 19-20: ch2, turn, dc row
We will now work a decrease on the opposite side from where you worked your increase.
Decrease section
Row 1: ch2, turn, dc till last 3 stitches, dc2tog, dc1 -13sts
Row 2: ch2, turn, dc1, dc2tog, dc the rest of the row -12sts
Repeat rows 1 & 2 until you reach 2 stitches remaining.
Last row: ch2, turn, dc2tog
Cut yarn, leaving a 10 inch tail. Set aside.
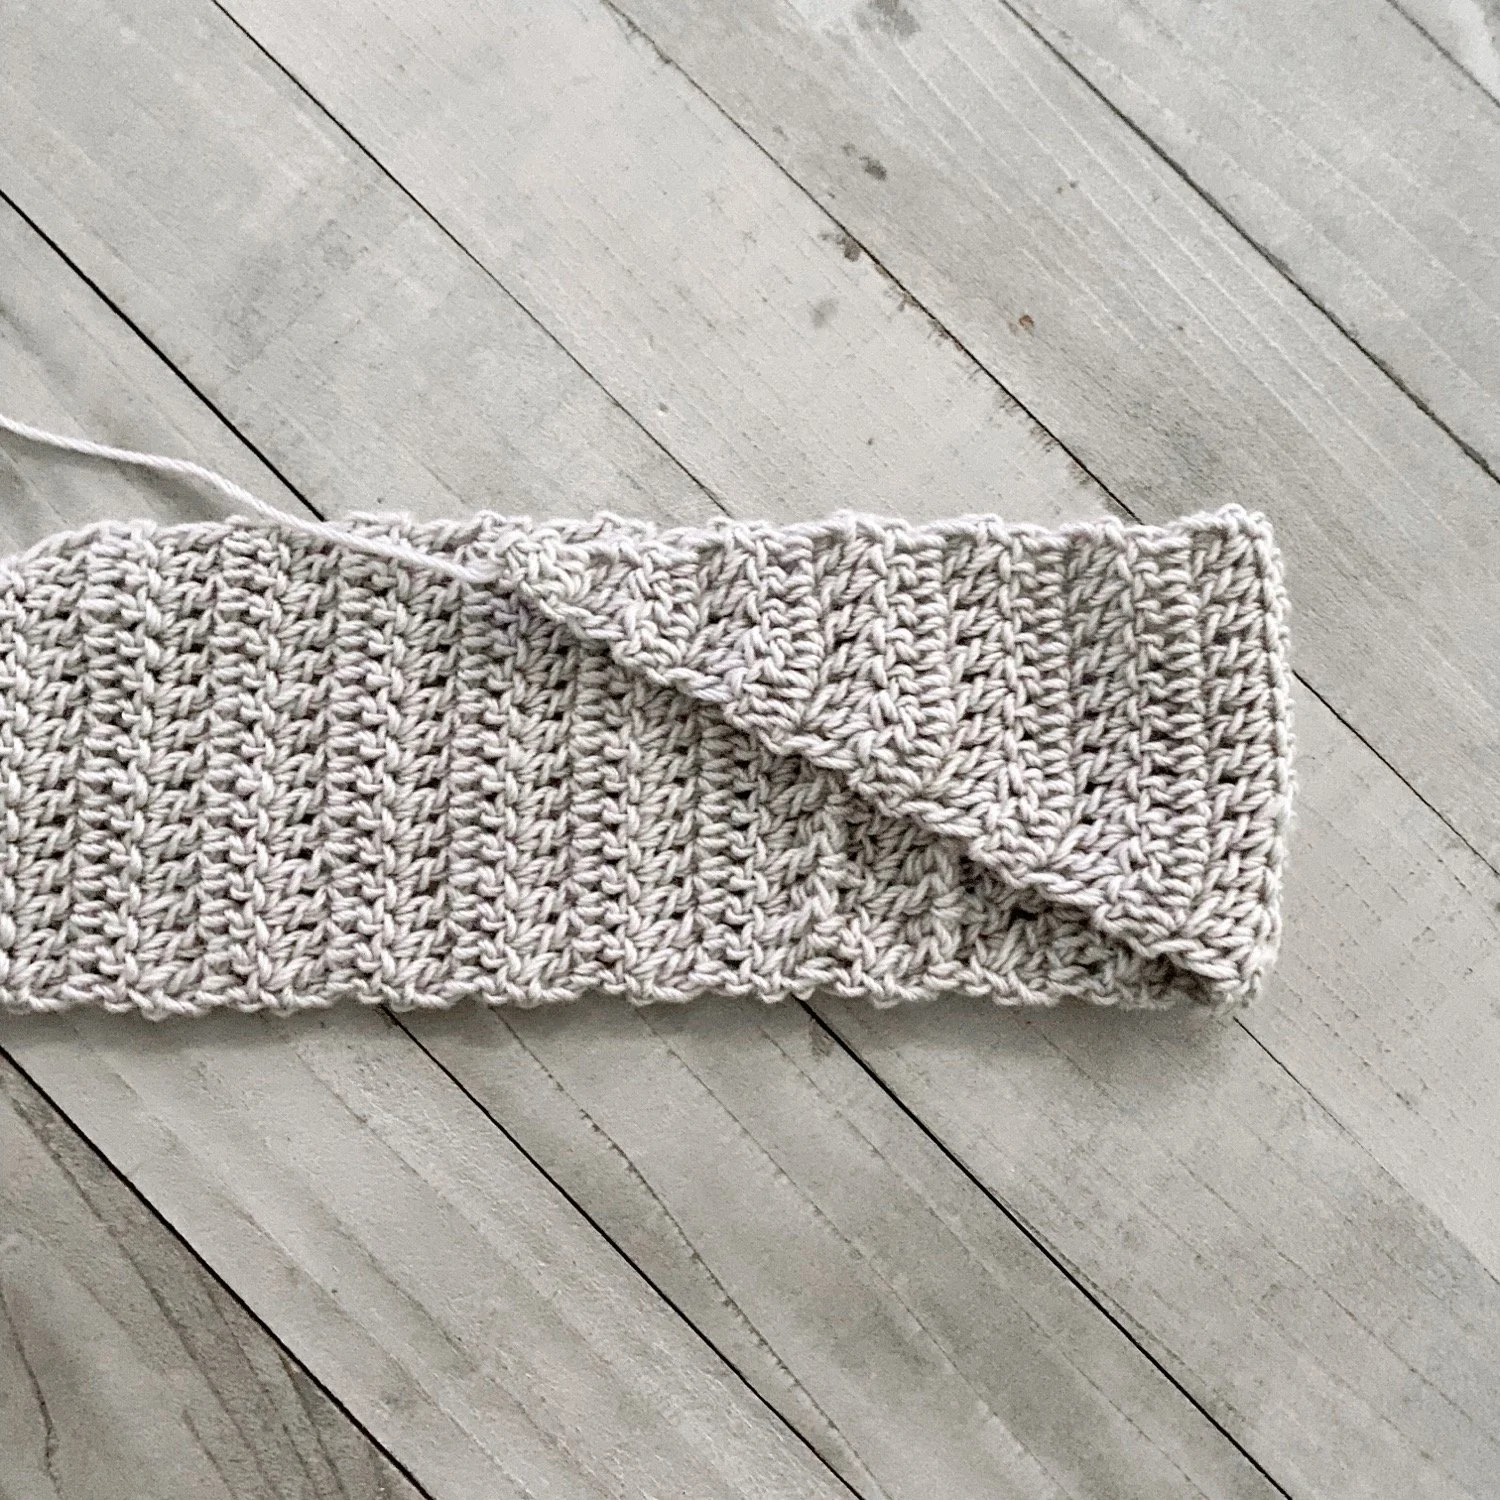
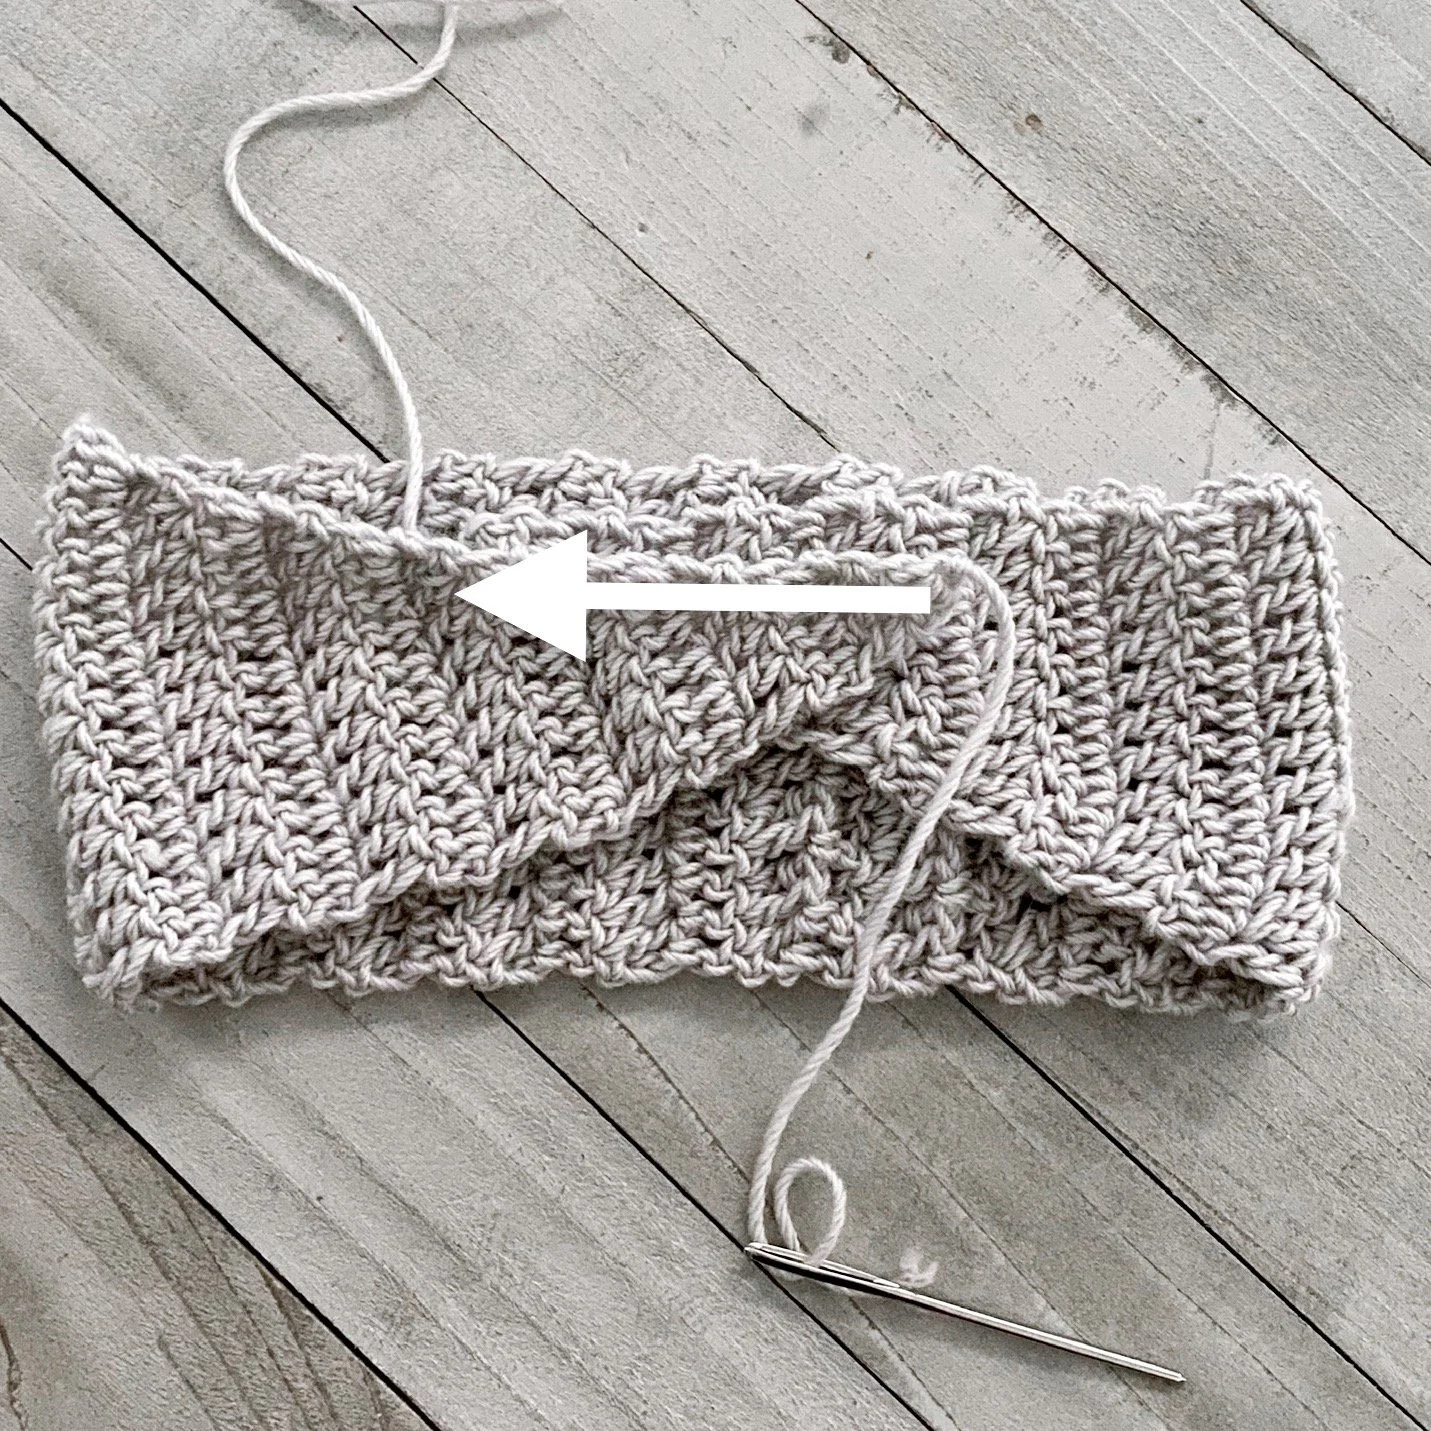
Folding the bow- Follow the diagram below.
Lay flat, wrong side in front of you.
Fold the last two inches of each end on top of each other. It should have a laid back slightly twisted look with the alternating ends being brought together. Stitch these together along the top of the bow so they don’t separate. I used the tail ends, so I simultaneously weave those in.
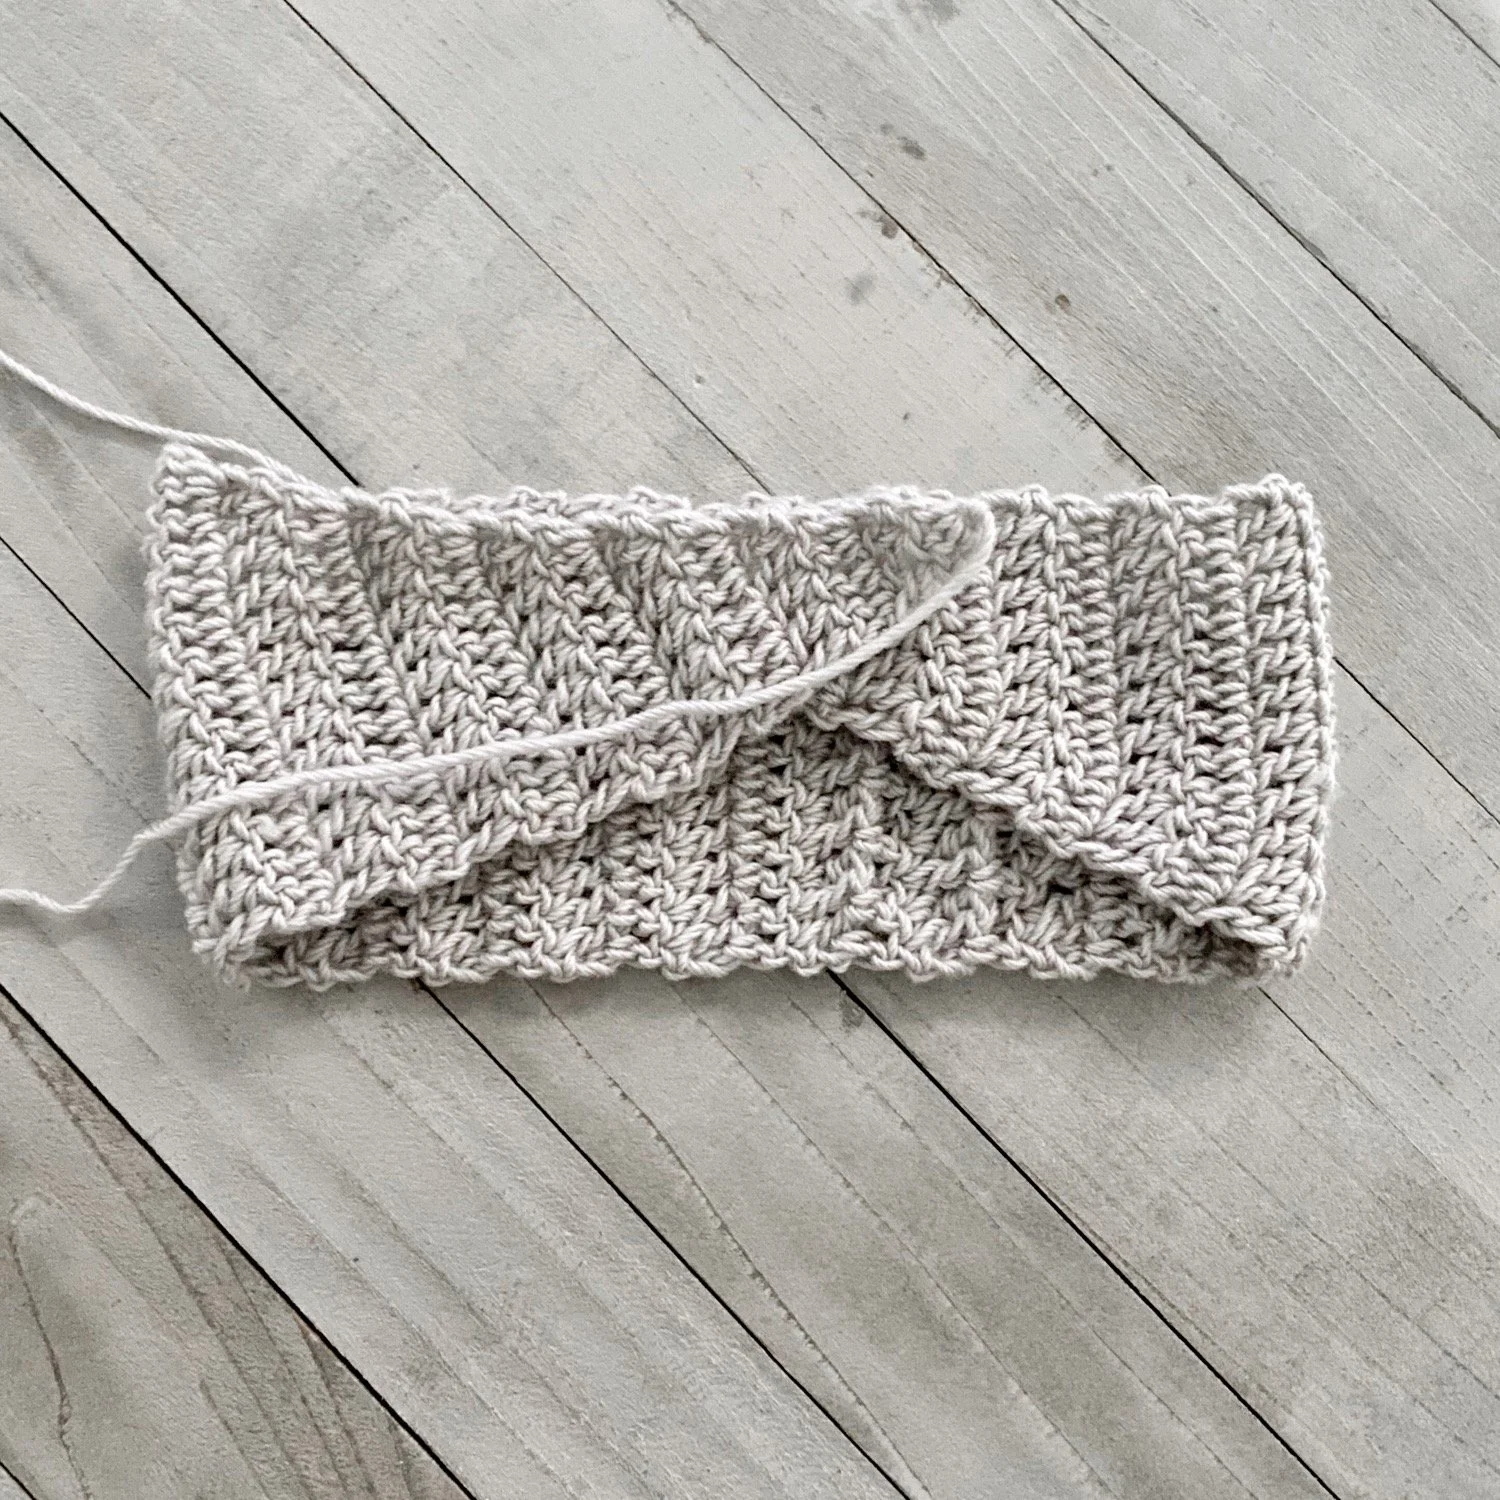
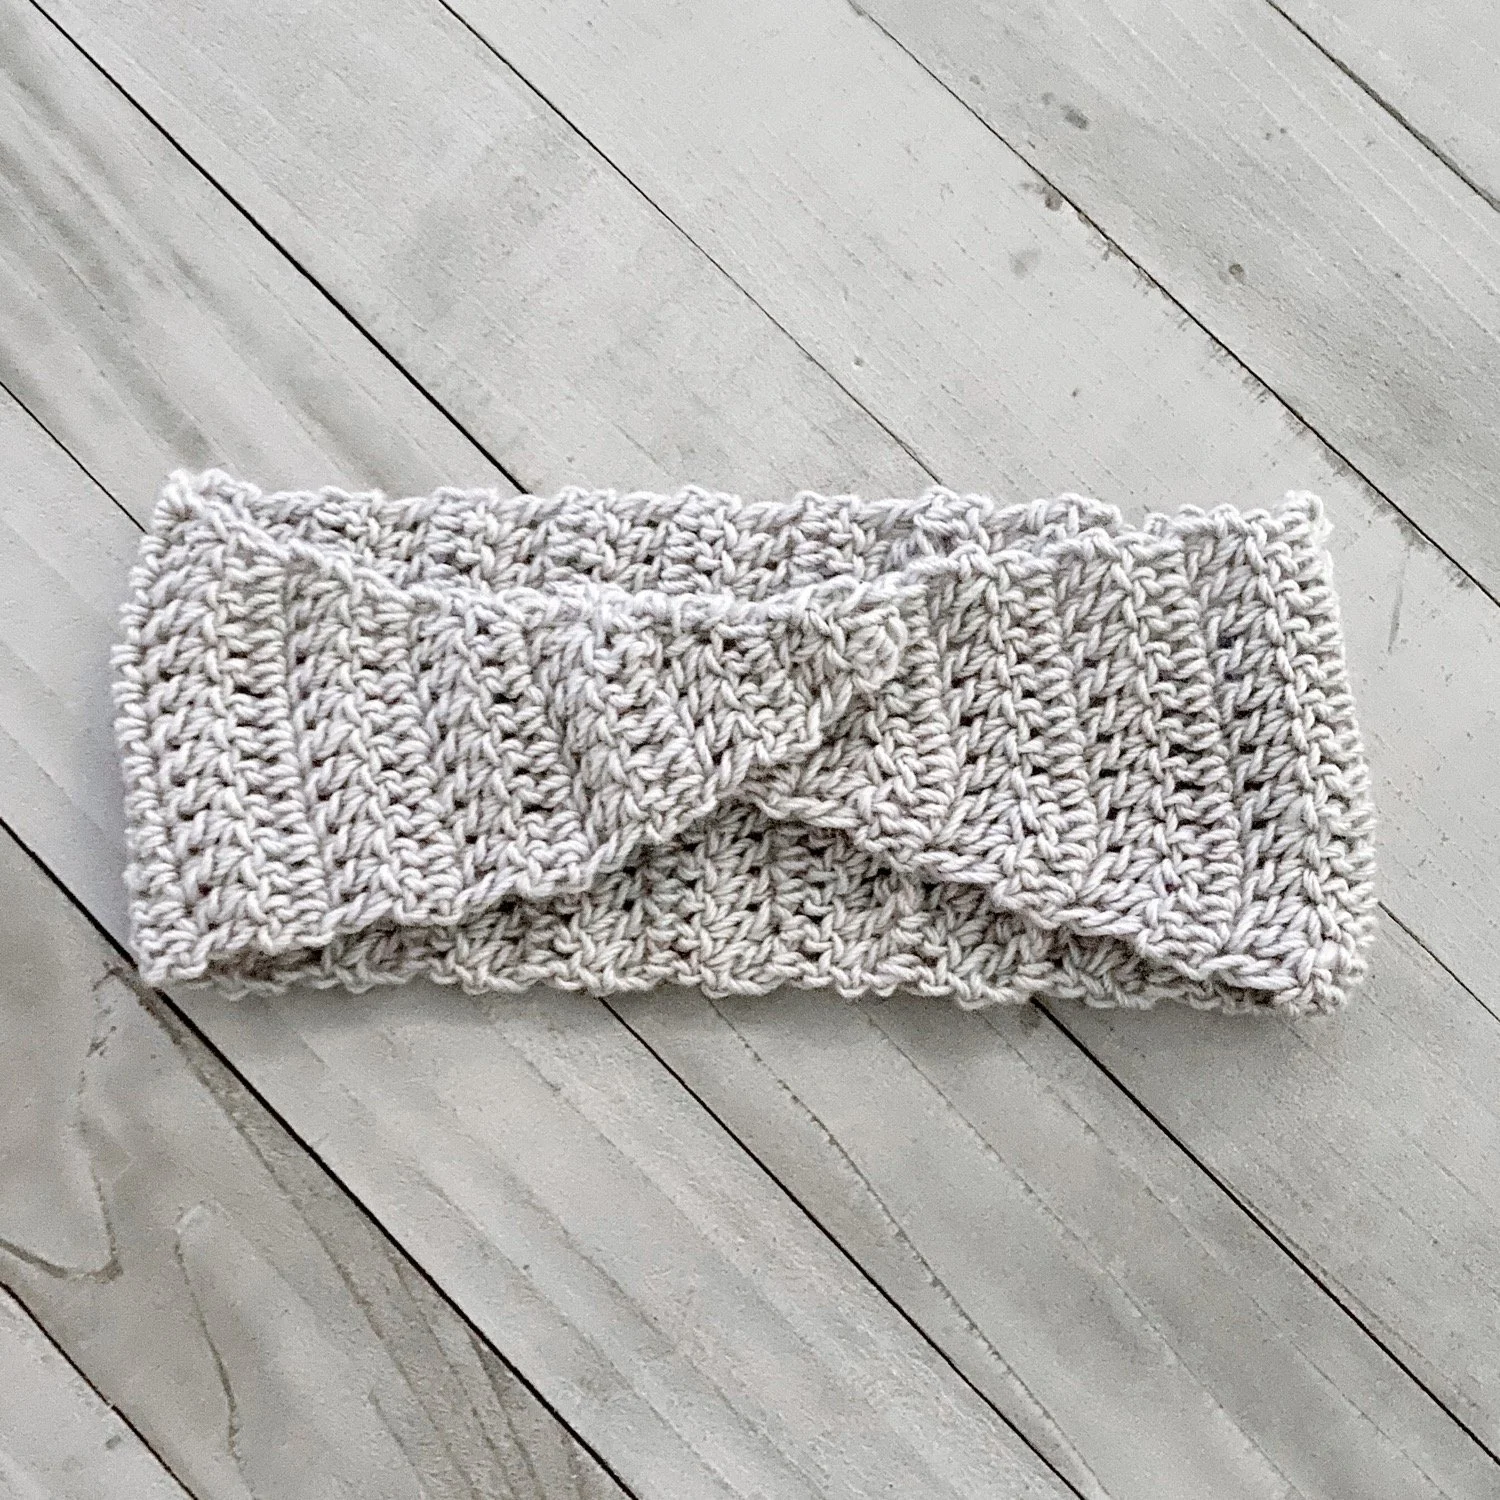
Turn bow around, RS facing you:
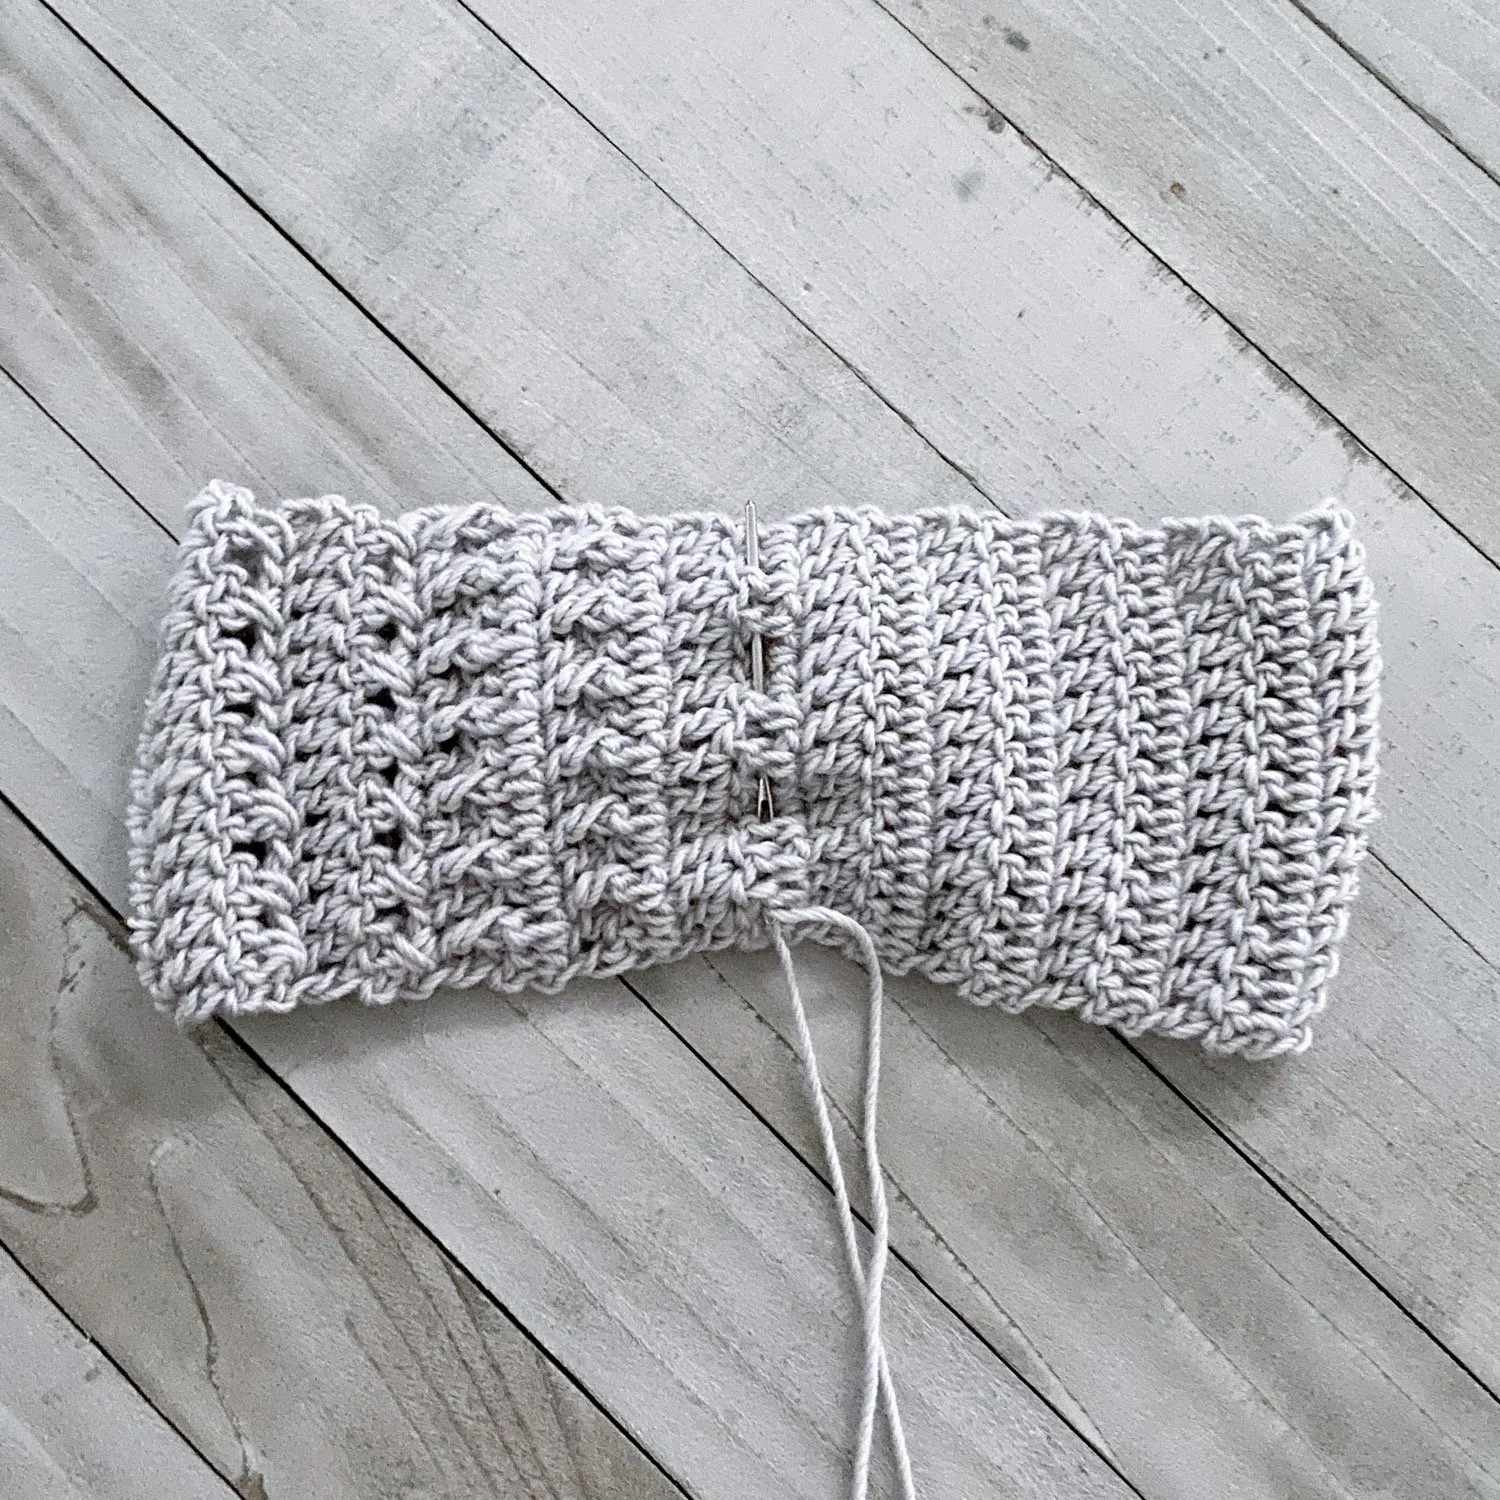
Thread your yarn needle with approx a 36 inch strip of yarn.
Weave in and out through the center.
Pull the yarn to cinch, and wrap around the center 8 times.
Knot the yarn on the underside of the bow.
Set aside.
Sc around your ponytail holder as follows: See tutorial below.
Make a starting loop. Pull it through the center of your hair tie and attach it to your hook. Make it taught on the hook. Ch 1.
Insert hook through the hair tie. Yarn over and pull the yarn through. Yarn over and pull through both loops. Sc1 made.
Repeat step 2 until you’ve gone around the whole hair tie. Scrunch the stitches together to make room for extra stitches. Make sure it's fully covered. Sl St to join at the end.
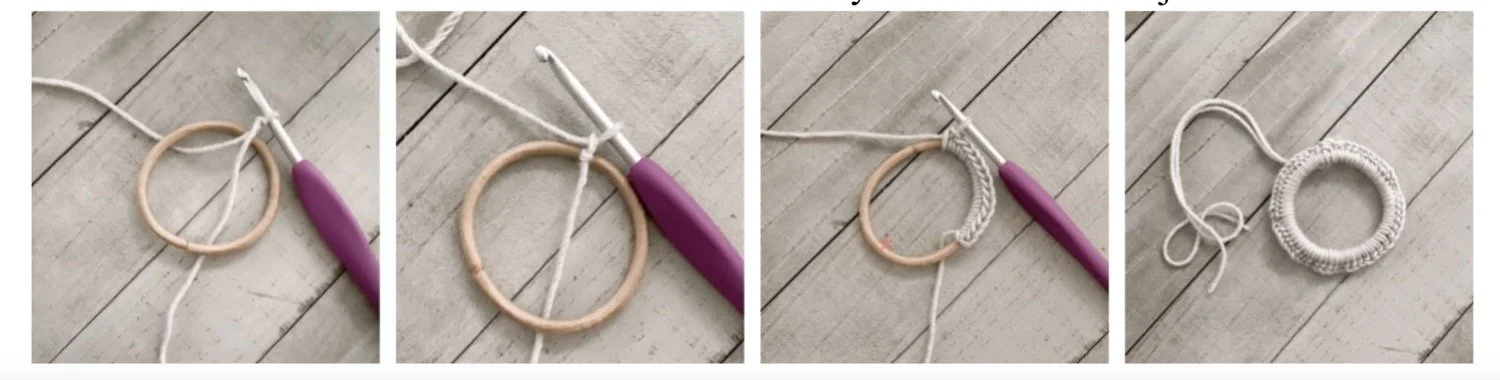
Cut yarn, leaving a 10 in tail, pull though the last stitch to secure.
Sew it to the underneath side of the bow, secure with a knot. Use the loose end on the bow to add extra stitches securing the two together.
Voila! You’re done! Enjoy!!
About Me:
I was taught to knit as a little girl and it was something I instantly loved and found so calming.
On a cold and rainy English day, my Gran taught me something that would forever remind me of her.
A feeling that would ring in my head just about every time I pick up my needles. For just a moment, I am back in England with my Gran, enjoying the inside. A beautiful grey moody sky going on around me.
Contact
Instagram @whistleandwool
Ravelry- Whistle and Wool
Email: whistleandwool@gmail.com