
Somerton Sweater-Perfect for Summer
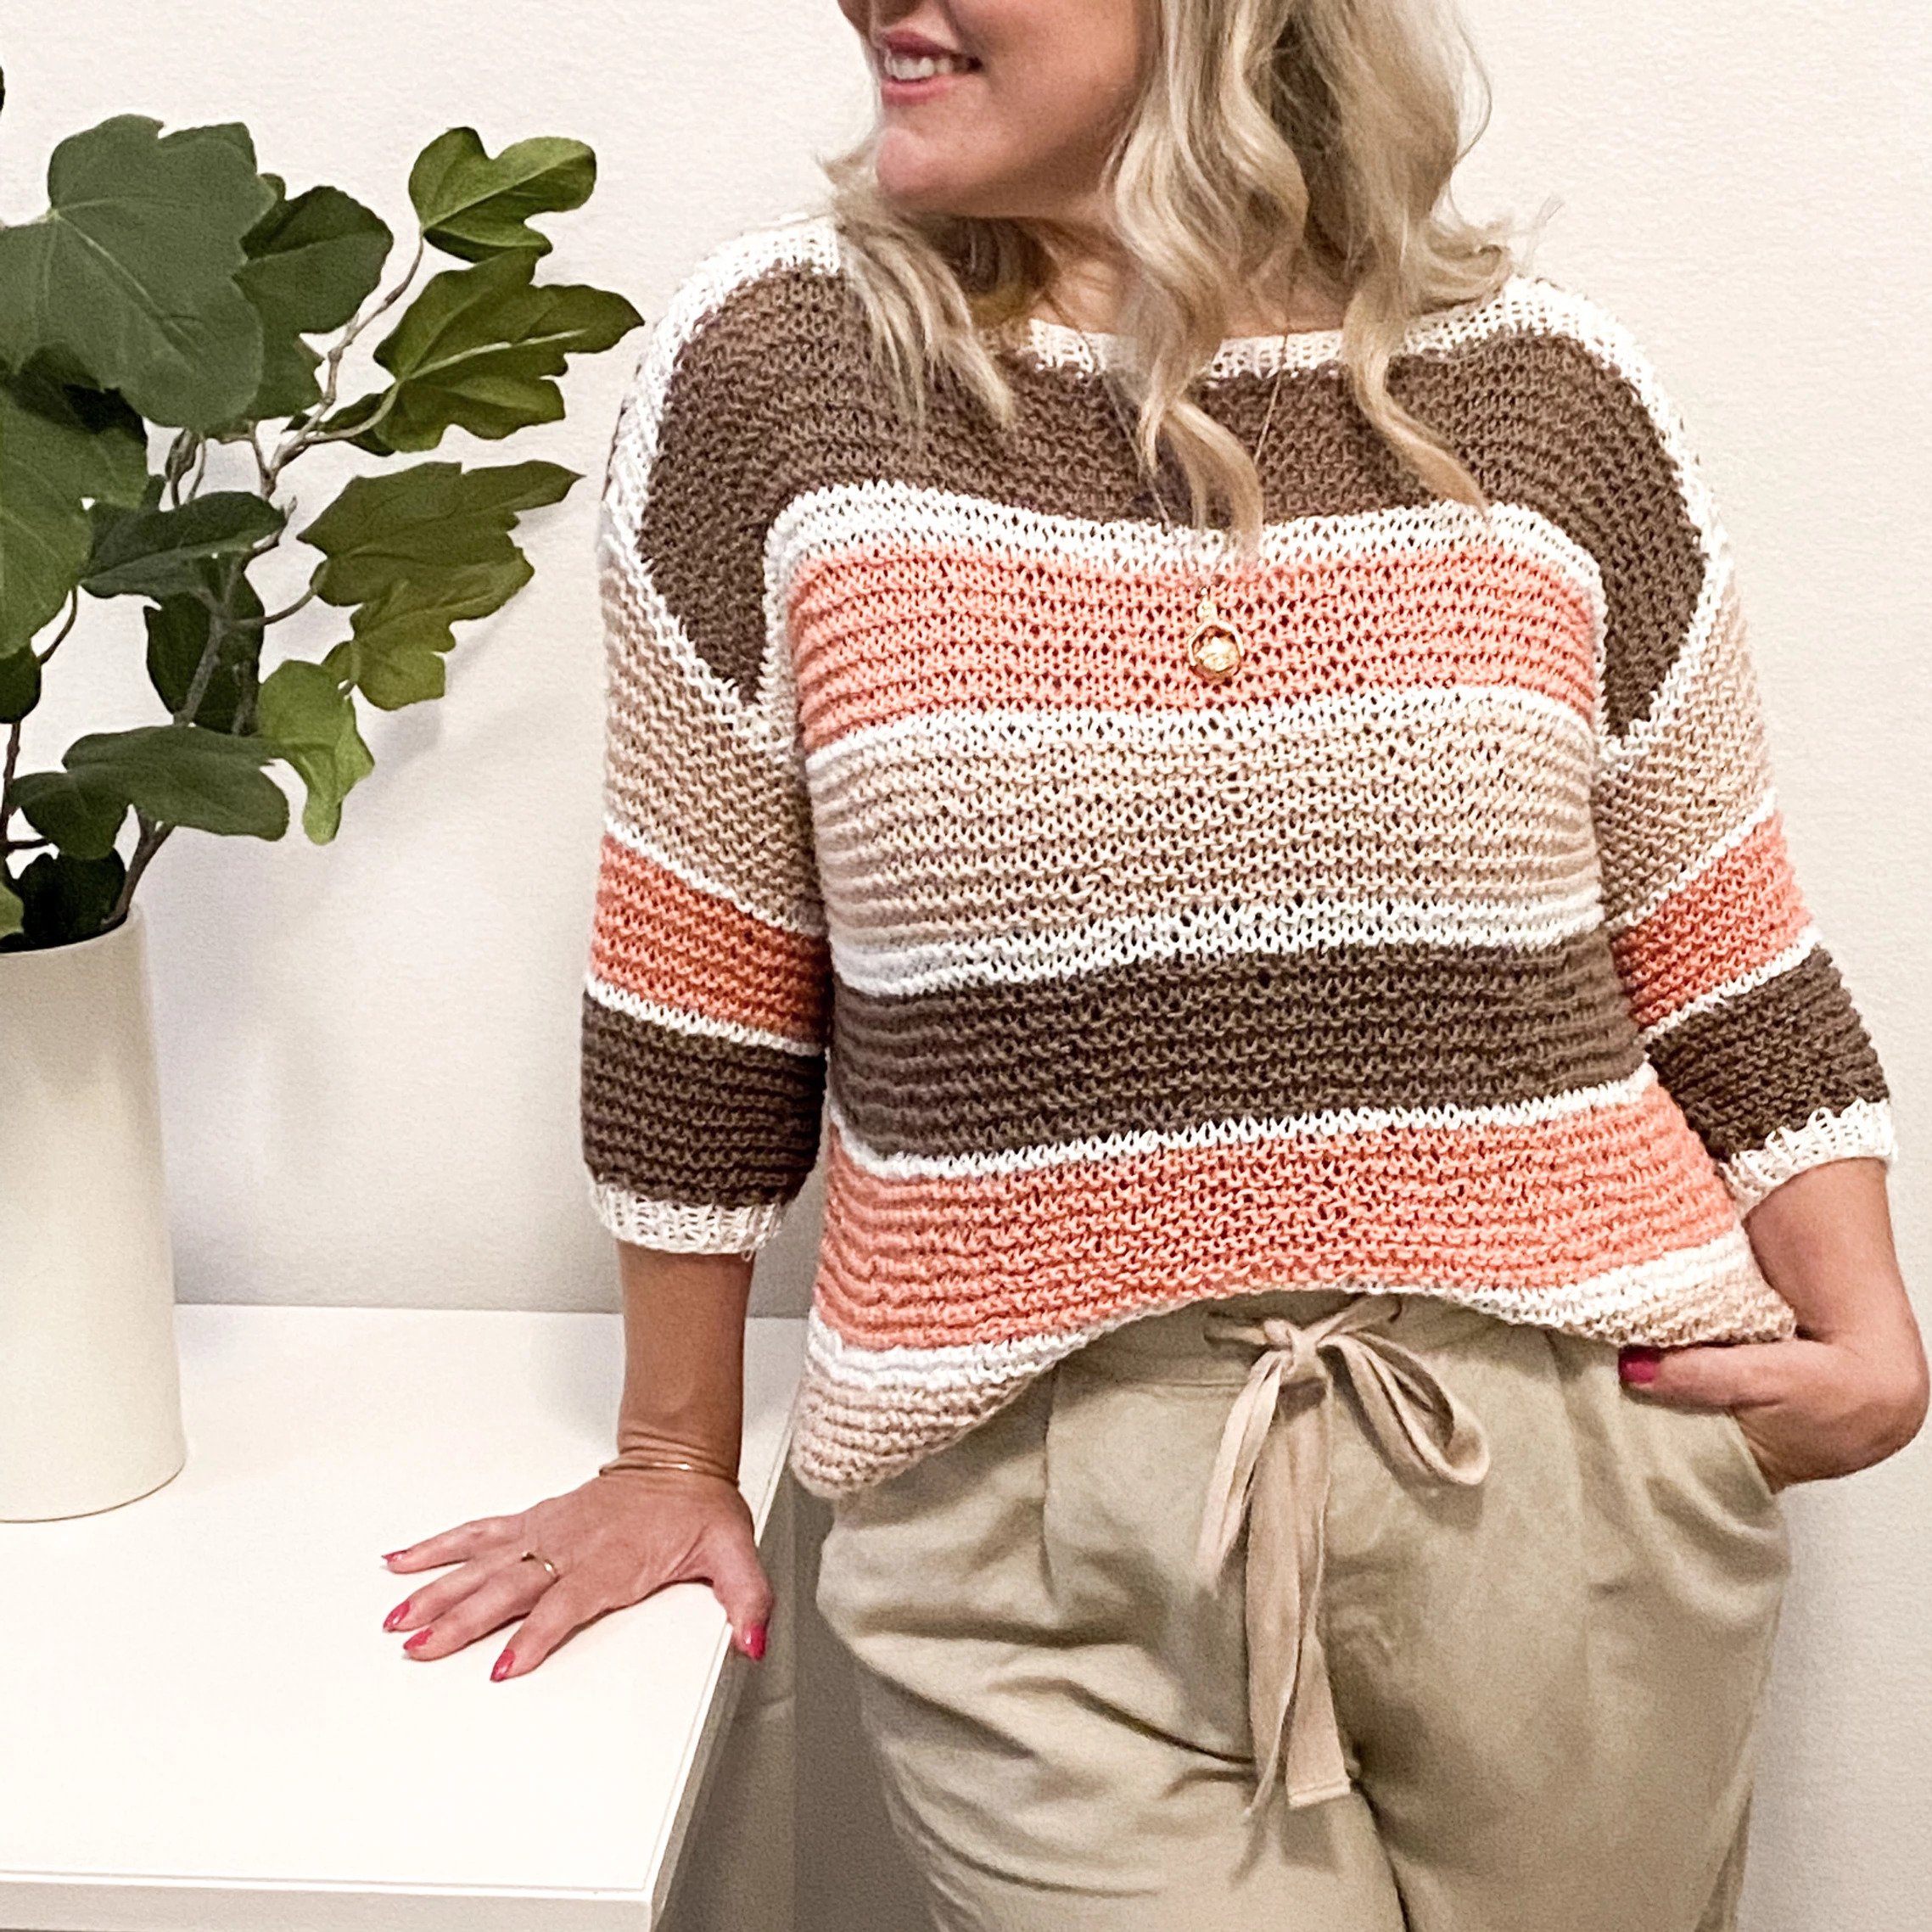
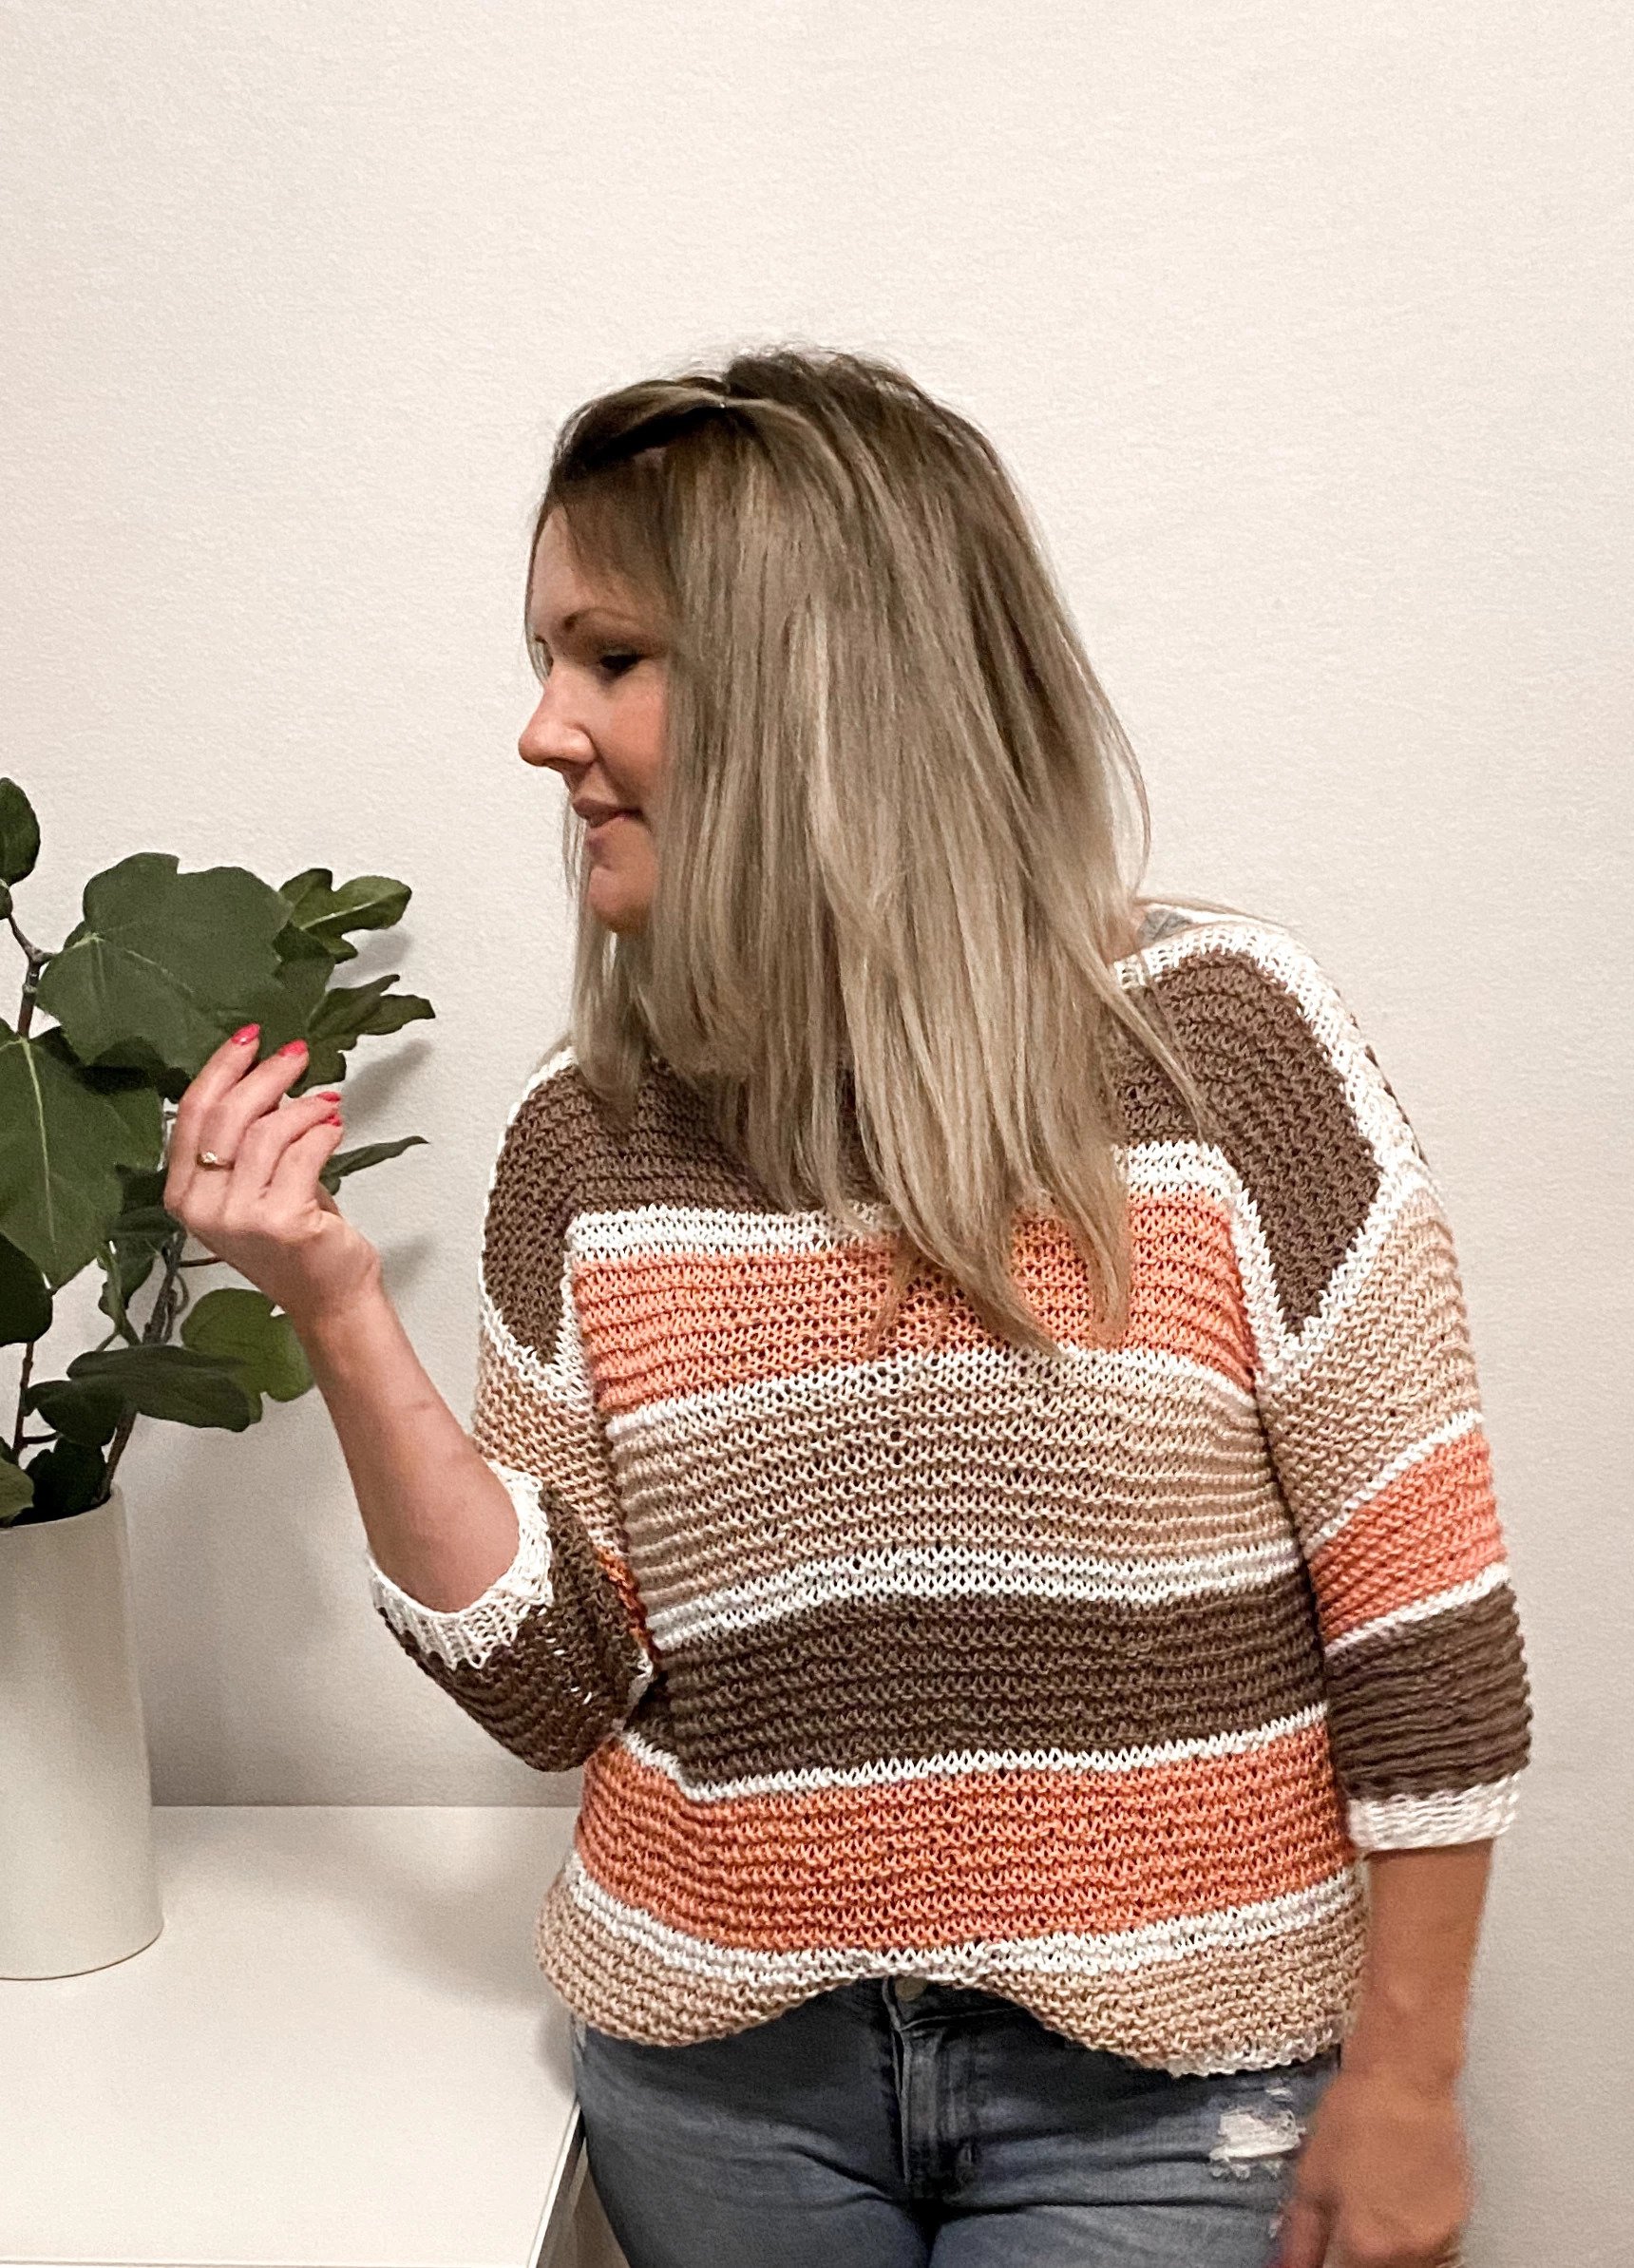
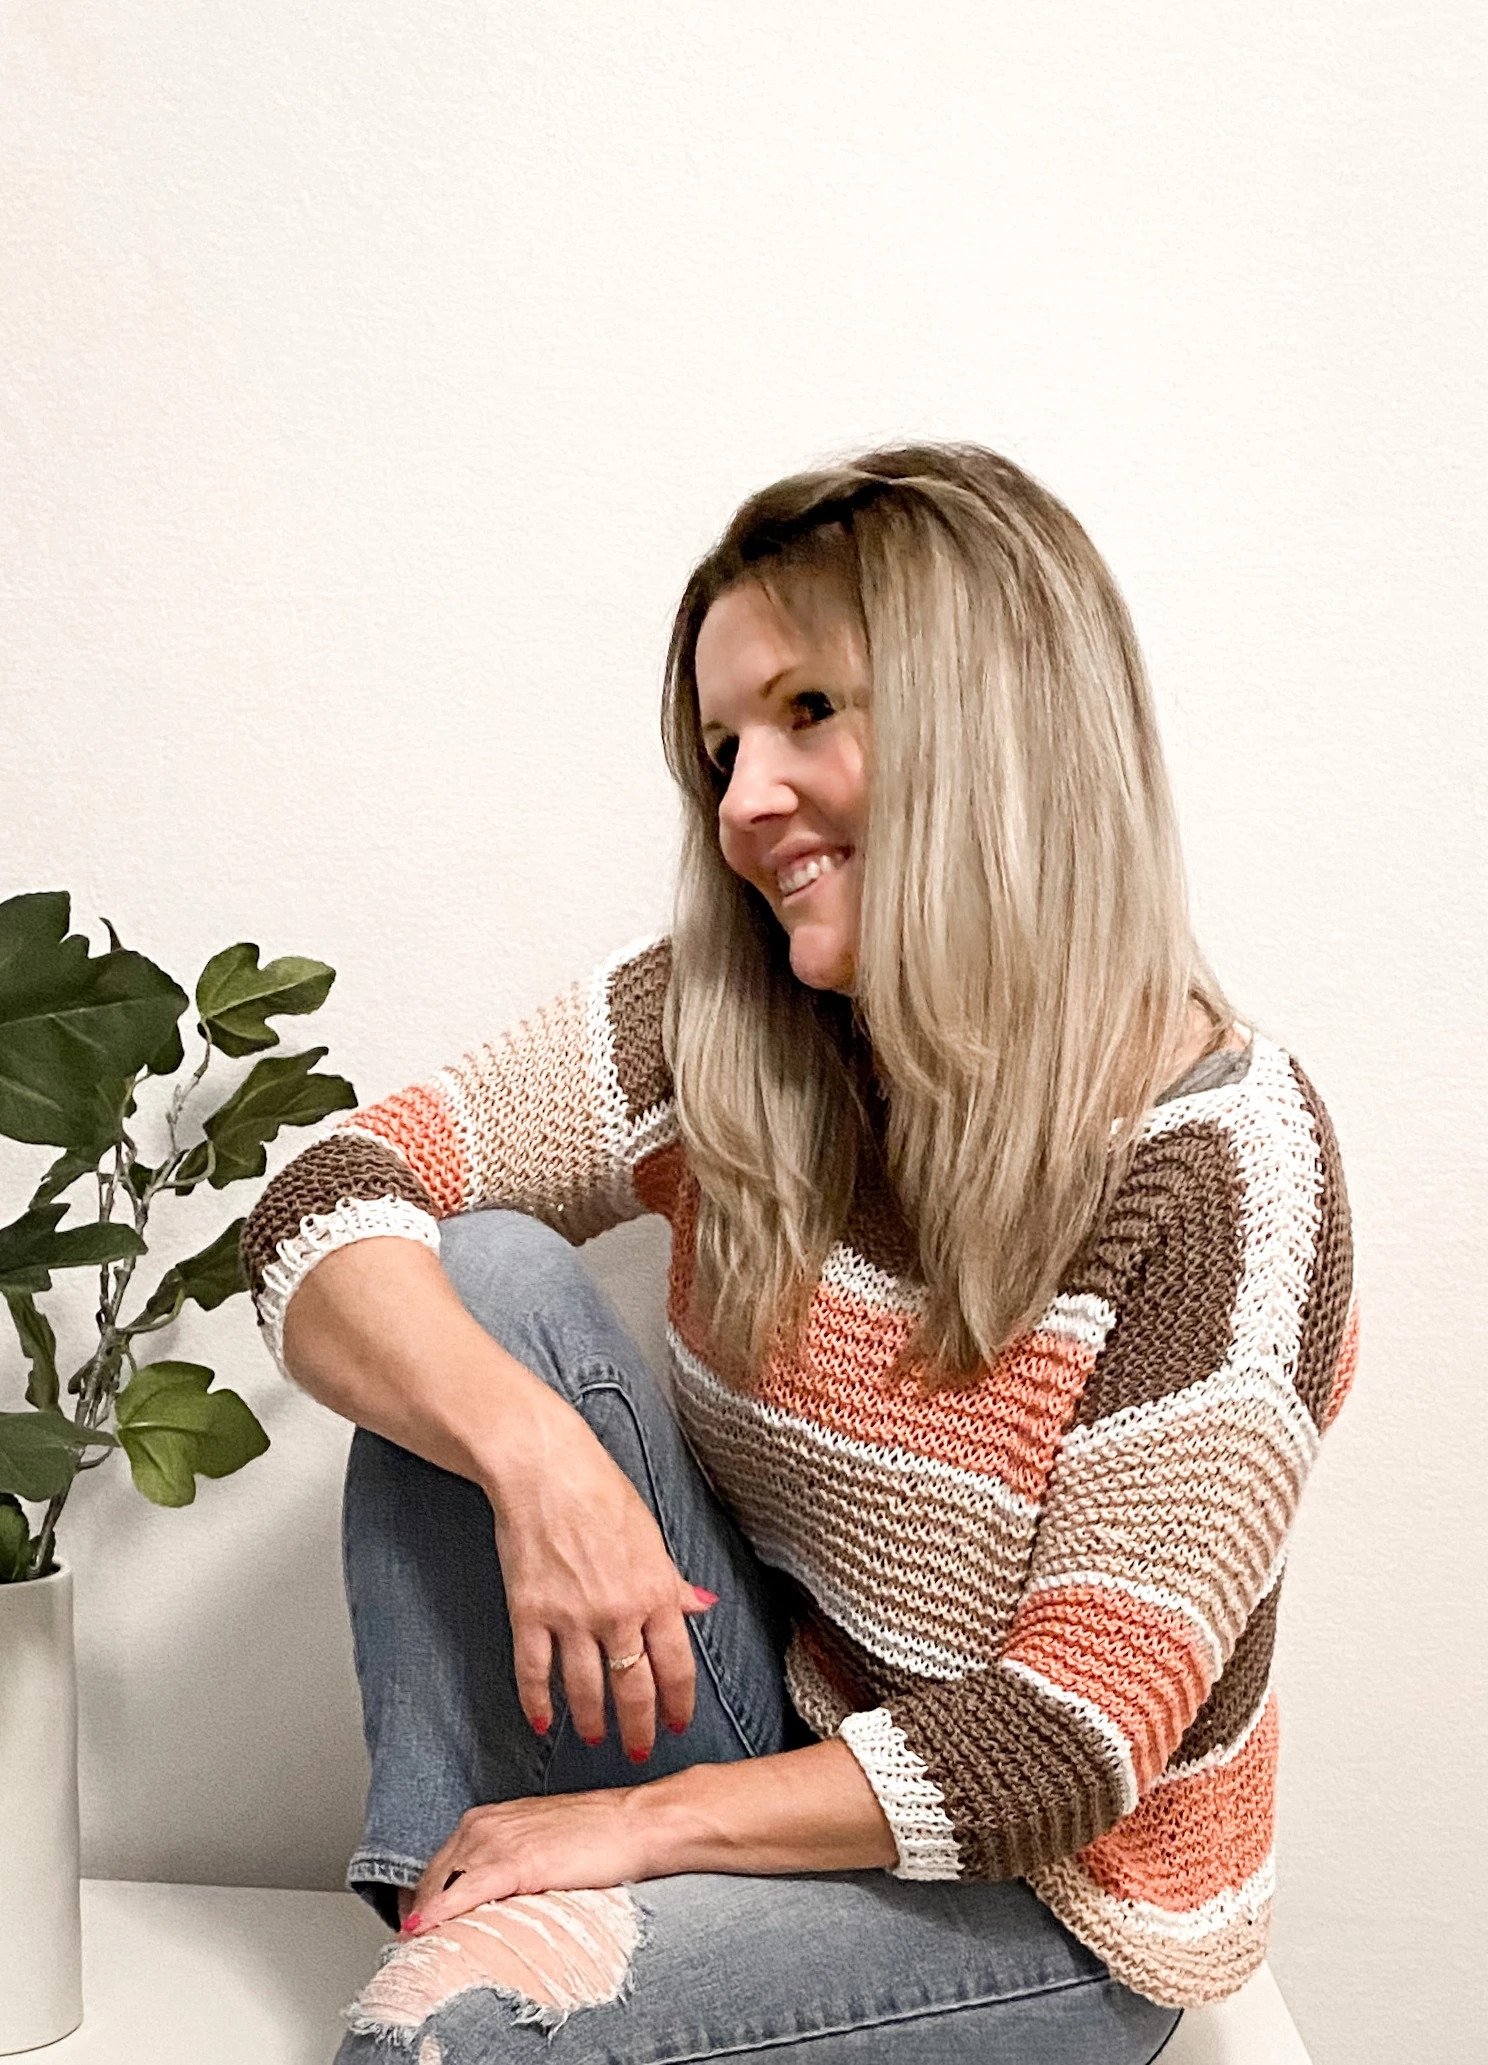
Hello! I hope everyone is having a safe pleasant summer so far, filled with lots of smiles and good times with your families. When I have a bit of quiet time I've been enjoying some relaxing stitching. Just when I needed the perfect Summer project, this yarn came into my life. This was the first time I had used Coboo by Lionbrand and boy did it hit the spot. These skeins paired up made me think of Summer sunsets and the start of Fall leaves changing. With that initial feeling I thought this would make a great transitional Summer sweater to wear in the evening and those first moments of Fall. I drew additional inspo for the color, fit and texture from some of the sweaters I always remember my Mum wearing in the early 80's. I loved all the warm brown tones, flattering slouchy fit and soft yarn feel when I would cling on tight to her during my extra shy moments as a child.
I hadn't had the opportunity to work with a Bamboo yarn before and the texture / weight was instantly noticeable. When I first cast on I couldn't believe how soft, silky and weightless this yarn was. It is 50% Cotton / 50% Rayon from Bamboo. It glides through your hands and it also did a nice job of staying on my needles.

For this project I paired this lightweight bamboo mix cotton with a needle size just a few higher then this yarn actually calls for. This created a nice see-through texture and it made it work up quick. Big needles and a thinner yarn can be a bit of a problem for a consistent tension, but I think the garter stitch helps curb that. Garter stitch almost creates a diagonal stacking texture on the needles keeping the stitches easily worked, so it's not as loose as a stockinette would be.
When worn you really see that slight stretch from the garter. I gained approximately an inch in length when worn which also made me appreciate this cottons texture. It holds its shape quite nicely.

The Somerton Sweater is also available as a Kit through Lionbrand Yarn for $23.96 - if all you need is the yarn. Be sure to deselect all the additional supplies if you have them at home or leave them selected to add them to your cart! I love their Kits because they will send you all the yarn needed for your size AND they always have an awesome sale going. Wit their new website live as of this month you can now select any color combo you want from the Coboo line. If you wanted to sub the Peach for a Blue, or the Taupe with a Pink, it's now easy peasy to do.
This Pattern is also available in an affordable PDF format Pattern Via my Ravelry and Etsy and Love Crafts shops! Thank you so much for all your shop support :)
Somerton Sweater
By Whistle & Wool
Ravelry-Whistle and Wool
Join me on Instagram and tag your projects to @whistleandwool, #whistleandwooldesigns
KNIT PATTERN
Sizes: XS (S, M, L, XL, XXL, 3X, 4X)
Somerton, England: Around the start of the 14th century, the county town, and around 900 was possibly the capital of Wessex. It has held a weekly market since the Middle Ages. In the centre of Somerton the wide market square, with its octagonal roofed market cross, is surrounded by old houses, while close by is the 13th century Church. Archaeological remains at Somerton are evidence of a Celtic settlement. During the Anglo-Saxon era, Somerton was an important political and commercial centre. After the Norman conquest of England the importance of the town declined, despite being the county town of Somerset in the late thirteenth century and early fourteenth century.
For more history behind the name visit : www.wikipedia.com
Thank you so much for your shop support! I hope you love it!! If you need any help or have questions along the way, please contact me via Email.
NOTES:
Worked bottom up, and flat.
Made in panels and sewn up.
I worked all my ribbing in Color A.
Striping Pattern listed for each section.
Finishing:
This needed a Steam blocking to relax and calm the stitches.
**Please check your gauge before you start this Pattern: Swatching for gauge is very important. It does take a few minutes to do but it ensures that the finished size of your piece will match the sizes given in the pattern. A change in your stitches per inch can affect your overall width measurements. A difference in your rows can affect your length for this piece.
*Start with the suggested needle size:
If your swatch per inches is larger, then you need to swatch again using a smaller needle.
If your swatch per inches is smaller, then you need to swatch again using a larger needle.
Getting a close and accurate swatch will get you to the exact measurements given for the pattern.
***This Pattern is a copyright of Whistle and Wool© so you may not copy, alter, adjust, share, record, redistribute or resell my Pattern. No tutorials or any kind of demonstrations may be made using any information contained in my Pattern. I do not mind if you wish to sell a completed HANDMADE item and you are a small independently owned business, however, You do not have permission to use ANY of my photos. If you do sell a completed item, please list credit of the design belonging to me, Whistle and Wool and a link to my shop. www.WhistleandWool.etsy.com
Sizes: XS (S, M, L, XL, XXL, 3X, 4X)
Skill Level: Beginner
Yarn: Lionbrand, Coboo, #3, 232 yards per skein, Colors: A White, B Tan, C Peach, D Taupe
Skeins: XS - S: 4 skeins- 1 skein of each / M - 4X: 8 skeins- 2 skeins of each
Needles: Addi Turbos - 10.5 (6.5mm). Used for both body and sleeves.
2: Stitch Markers
Other: Yarn Needle
Gauge: (Unblocked) 16 sts x 24 rows = 4 inches of Garter Stitch
NOTE: The row gauge will stretch slightly when length is added. Matching stitches per inch for the garment will get your width to match. I include inches to work in the pattern to adjust for rows per inch being different.
Finished measurements: In inches
Chest: positive ease 4-6 inch
34 (38, 42, 46, 50, 54, 58, 62)
Body Length: 12 inches from under arm to bottom hem (will stretch when worn. My garment stretched approx. 1 inch in length when worn)
Sleeve length/ inseam: 9 inches
Upper Arm width: approx. +2 inch positive ease
Stitches to Know: Standard American Terms
*-repeat the stitches indicated in the pattern
k- Knit
p- Purl
k2tog- Knit two stitches together (decrease)
SM- Stitch Marker
RS- Right side
WS- Wrong side

This Pattern is also available as an affordable PDF format Pattern Via my Ravelry and Etsy shops!
Pattern:
Yarn Colors: A White, B Tan, C Peach , D Taupe
Color block rows are listed for each section. All Color changes are worked on a RS row.
Body Panels: Make 2
Stripe Pattern
*12B, 4A, 14C, 2A, 12D, 4A, 14B, 2A, 12C, 4A, 14D, 2A - repeat after * as needed.
Each size will vary for how many color rows are needed. Follow the pattern below for your size.
With Color A, Cast on 68 (76, 84, 92, 100, 108, 116, 124) sts
Ribbing
Work 4 rows of rib in a (k1, p1) pattern in color A
-68 (76, 84, 92, 100, 108, 116, 124) sts
Body:1st row will be the RS, follow ”Stripe pattern” above.
Knit every row until the piece measures 12 inches - or until the desired length till underarm is reached. (I got 70 rows, 2 rows into my second color block of Color C).
Do not cut yarn. Place a SM at the beginning and end of the row so when you seam up the sides, you know when to stop. Continue.
Under arm depth to Shoulders
Knit every Row for : 5.5 (6, 6.5, 7, 7.5, 8, 8.5, 9) more inches - last row worked is a WS. Continue “Stripe Pattern” above.
Neck Ribbing
(RS) Work 4 rows of rib in a (k1, p1) pattern in color A
Row 5: Bind off in rib (k1, p1)
Cut yarn, weave in ends
Repeat these steps for your next panel
Once both Panels are made, continue to Side Seams.
Side Seams
Lay your back panel down RS up, lay your front panel on top of it RS down. WS facing you.
Seam both sides from the bottom hem to SMs (the underarm measurement). I used a whip stitch and a 24 inch piece of Color B for each side.
Weave in all ends
Shoulder Seams
Garment still WS facing you (inside out)
Seam together 16 (20, 24, 28, 28, 30, 32, 32, 34) sts from the outer edges in, of both panels together. I used a whip stitch and a 15 inch piece of Color B for each side.
Weave in ends.
Sleeves: Repeat for both
Yarn Colors: A White, B Tan, C Peach, D Taupe
(RS) Row 1: At the center of the underarm, join yarn with Color A. Working around the sleeve opening (clockwise), pick up the amount of stitches for your size indicated below.
-45 (48, 51, 57, 63, 69, 75, 81) sts
Do not join in the round.
Row 2-4: knit
Continue to Knit every row with the following Stripe Pattern:
16B, 2A, 10C, 2A, 16D - Rows
Sleeve measures 8 inches- for added length, repeat color blocks until the desired length till cuff is reached. Work 2 rows in Color A before repeating.
Sleeve Cuff
Decrease - Row 1: In color A. (k2tog, p1) repeat this pattern for the row
-30 (32, 34, 38, 42, 46, 50, 54) sts
Row 2-5: *k1, p1, repeat after * for the row
Row 6: Bind off loosely in rib (k1, p1)
Cut yarn, leaving an 18 inch tail to seam up the sleeve.
Turn your sweater inside out and seam up your sleeves using a Whip Stitch from Cuff to underarm.
Weave in all your ends
Steam block your garment.
This Pattern is also available as an affordable PDF format Pattern Via my Ravelry and Etsy shops!
Voila! You’re done! Enjoy!!
