
Lakeland Tote
Lakeland Tote
By Whistle & Wool
Ravelry-Whistle and Wool
Join me on Instagram and tag your projects to @whistleandwool, #lakelandtote
CROCHET PATTERN
Sizes: One size
Thank you for your support of my designs! If you enjoy this pattern and would like a low cost PDF Pattern, please visit my Ravelry, Etsy or Love Craft links above. Your support helps me to be able to bring you more cozy makes. Thank you so so much!!
A bit of History behind the name:
Lakeland, England: The Lake District, also known as the Lakes or Lakeland, is a mountainous region in North West England. A popular holiday destination, it is famous for its lakes, forests and mountains, and its associations with William Wordsworth and other Lake Poets and also with Beatrix Potter and John Ruskin. The Lake District National Park was established in 1951 and covers an area of 2,362 square kilometres.The Lake District is located completely within the council area of Cumbria. It also contains the deepest and largest natural lakes in England.
Please see “www.wikipedia.com” for more history behind the name.
This Summer in the garden had me imagining a cute wicker style basket turned into a cute Tote, to hold my veggies, freshly picked from the garden. Warm summer breezes through the air, maybe the sunlight flickering off the lake or ocean on a family trip with the perfect bag! Then I thought, what a cute yarn holder it would be too! This Re-tweed yarn has a good sturdiness to it, but awfully softer to work with than wicker.
Thank you so much for your shop support! I hope you love it!! If you need any help or have questions along the way, please contact me via Email.
**Please check your gauge before you start this Pattern: Swatching for gauge is very important. It does take a few minutes to do but it ensures that the finished size of your piece will match the sizes given in the pattern. A change in your stitches per inch can affect your overall width measurements. A difference in your rows can affect your length for this piece.
*Start with the suggested hook size:
If your swatch per inches is larger, then you need to swatch again using a smaller hook.
If your swatch per inches is smaller, then you need to swatch again using a larger hook.
Getting a close and accurate swatch will get you to the exact measurements given for the pattern.
***This Pattern is a copyright of Whistle and Wool© so you may not copy, alter, adjust, share, record, redistribute or resell my pattern. No tutorials or any kind of demonstrations may be made using any information contained in my pattern. I do not mind if you wish to sell a completed HANDMADE item and you are a small independently owned business, however, you do not have permission to use ANY of my photos. If you do sell a completed item, please list credit of the design belonging to me, Whistle and Wool and a link to my shop. www.WhistleandWool.etsy.com
Pattern Size: One size
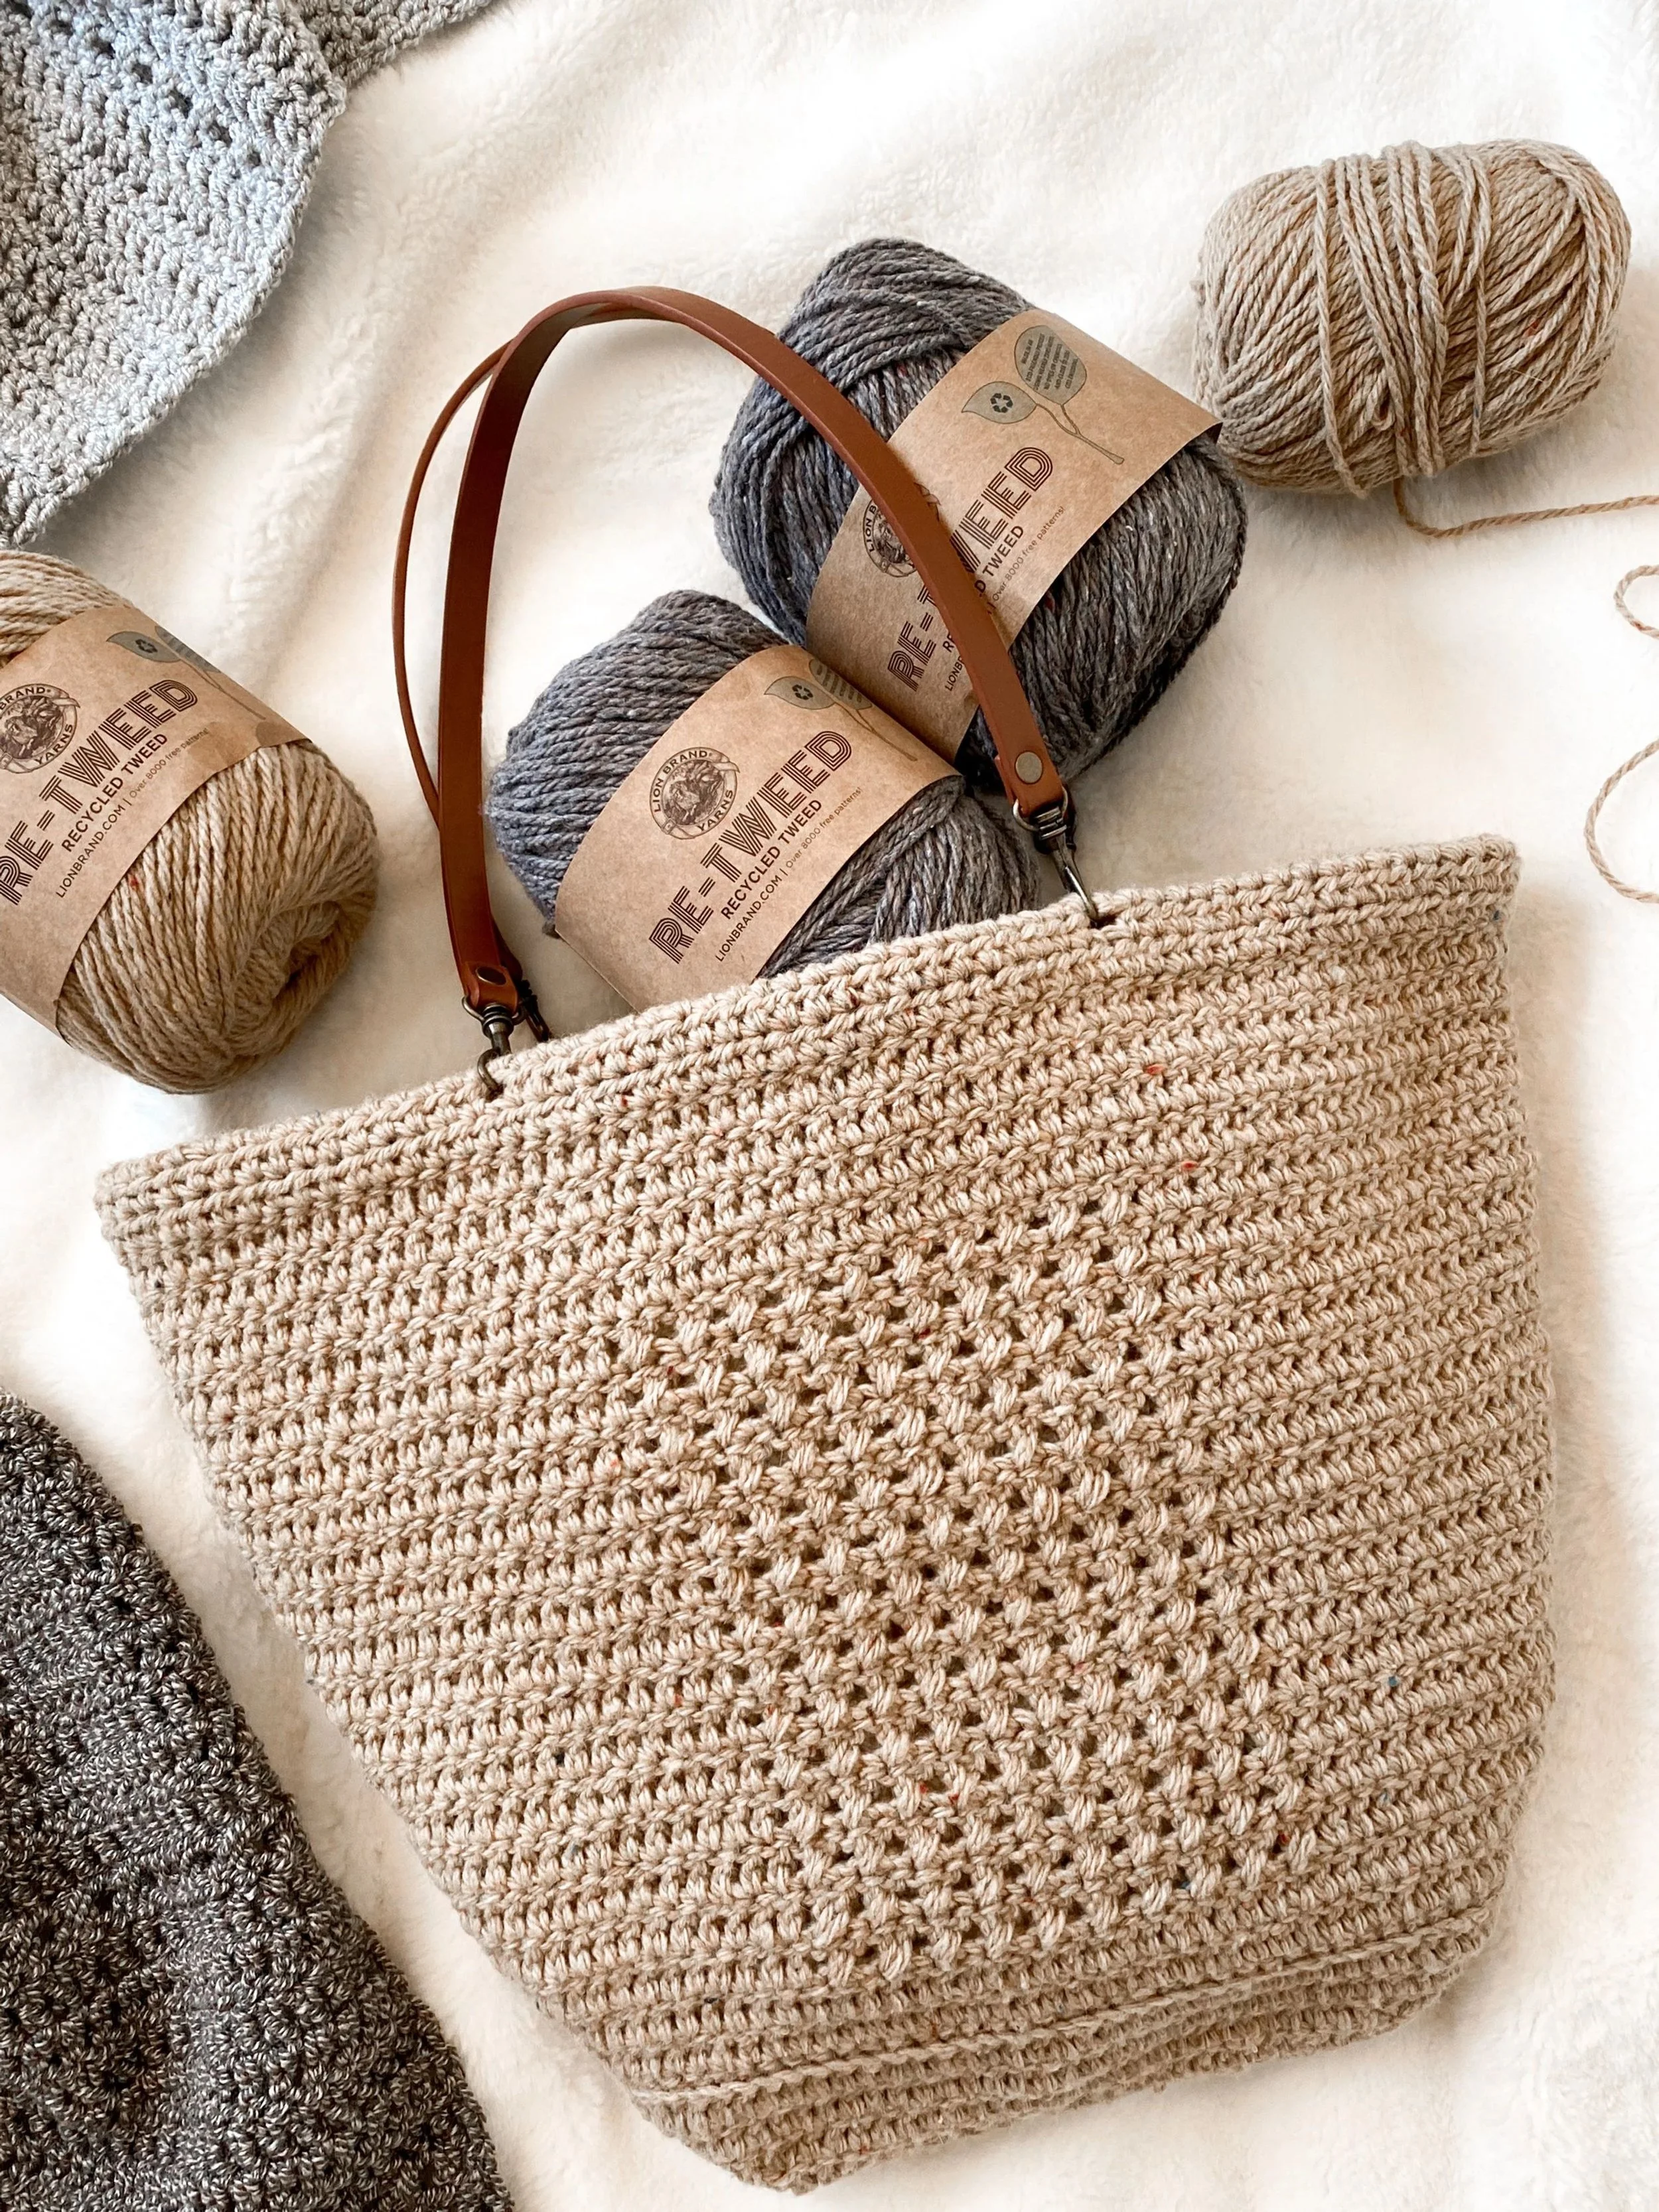
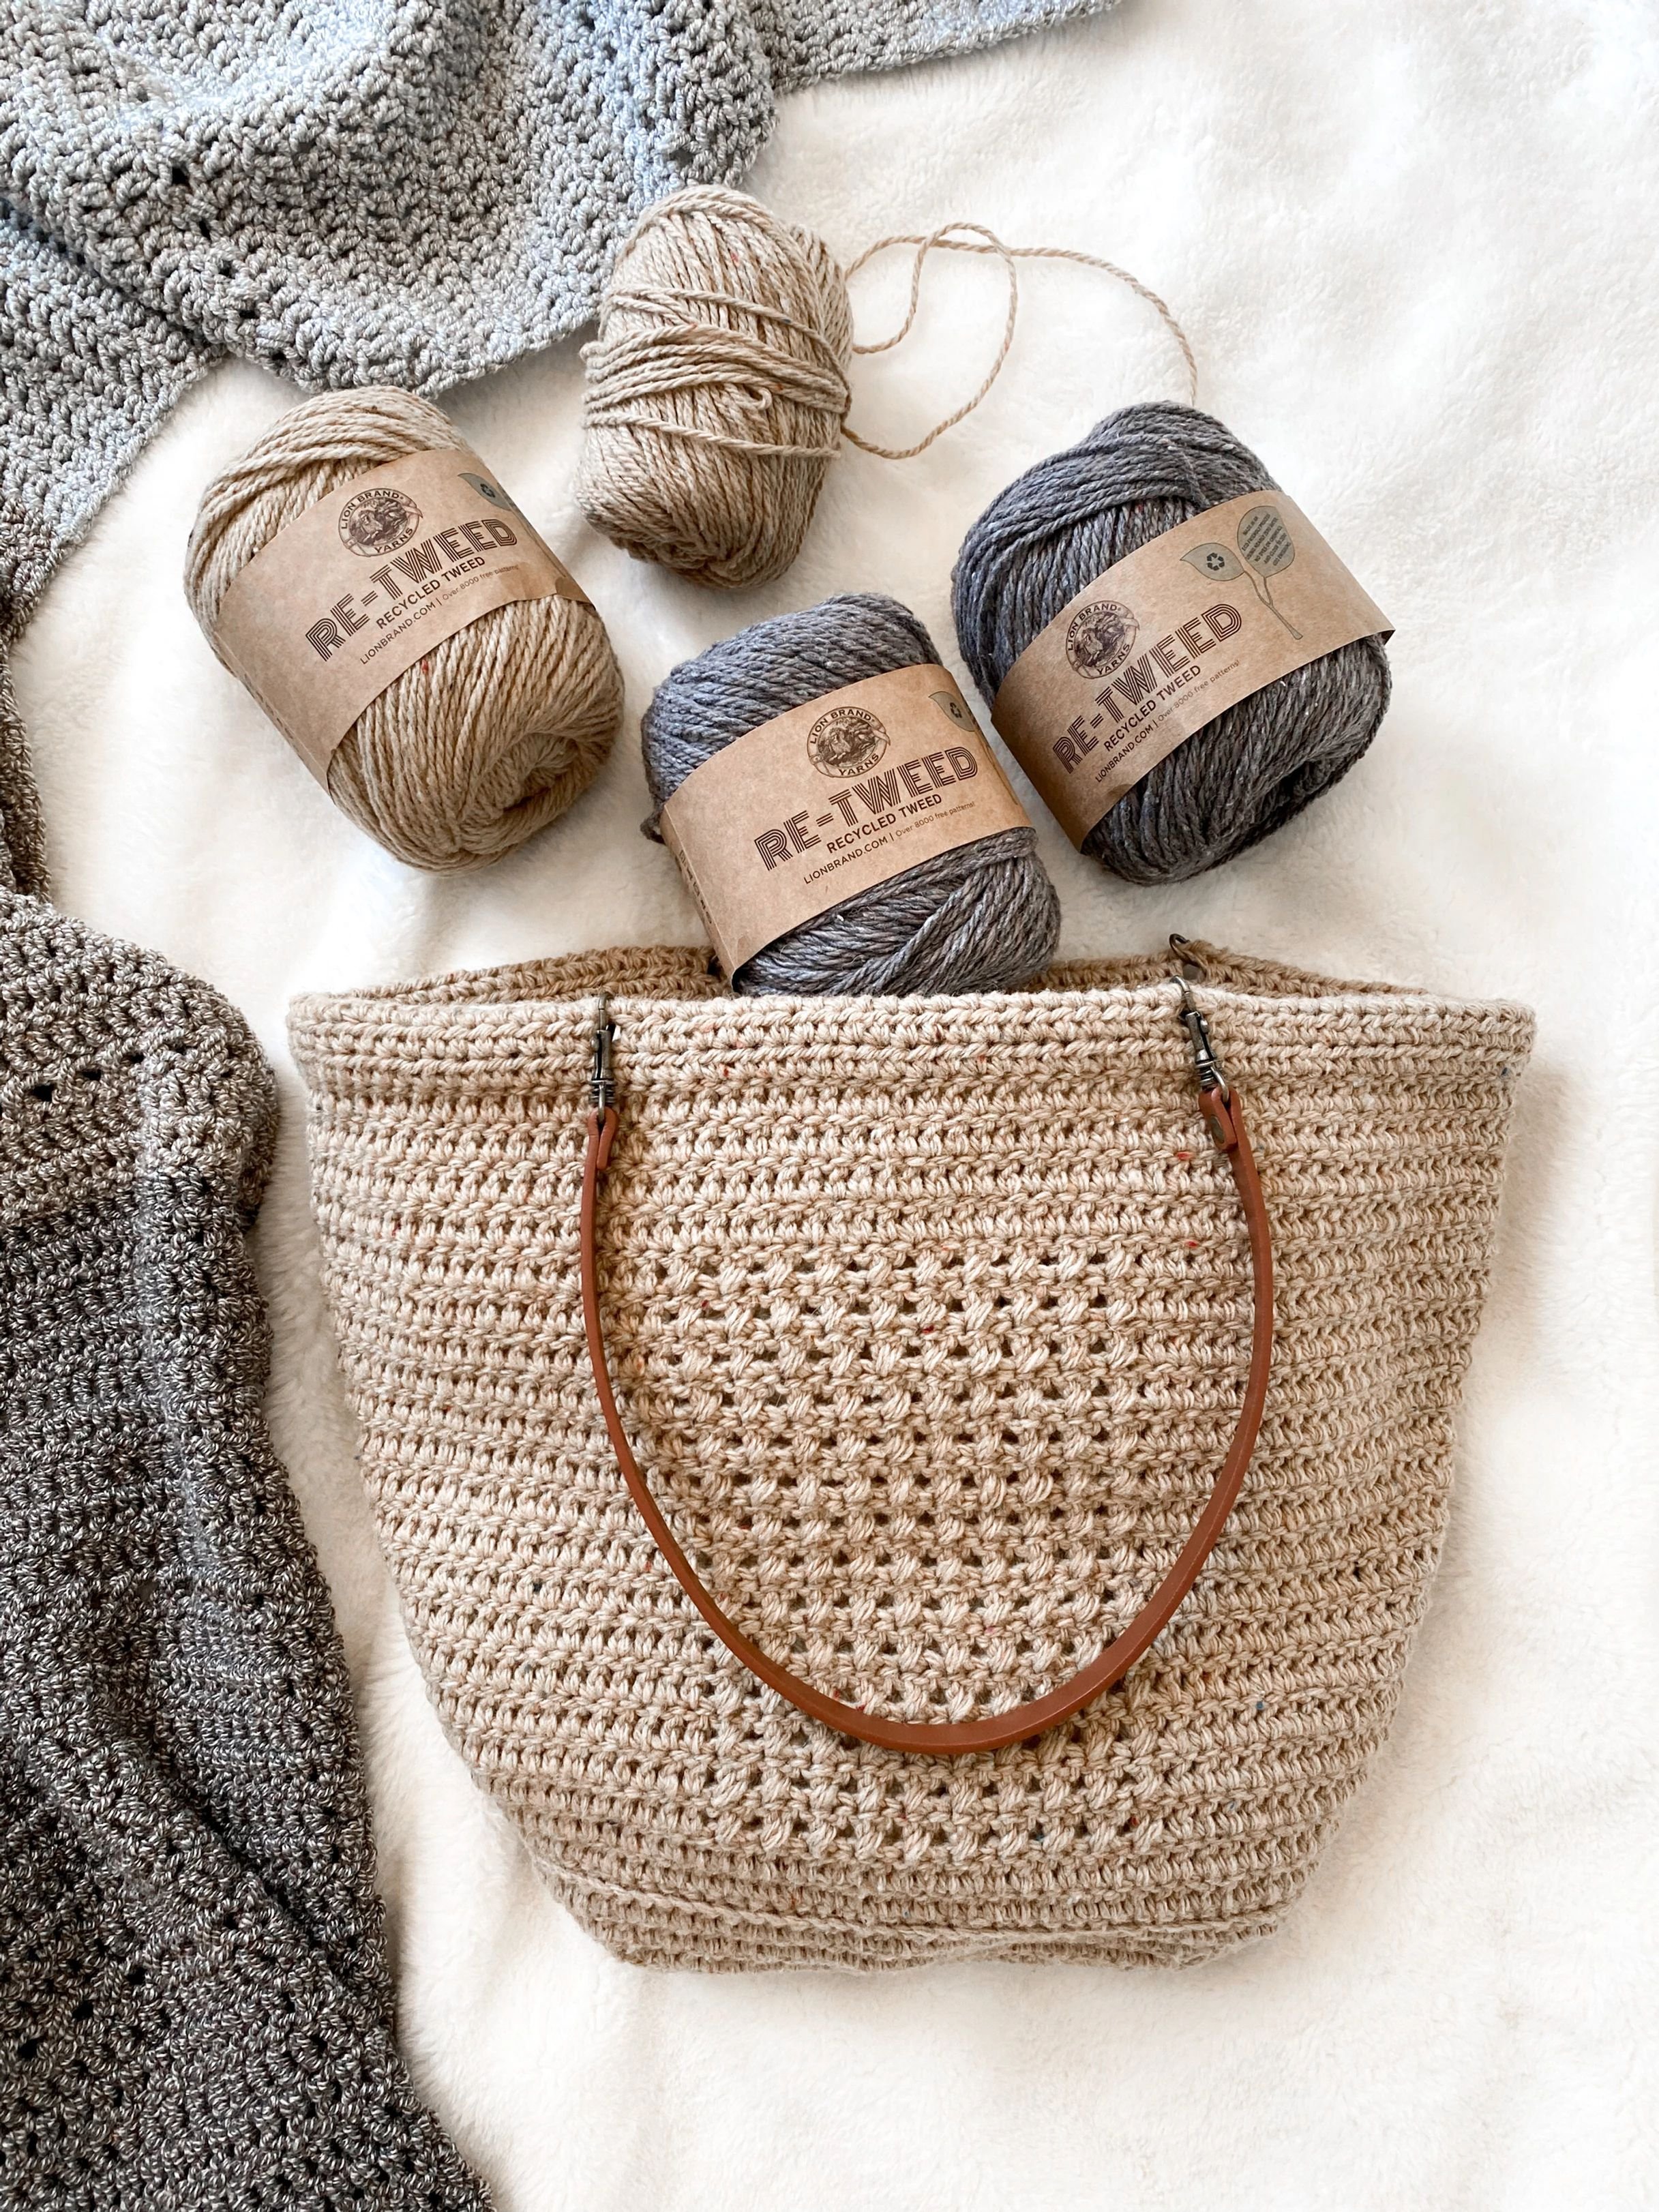
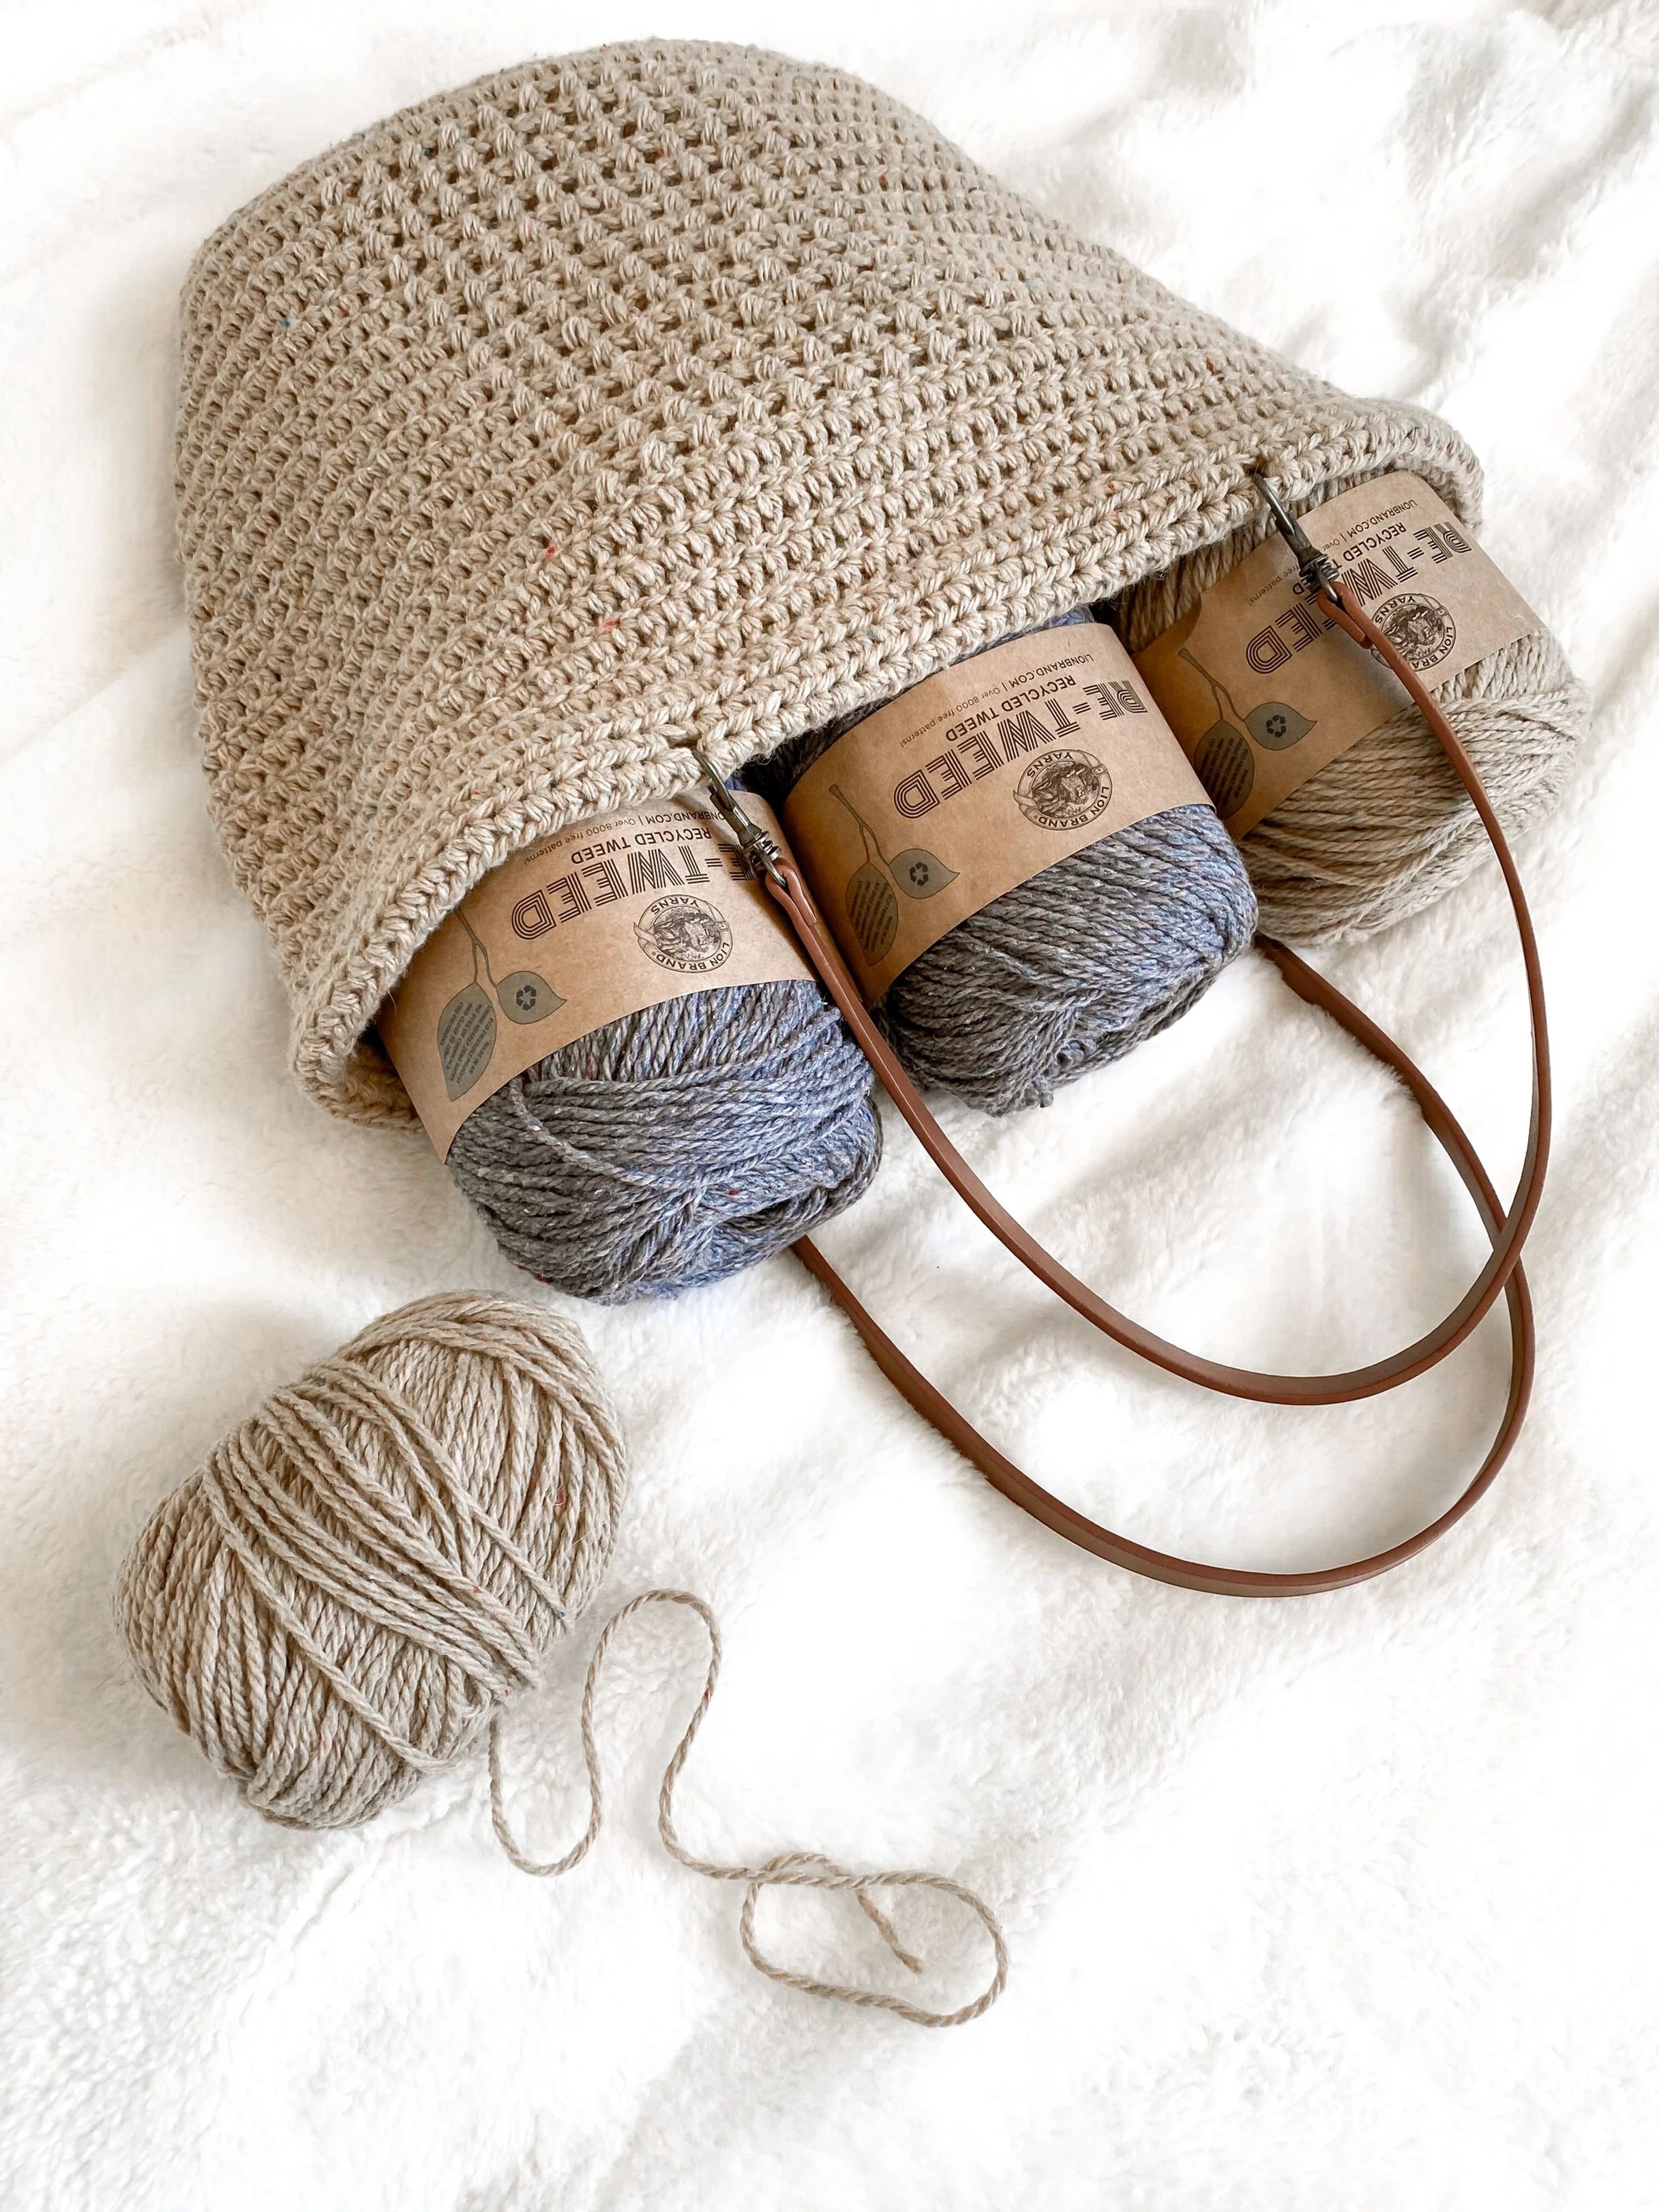
Materials needed:
Lionbrand Yarn, Retweed in Peanut Butter, #4 weight, 202 yards
2 Skeins
Hook: Clover Amour, G (4mm)
6- Stitch Markers
Large-eyed blunt Needle for yarn (Seaming & Weaving in your ends)
2- Lionbrand short: 20" faux leather handles
Link: https://www.lionbrand.com/collections/other-tools/products/faux-leather-handle-with-hardware
Gauge:(unblocked) 15 sts x 8.5 rows = 4 inch square of dc
Finished measurements in inches: laid flat, W measured along the top 16”W x 12.5”H (base included)
Stitches to Know: Standard American Terms
*-repeat the stitches indicated in the pattern
RS- Right Side
ch- Chain
st(s)- Stitch(es)
Sl St- Slip stitch
SM- Stitch Marker
dc- Double Crochet
2dc- Double Crochet twice into the same stitch
hdc - Half Double Crochet - handle rounds only
X stitch- A criss-crossed stitch pattern.
1. Skip the first stitch.
2. Double crochet in the following stitch.
3. Go back and double crochet your skipped stitch.
Continue for the row. Always working your stitches from front to back, like a standard stitch.
Pattern:
NOTE: I worked from the inside of the tote moving counter clockwise. Please note, If you crochet along the outside moving clockwise, your texture will be different. The entire bag is worked using dcs and X stitch, the handle section is in hdc.
Ch does not count as a stitch in this pattern.
Bag Base
Ch 30
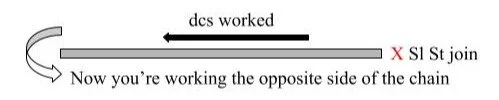
Round 1: starting In the 3rd chain from the hook, dc27, dc twice into the last stitch (place a SM in each of these last 2 stitches), (see pic) we will now turn to work the other side of the chain, dc27 (in each ch to finish the round), Sl St into the top of the starting chain to join -56 sts
Round 2: ch2, 2dc into the 1st and 2nd stitch, dc24 to the stitch before the SM
2dc into this st
Remove SM, 2dc, place marker into the 2nd st created
Remove SM, 2dc, place marker into 1st created st
2 dc into the next st
dc24, til the last 2 stitches, 2dc into each of them (4sts), Sl St to join - 64sts
Round 3: ch2, 2dc into the 1st and 2nd stitch, dc28 to the stitch before the SM
2dc into this st
Remove SM, 2dc, place marker into the 2nd st created
Remove SM, 2dc, place marker into 1st created st
2 dc into the next st
dc28, til the last 2 stitches, 2dc into each of them (4sts), Sl St to join - 72sts
Round 4: ch2, 2dc into the 1st and 2nd stitch, dc32 to the stitch before the SM
2dc into this st
Remove SM, 2dc, place marker into the 2nd st created
Remove SM, 2dc, place marker into 1st created st
2 dc into the next st
dc32, til the last 2 stitches, 2dc into each of them (4sts), Sl St to join - 80sts
Bag Body
Round 1: ch1, sc into the front loop only (working counter clockwise still) - 80sts
Replace markers into the newly made stitch as you come to them.
Round 2-3: ch2, 2dc into the 1st st, dc to SM
Remove SM, 2dc into the stitch (place SM into the 2nd newly made st)
Remove SM, 2dc (place SM into the 1st newly made st)
dc til the last st, 2dc, Sl St to join - 4 increase stitches made each round - Round 2 st count - 84sts, Round 3 st count - 88sts
Setting up X stitch detail pattern- 4 SMs needed (Diagram on PDF)
We will be placing SMs to mark the center 20 sts per side.No stitches worked for this. They should line up. If you do have a slight twist in the bag from moving in the round this will block out at the end, but the SMs should be lining up. You could block the base now as well if you prefer.
Count 12 sts, place a marker in the next stitch.
Count 18 sts, place a marker in the next st. There should be 12 stitches left for this side, including the halfway SM.
Starting at the 2nd halfway SM, count 12 sts, place a marker in the next stitch
Count 18 sts, place a marker in the next st, there should be 12 sts left. - 4 new markers placed.
Round 4-5: ch2, 2dc, dc till SM, work the X stitch from SM to SM, dc til next SM
Remove SM, 2dc, place marker into the 2nd st created
Remove SM, 2dc, place marker into 1st created st
dc til SM, work the X stitch from SM to SM, dc to the last stitch, 2dc, Sl St to join - 4 increase stitches made each round - 96sts
Round 6: (same as round 5 but no increases) ch2, dc till SM, work the X stitch from SM to SM, replacing markers along the way, dc til X stitch SM, work the X stitch from SM to SM, dc the remaining round, Sl St to join - 96sts
Repeat Round 5-6, 5 more times -116sts, **Stitch count at this point is 19sts before and after each X stitch pattern. 20sts each X st section
Round 17: repeat Round 6
Round 18-21: ch2, dc round, Sl St to join
Handle Rounds
Round 21: ch1, hdc the round, Sl St to join
Round 22: ch1, *hdc18, ch1, skip1, hdc22, ch1, skip1, hdc16 -halfway point- repeat after * for the round, Sl St to join
NOTE: hdc rounds slant from center so we will adjust the stitches between the handle gaps so they’re perfectly spaced visually on the completed bag.
Round 23: ch1, skip1, hdc the round (your last hdc will be in the previous rounds, end of round Sl St so your stitch count remains the same), Sl St to join- this helps reset the slanting hdc rounds
Round 24: ch1, *hdc18, ch1, skip1, hdc22, ch1, skip1, hdc16 -halfway point- repeat after * for the round , Sl St to join
Round 25: repeat Round 23
Cut yarn, weave in ends
Seaming/double folding the top of the tote
Fold over the hdc section to the inside of the tote. To know how far to fold it over, line up your skipped spaces on both sides so the holes for the handles line up.
Pin in place for easy sewing.
Using a piece of matching yarn 2 times the circumference of the tote, sew the edge down to the inside of the tote. Make sure your stitches don’t show on the RS of the bag.
Weave in all your ends.
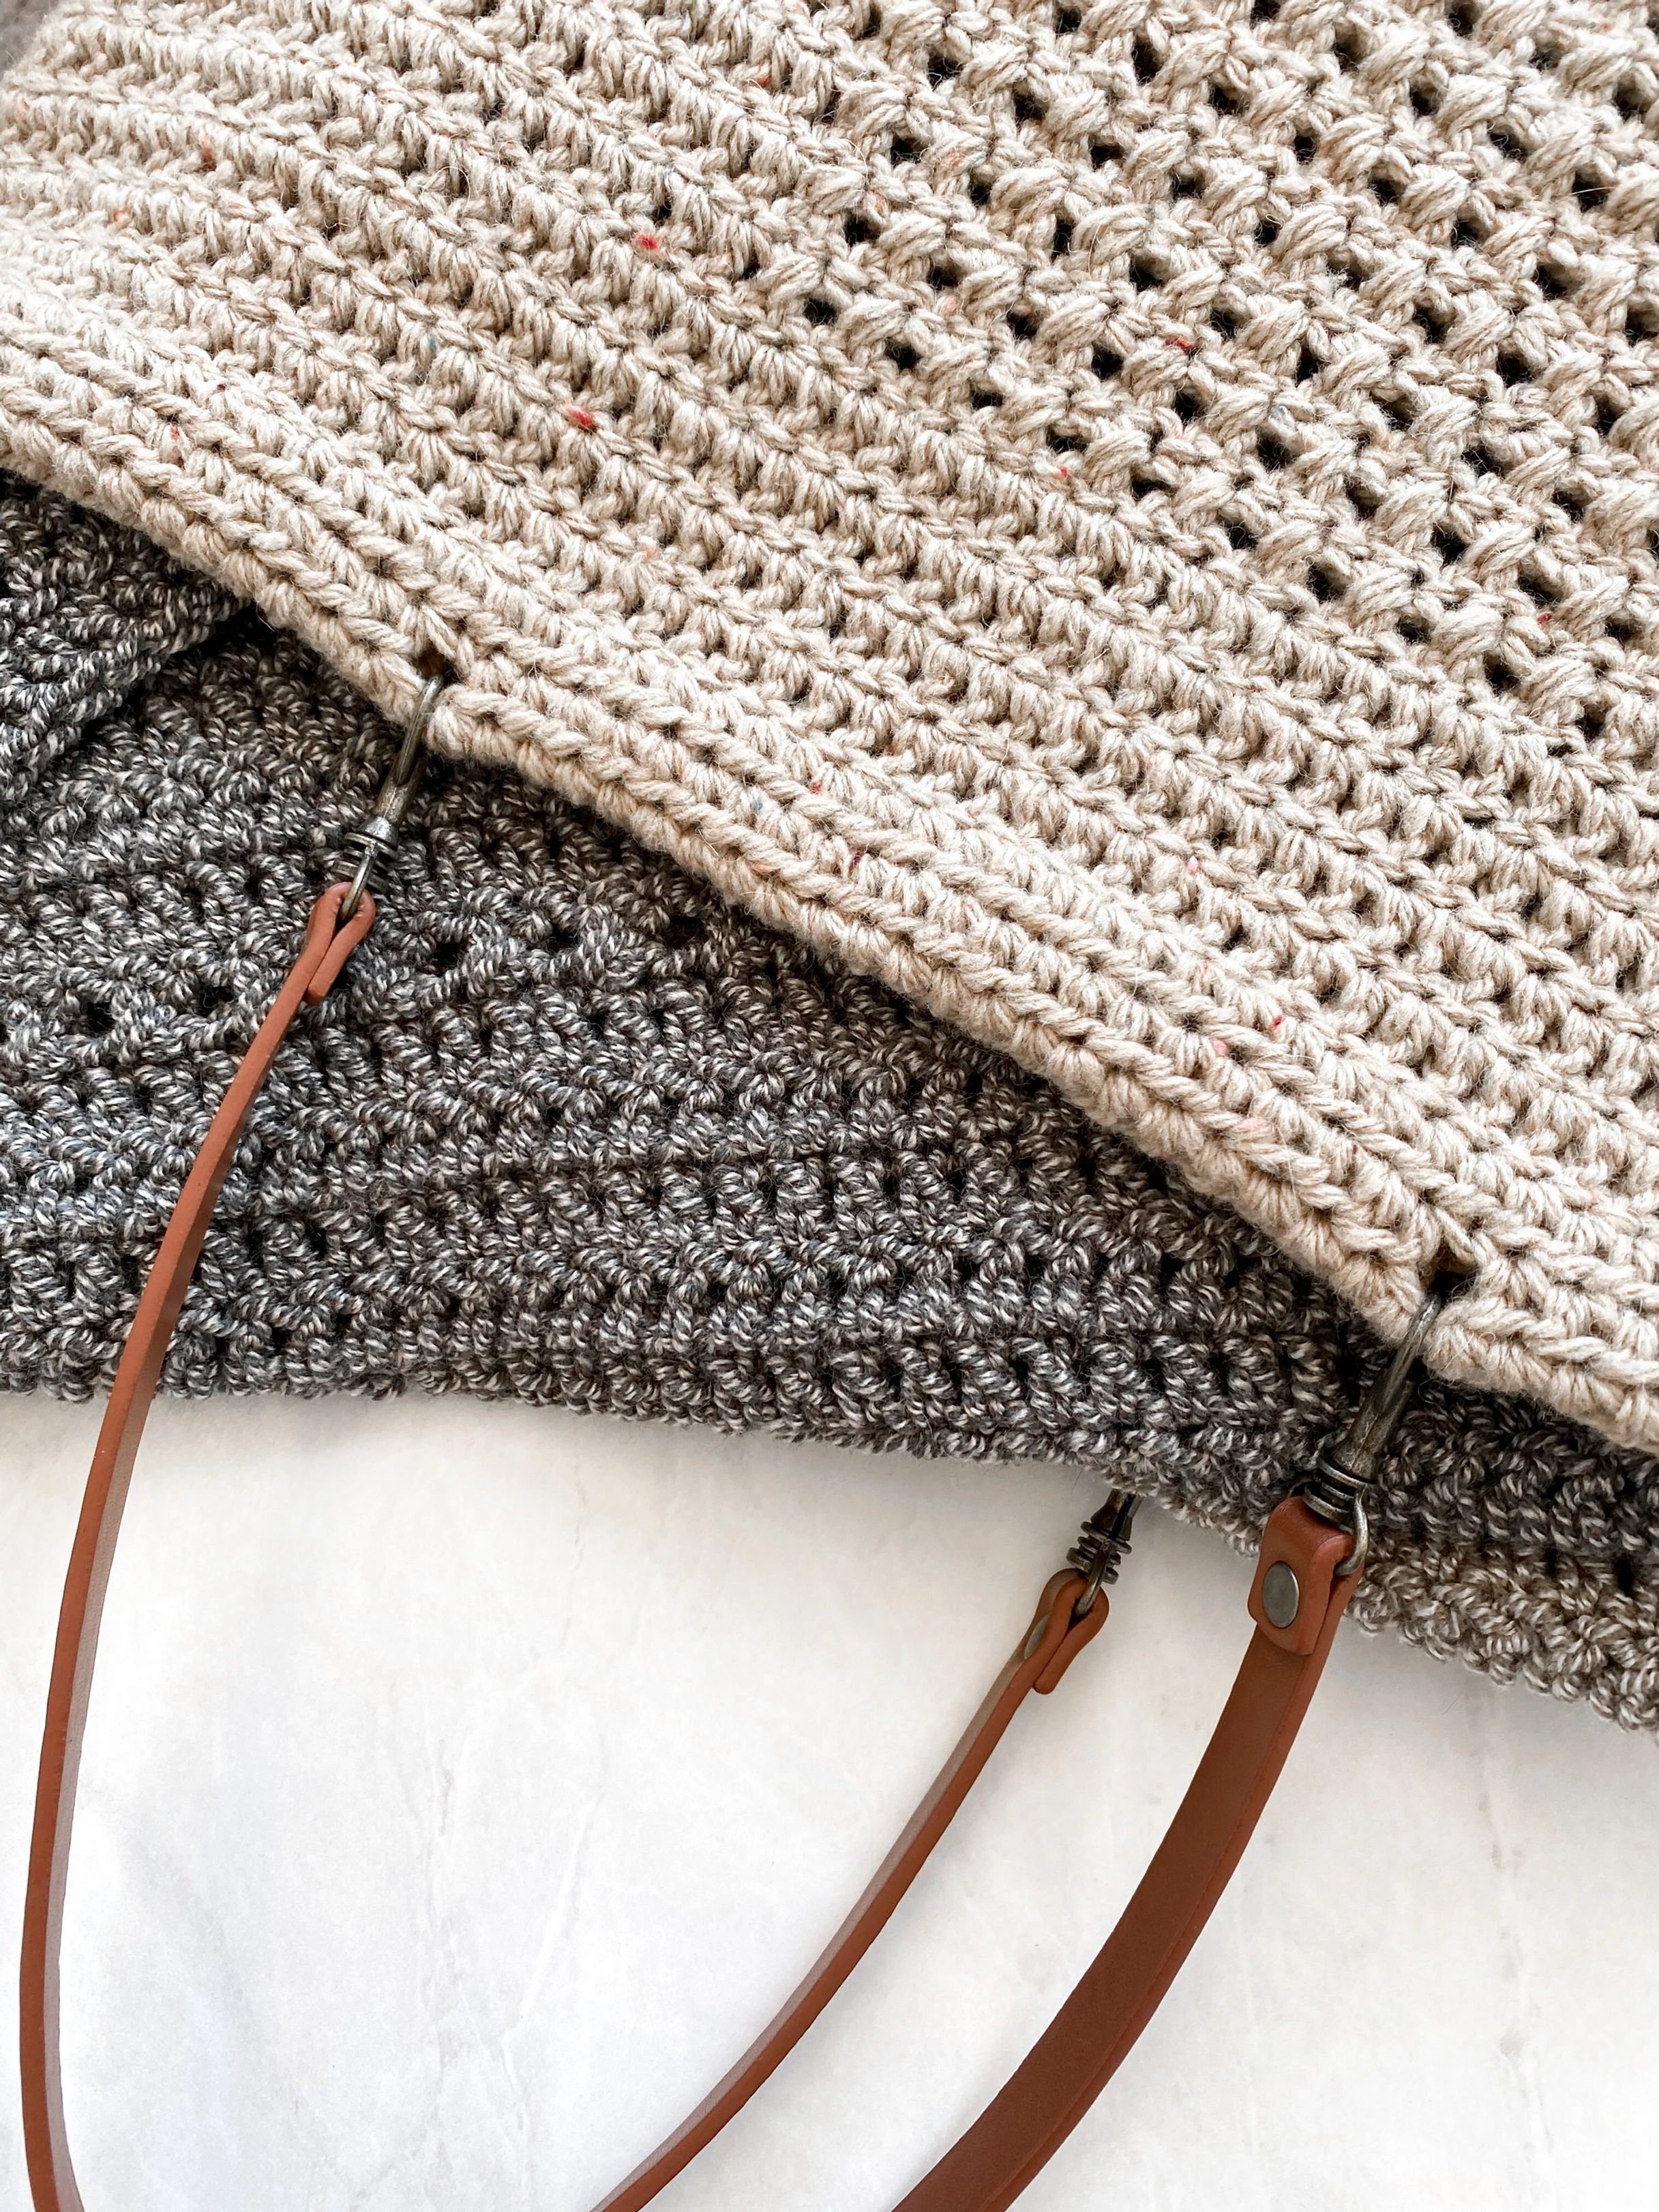
RS facing you, attach your handles into the 4 spaces along the top of the bag.
Steam block to get the base to lie nice and even.
Voila! You’re done, enjoy!
Thank you for your support of my designs! If you enjoy this pattern and would like a low cost PDF Pattern, please visit my Ravelry, Etsy or Love Craft links above. Your support helps me to be able to bring you more cozy makes. Thank you so so much!!